Hello

Welcome to my blog, a place where I can lose myself in a crafty haven. Pull up a comfy chair grab a cuppa and come and have a read. Oh and if you like what you see, stop by and leave me some love in the comments section

Followers

Showing posts with label Orange. Show all posts

Saturday, September 10, 2022

Off Duty Witch

 Good afternoon. It's another hot day here but at least it's now cooling at night!

Halloween is here next month and of course the witching hour will be upon us! My card today is from a off duty witch, I don't know what this Stamper's Delight character has in mind but she's brewing up something instead of out flying her broomstick. Meet Anime Witch's Night Off:


Isn't the cat hanging on her hat the cutest? I arranged my scene with the clock and sentiment, printed and trimmed to size. She was then colored with Copic markers and the edges inked with distress ink.

I matted an A2 card base with purple card - coordinating with her outfit and added my image. 

A simple card but the scene didn't need much to assenuate it.

Stamper's Delights have a great collection of images for your Halloween crafts in their store!

Be sure and check out more DT inspiration and join us at

We'd love for you to connect with us on our Facebook page too:

Thank you for stopping by


Wednesday, September 15, 2021

Come and Hop along with Crescent Creations.

 Good afternoon! It's hump day already, where is the time going?

My post today is inspiration and a link for a blog hop for a company new to me. Crescent Creations is an online craft store that sells lots of crafting goodies including their own digital stamp collections. It's a new release day today and we are having a blog hop to celebrate.

If you comment on each stop and we would love you to subscribe to our platforms you are in with a chance of winning a $25 gift certificate to spend in the store.

The digital images are PNG files, but are white on the inside so you can layer them up. I have chosen to use their brand new Happy Diwali set. This comes with 2 mandalas a candle and 5 sentiments in different fonts.

I have made 2 cards to showcase both the mandalas which are stunning colored in bright colors.


The first mandala reminded my so much of a marigold flower which is synonymous with Diwali -used for garlands and offerings to the Hindu gods.
I printed it onto stamping cardstock and colored it with shades of orange marker.


The second is stunning, I used markers to color the mandala I also added silver paint pen for extra shine.
For both cards I used a paisley digital design paper on which I printed my sentiment.

I matted an A2 black card base with orange and black cardstock to make the colors pop even more. My design paper was added and the mandala was adhered with foam squares for dimension. Finally I added some iridescent bubbles which pick up the colors of the mandalas.

The winner of the hop will be announced on 23rd September on Crescent Creations social media. You should have hopped here from Tammi and you are heading to our next design team member Theary. If you have somehow gotten lost you can head back to Crescent Creations to find your way! You should have commented on all of the design team's inspiration posts or videos.

I will be back later in the month with more inspiration for the new release.

Thank you for stopping by.

Sunday, June 6, 2021

Altenew Educators Program - With a Twist

 Good afternoon - Wow is it hot here, we have a red flag warning - high risk of fire as we have low humidity gusty wind and high temperatures - It's also not rained in a while!

My cards today are using techniques Therese Calvird taught in the Altenew Academy Class - With a Twist.

I love all the techniques she taught but have taken inspiration from 2 for my AECP class work. The first one is acetate with a twist, I love Therese's shaker so decided to do something similar but with a flower stamp set.


The Ranunculus stamp and die set are great for this technique as it is a gorgeous large flower! 

I started my card with an A2 card base and a piece of the same cardstock cut to the same size.
I lined up the die on the cardstock piece and ran this through my cutter. 
Before removing the die I lined up the card piece wit my card base and traced the inner edge of the die onto the front of my card base in pencil. removing the die from the cardstock,  I then lined the die up with the pencil markings, opened the card base and ran through my cutter leaving me with an aperture in my card front.
I did the same with a piece of white fun foam to use for the spacing of my shaker.
I traced the aperture onto the inside with pencil. This gave me a template of where to stamp my first flower layer. The remaining layers were stamped giving me the stunning flower so when I closed my card it showed through the aperture.


Next I built my shaker, I glued a piece of acetate to the outside of the card front and the back of the extra card panel. The foam was glued in place on the card front, making sure that the glue adhered the foam firmly around the aperture. I placed prills onto the acetate on my card base.
I stamped the sentiment on the outer of the extra panel and then adhered this to the top of my card base, encasing the prills between the 2 pieces of acetate.


Finally I added some Nuvo drops around my sentiment.

My second card inspiration was Therese" Cut oddly class, I used a die for my card cut out section:


I started with an A2 card base and cut the right corner away with the Soda Bottle die. I repeated this on a piece of A2 green card stock.
On the inside of my card I stamped the flower and colored with alcohol markers. 


I used 2 of the leaves from the same stamp set to do tone on tone stamping on my green card. This was then adhered to my card base. I stamped a sentiment with versamark ink and heat embossed this with white powder, trimmed it to size and added across my card front.
A few clear enamel dots were dotted around my flower to balance the card.


Thank you for taking time to stop by and I hope you enjoyed my post. 
On to the next class!

Items I used:

Neenah Classic Crest Solar White 110lb Coverstock
Purchase From:
SSS | AZN
Copic Markers
Copic Markers
Purchase From:
SSS | AZN
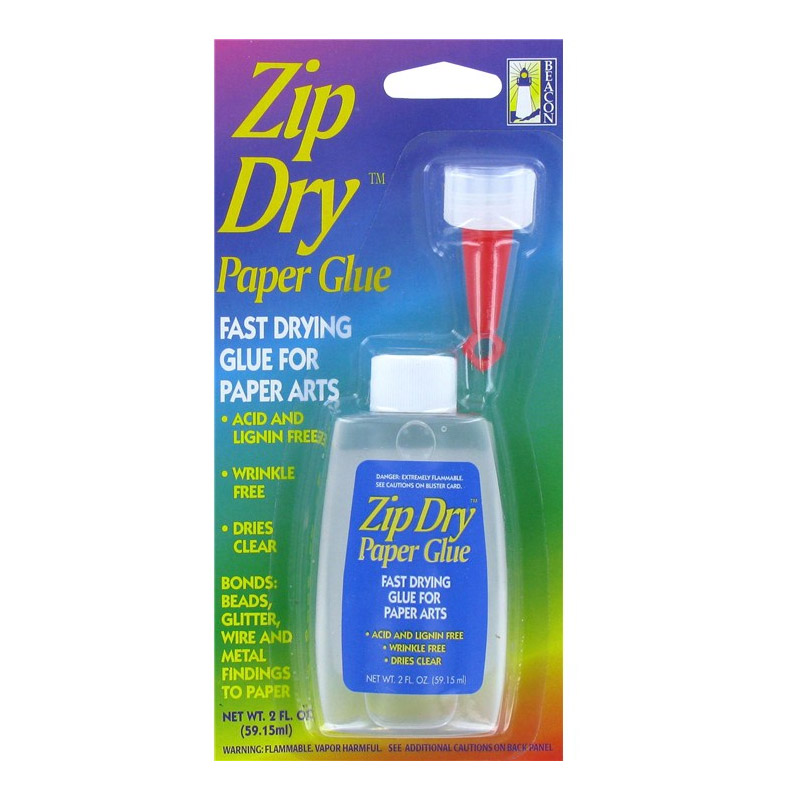
ZipDry Glue
ZipDry Glue
Purchase From:
SSS | AZN
Translucent Enamel Dots
Purchase From:
SSS
Altenew Jet Black Ink
Purchase From:
ALW
Altenew Green Meadows Crisp Inks
Purchase From:
ALW
colored cardstock
colored cardstock
Purchase From:
SSS
Altenew Sugar Plum Crisp Dye ink Oval Set
Purchase From:
ALW
Altenew Build-A-Flower Ranunculus Stamp & Die Set
Purchase From:
ALW
Acetate Dura-lar Sheets
Purchase From:
AZN
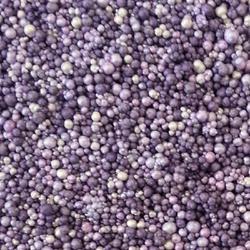
Plum Crazy Prills
Plum Crazy Prills
Purchase From:
ACOT
Altenew Poppy Arrangement Stamp Set
Purchase From:
ALW
Altenew Soda Top Nesting Dies
Purchase From:
ALW
Altenew Pure White Crisp Embossing Powder
Purchase From:
ALW
Versamark Ink
Versamark Ink
Purchase From:
SSS

Thursday, April 1, 2021

My Kind of Crazy

Good afternoon, I hope everyone is enjoying spring blooming around us. We have crocuses and daffodils peeking through and currently no snow!

As it's the first week of April (Yes really!!!!) it's new release weekend at Stamper's Delights and of course we have some super sweet images to share with you.

My first is My Kind of Crazy - she is for all you cat lovers:


Check out that adorable kitten hanging from her braid. 
I colored her with Copic markers and fussy cut her using my Scan n Cut.
The sentiment was partly recolored and printed onto white cardstock.

For my card base I matted an A7 card blank with orange cardstock. I then added Brusho powders to a piece of cream card and spritzed with water, giving me a 'crazy' background which was adhered to my base. I used a piece of the orange cardstock and a piece of blue to make a ribbon effect across the card. I added both my image and sentiment with foam squares to my card. Finally I added a few blue glitter enamel dots.

If you love this image head on over to the Stamper's Delights Store to see all of this week’s New Releases.

Why not stop by the Stamper's Delight Facebook page for regular news and inspiration from my Teamies you can also enter the progressive challenge there, no blog needed and receive freebies! 

 All the design team projects are available on the Inspiration blog - hop on over there for more inspiration.

Thank you for stopping by, I will be back on Saturday with another new release cutie.


Tuesday, September 29, 2020

Agnes gets wheels!

 Good afternoon! it's a nice cool rainy day here and I'm loving it for a change!

I'm back with another inspiration design for the Polkadoodles Too Cute new release. Today it's Agnes' turn and she's having fun on a scooter!


What I Did:
Agnes was resized and printed on stamping card I colored her with alcohol markers and then fussy cut her using my Scan N Cut. I matted an A7 card base with orange cardstock and digital patterned paper. I then chose a yellow cardstock and matted a further piece of patterned paper the was added to my base. I printed a sentiment and added this and 2 die cut panels to my card. Agnes was then positioned using foam squares to give her some dimension. Finally I added a few enamel dots in a coordinating color.

What I Used:
Sentiment: Polkadoodles - Winnie Celebrations 3 sentiments
Digital Design Paper: Polkadoodles - Pretty Sweet
Stamping Card: X-Press It
Alcohol Markers: Copic
Card Base: Neenah Solar White Cover stock
Orange and yellow card stock: Core'Dinations Signature Series
Dies: Gina Marie Designs
Glue: ZipDry
Foam Squares: Dollar Store

Looking for more inspiration? Then check out my teamies designs over on the Facebook page, you can also post your own Polkadoodles' designs on the Craft Stamp and Colour with Polkadoodles Facebook group


Thanks for stopping by.


Saturday, September 19, 2020

Trick or Treating and Graveyard Fun for Halloween

 Good afternoon, hope you are enjoying your weekend, we need to get out and clear the garden now we've had most of the veggies from it!

I'm continuing with showcasing the Polkadoodles Halloween new release. Today I have designed 2 cards using 2 stamp sets - Happy Halloween Winnie Wednesday and Spooky Time:

My first is a trick or treat scene:


What I Did:
I Stamped Winnie first then masked her to stamp the spooky house. I then colored the images. I made the images into a full scene by freehand adding a path, grass and a starry sky. Finally I stamped bats and the BOO sentiment.
My A7 card base was matted with orange cardstock which I stamped with the bats. I then added a strip of black cardstock and a piece of design paper.
My image was matted with black cardstock and added to the base.

What I Used:
Stamping Card: X-Press It
Alcohol Markers: Copic
White Pen for 'stars' - Uniball Signo Broad
Black and Orange Cardstock: Core'Dinations Premium
Glue: ZipDry

My second card is Winnie Wednesday in a grave yard:


What I Did:
This was a simple card, I ink blended my background using Distress Oxide inks. Once dry I then stamped the images from Spooky Time to create my scene. Winnie Wednesday was stamped and then fussy cut her. She does have pumpkins on the original stamp but I decided to use her without these. I then colored her with alcohol markers. I matte an A2 card base with orange cardstock then added my background. finally I adhered Winnie to the corner of the card. 

What I Used: 
Stamping Card: X-Press It
Alcohol Markers: Copic
Blending card - Bristol Smooth
Inks: Tim Holtz Distress Oxide
Black and Orange Cardstock: Core'Dinations Premium Heavyweight


Looking for more inspiration? Then check out my teamies designs over on the Facebook page, you can also post your own Polkadoodles' designs on the Craft Stamp and Colour with Polkadoodles Facebook group


Thanks for stopping by.


Saturday, September 12, 2020

Love Endures Fall Leaves

Good morning, fall has finally arrived this week I'm thankful for the cooler temperatures but don't like all the rain that has come with it.

 My card today is using the Love Endures Clear Stamp Set, this has a set of leaves that are great colored with the gorgeous colors fall brings.


I started my design by stamping the 3 different leaves multiple times. I then colored them with alcohol markers and fussy cut them, finally I shaped them with a ball stylus. I matted my card base with a deep red cardstock. I stamped a piece of patterned paper with Give Thanks, both are sentiments included in the Love Endures set. I adhered this to my card base and arranged my leaves so the look as though they are blowing across my card. I then added some enamel dots from the Fuzzy Peach Clear Enamel Dots.


I love these leaves and know they will appear on lots of my fall cards this year.

 You can check out the new release and all of Joy Clair's products over in their store.

Thank you for stopping by. I will be back during the month with more inspiration from Joy Clair. Also my teamies will be sharing with you over on the Joy Clair Facebook Group.


Monday, August 3, 2020

Mandala Love

Good morning! We are still at home, enjoying the sunshine and working in the yard, our veggie garden is doing great we enjoying offerings from it.

I'm back today with more inspiration for the August Joy Clair new release. This card is using one of the designs and a sentiment from the Mandala Love collection:


I loved coloring this, so relaxing just to sit and color. The Mandala is actually a full one but I decided to cut it down for my design. I used Bristol Smooth paper and printed both the mandala and sentiment. I chose to use this paper so I could color with my Prismacolor pencils, I don't use them independently often so thought I'd give them a try. 
Once colored I matted the image with black card and added to a cream card base (this was so the Bristol Smooth didn't look dirty as it would with a white base).
I added a few iridescent gems which catch the color of the mandala at certain angles.


 They are perfect for any card makers style but  I am loving being able to make my favorite card style, Clean and Simple, with the Joy Clair images.

Thank you for stopping by. I will be back during the month with more inspiration using the new release. Also my teamies will be sharing with you over on the Joy Clair Facebook Group.

 You can check out the new release and all of Joy Clair's products over in their store.


Items I used:

ZipDry Glue
ZipDry Glue
Purchase From:
SSS | AZN
Translucent Enamel Dots
Purchase From:
GMD
Prismacolor Pencils
Prismacolor Pencils
Purchase From:
SSS | AZN
Studio Katia Iridescent crystals
Purchase From:
SSS
Strathmore Bristol Smooth Paper Pad
Purchase From:
SSS | AZN
Mandala Love
Mandala Love
Purchase From:
JC

Tuesday, April 28, 2020

Poppi Pokkadot Mom

Good afternoon!

Today's post is another one with some Mother's Day inspiration. Sherry West couldn't let the occasion pass without introducing you to Mother Poppi Pokkadott and she is a darling:


What I Did:
I resized and printed the image onto Stamping card then colored her with my Alcohol markers.
Coordinating the orange from her apron I matted and a 7x5in card base with orange cardstock. To keep with the polka-dot theme I then chose some blue spotty design paper, tucking a coordinating ribbon around this before adhering it to the card base. I die-cut a frame and added Poppi to this. She was then placed on the card using foam dots.
As an added decoration to match in with the theme, i die-cut some kitchen utensils and added these to the bottom of my card.

What I Used:
Digital Stamp: Sherry West:
Stamping Card: X-Press It
Alcohol Markers: Copic
Card Base: Core'Dinations Premium Cardstock Heavy weight
Orange Card: Core'Dinations
Blue Polka-dot Paper: Digital Stamp Boutique
Die cut Frame: Gina Marie Designs: Loopy Rectangle Die Set
Kitchen Utensils: Memory Box: All Mixed Up

Thanks for stopping by you can see my teamies inspiration over on our Facebook group and you can buy the digital stamp in Sherry's Etsy store


Tuesday, August 8, 2017

May your troubles be less

Good afternoon, We have started preparing for the start of school Mollie is really looking forward to finding out who her 3rd grade teacher will be. 

My post today is a simple card with a lovely little message:


The sentiment is May Your Troubles Be Less from Riley and Company. I stamped it on to water color card with versamark and heat embossed in white. I then used my watercolor markers to flood the sentiment with color.
I matted a printed card base with dark orange card and once dry added my stamped topper. A die-cut flourish and mulberry flower along with some enamel dots balanced the design.

Thank you for stopping by, you can find the stamp I have used over on the Riley and Company online store. For more inspiration check out the Riley and Company Blog. Or for more news about what the Moose and his pals are up to head on over to the company Facebook page 


Tuesday, April 11, 2017

The sun is shining - Happy Spring!

Following the snow storms last Thursday we have had a lovely few days of warm weather but they ended last night with thunder storms and its back to being seasonally cooler.

So my post today is showing summer flowers aren't far away. Prickley Pear Rubber Stamps have some great banner sets and I have used one set today for my flower "petals"


I used 6 different orange and yellow shades of ink to stamp out one of the banner stamps from the Spring Easter Banner set numerous times and then hand cut them all out - I do need to invest in the coordinating dies!!. I then Stenciled some yellow card and pale yellow design paper using one of the orange inks. The yellow card was die cut into a circle and stamped with Happy Spring sentiment from the same set of stamps. I glued the banners at various lengths around the circle making a sunflower.  
I matted an 8x8 inch card base with the same yellow card and the stenciled design paper before fixing my sunflower in place. 
The points of the banners were folded to raise them from the card giving dimension. A few coordinating enamel dots completed the card.

Thank you for stopping by, you can find more inspiration from me and my teamies on the Prickley Pear blog and their Facebook page.


 photo Crafty Hugs_zpsmrp6bnmu.gif