Hello

Welcome to my blog, a place where I can lose myself in a crafty haven. Pull up a comfy chair grab a cuppa and come and have a read. Oh and if you like what you see, stop by and leave me some love in the comments section

Followers

Showing posts with label copic markers. Show all posts

Sunday, September 29, 2024

Baby Love

 Good afternoon! We've had a busy weekend but I still found time to sit and do some crafting. 


This beautiful image is part of a coloring book by Radiant Artistry Designs. It is available from Kathleen's Kofi account and is called Delightful Treasures. I colored the image with Copic markers and Prismacolor pencils before matting it and adding to a slimline cardbase.

If you don't know how Ko-Fi works you join the membership or make one time donations to support the artist and in return you get access to their work. Kathleen has some amazing work and is very generous with her art. You can find her on her Facebook and Instagram accounts where she does often give away free images. 

I hope you love my work - if so let me know in the comments


Crafty Hugs 

Sharon


Sunday, March 26, 2023

Fawn Hugs

Good afternoon, we had snow and frozen rain yesterday - Today you wouldn't think so - although cool it's a nice spring day just in time for Spring Break!

I'm back with a card made using Stamper's Delights Chibi Fawn who's another cute member of this month's digital stamp and coloring club pack. 


I sized him to fit an A2 card and printed him on stamping cardstock. He was then colored with Copic markers and fussy cut leaving a thin white border.

My card base was matted with brown cardstock. I have these cute wood slices as digital images so I printed and fussy cut a heart shaped one - Hugs was stamped in to the middle. I added foam squares to the back of their and threaded some jute string through this to make a pendant. 

The heart was added to some leafy digital paper and the string fastened behind this.
I then used foam tape to adhere the paper to my base.
Finally Chibi Fawn was added again using foam squares.

Love what you see? Check out the blog posts from the rest of the team for more inspiration. Also join us on the Fan Facebook Group and share your designs there!

Join the Free Community too - Freebies, Challenges and more will be happening here but you can only access if you have joined us!

Thank you for stopping by. The clubs are open for you to join check all of them out here!  

Friday, February 24, 2023

Wonderland Digital Stamp Club

Good afternoon! We have had a winter storm over the last few days so have been home in the warmth.

Stamper's Delights have some new stamp clubs and the image I have worked with today is from their Wonderland Club - Alice Reading is so adorable.


I colored the image with Copic markers and fussy cut around it. Using an A7 card base I matted it with blue cardstock then a paler blue gingham which felt very "Alice" like. I then colored a strip of cat themed backing paper, matted this with the blue card and added to the left of the card.
Finally Alice was added popped up on foam squares.

Love what you see? Check out the blog posts from the rest of the team for more inspiration. Also join us on the Fan Facebook Group and share your designs there!

Join the Free Community too - Freebies, Challenges and more will be happening here but you can only access if you have joined us!

Thank you for stopping by. The clubs are open for you to join check all of them out here!  

Friday, February 10, 2023

Where Are You!!

 Good morning everyone! The weather here is so unpredictable. Normally winter it's snow snow and more snow. We've had some but it doesn't stick around for long!

Stamper's Delights is making changes and bringing you amazing new clubs. We have 4 new clubs for you to join.

Community Image Challenge Image - If you love challenges this is for you

Wonderland Digital Stamp Club - Creative Community, Challenge Image bringing this beautiful classic story to life in  chibi/anime art style. 1 exclusive image pack each month. 1 exclusive Colouring page, 1 printable calendar and 1 printable sheet.

Digital Stamp & Coloring Club: Gives you access to everything - Creative Community, Challenge Image, Wonderland Digital Stamp Club, This includes Exclusive character packs: 3-4 image packs each month,  3-4 colouring pages, early access to presales, supportive community, behind the scenes & work in progress & sneak peeks.

Want all that and more:

Digital Printables & Stamp Club: Creative Community, Challenge Image Club, Wonderland Digital Stamp Club& Digital Stamp & Colouring Club. PLUS Monthly Themed: calendars, bullet Journal Sticker Sheet(s) & bullet Journal content like printable trackers/goals etc.

Want all that and MORE????

Then the Digital Art VIP club is for you: Free Creative Community, Community Challenge Image, Digital Stamp & Colouring Club, Digital Printables Club PLUS support Sessions, approx 400 + Stampers Delights digital stamps., approx 200 + Scrapper's Delights digital stamps & 2X year craft parcels with my limited clear stamp(s), craft supplies & one-of-a-kind art pieces.

Want a peek and what is included for February??? The Digital Stamp and coloring club includes these characters:


Meet the Mystery Gang - This image is also available as individual characters if you join the club!
I colored the gang with alcohol markers and added crystal glaze to the puppy nose, glasses and magnifying glass. 
I matted an A7 card base with orange cardstock, trimming my image down so it's shorter than the base I adhered it to the right of the card. 
My sentiment was foiled, matted with foiled card stock and added using foam tape.

These images make it easy to make a card - not a lot else is needed for your design. You can also print them any size so can use them for a poster if you want!!!

Head over the the Stampers Delights Club Page to find out more about the clubs and to join us there!

Join our Free Community where you can access the challenge, up coming freebies and more but only if you join!

Thanks for stopping by, you can find more details on Stamper's Delights Fan group on Facebook. Want more inspiration then check out the design team blog posts on the Stamper's Delights Community page.


Saturday, November 26, 2022

I made the Naughty List

 Hello, the weather is a lot better this weekend - we had a ton of snow fall last weekend so never left the house!

Are you on Santa's naughty list?  Little Chibi Xmas Decorations is the reason there is a list. She is opening presents before the big Day!

I was gifted a laser jet printer for my birthday so since then I have been playing with toner foiling. I added the included sentiment to my image, resized them both and printed using my laser jet.

I placed blue toner foil over most of the sentiment and red over the word Santa. This was then fed through my laminator giving my a foiled sentiment!'

I them colored my image with Copic Markers - She looks like she's been caught red handed opening the gift. 

I didn't go for the traditional red Santa hat and I wanted the lights to stand out against it so I made it part of her Pyjamas.

Once colored I matted an A7 card base with red mirror cardstock and added my image. I did then add a little gold gel pen to the lights - where they meet the cable.

I don't think anyone could stay mad at that little face and I think Santa would forgive her.


Be sure and check out more DT inspiration and join us at

We'd love for you to connect with us on our Facebook page too:
Thank you for taking time to read my post, I hope it has given you inspiration for your holiday cards.


Saturday, October 22, 2022

Pumpkin Fun

Hello! Well it feels more like winter than fall here, our heated blankets are out and the puppies are all cuddling together in piles!
My card today is more Halloween inspiration for Stamper's Delights. Meet Chibi Halloween Sachi. Isn't she a stunner dressed in her cat halloween outfit? 


I printed her on to Stamping card and colored her with Copic markers. I then printed a 2nd version on to masking paper and carefully cut around the part of her that was covering the moon. This was then used to mask her so I could stencil the moon. 
I used grey ink for the stenciling then added yellow ink to give the moon a glow. 
My image was then cut down so it fit on an A7 card with a purple mat underneath.
finally I added some shine to areas of the image.

Be sure and check out more DT inspiration and join us at


We'd love for you to connect with us on our Facebook page too:
Thank you for taking time to read my post, I hope it has given you inspiration for your halloween crafts!

Saturday, September 10, 2022

Off Duty Witch

 Good afternoon. It's another hot day here but at least it's now cooling at night!

Halloween is here next month and of course the witching hour will be upon us! My card today is from a off duty witch, I don't know what this Stamper's Delight character has in mind but she's brewing up something instead of out flying her broomstick. Meet Anime Witch's Night Off:


Isn't the cat hanging on her hat the cutest? I arranged my scene with the clock and sentiment, printed and trimmed to size. She was then colored with Copic markers and the edges inked with distress ink.

I matted an A2 card base with purple card - coordinating with her outfit and added my image. 

A simple card but the scene didn't need much to assenuate it.

Stamper's Delights have a great collection of images for your Halloween crafts in their store!

Be sure and check out more DT inspiration and join us at

We'd love for you to connect with us on our Facebook page too:

Thank you for stopping by


Saturday, August 13, 2022

Sucker For You

 Good afternoon!  we are in the middle of a thunder storm so a great day to get some crafting done! 


My card today is using Stamper's Delights Chibi Sucker 4U

The digital stamp includes a cute Chibi Character and 2 sentiments that you can resize to fit your design.


I started my card by resizing my image so she fit on an A2 card base. I placed the sentiment at the side of her and then printed on to stamping card.
She was colored with Copic markers. I have never colored grey hair before so decided to give it a go. It fit with the rest of my design well.
Once colored I trimmed my image to 4x5.25in This is my favorite size as it allows me to add a mat on my card without having too big of border.
I cut my mat 1/8in bigger. To add more detail I used a corner rounder on my mat and image. Both were added to a landscape card base.
Finally I added some little sequin hearts above the sentiment.
I do prefer my cards clean and simple and this one definitely follows that design!


Thank you for popping by. Be sure and check out more DT inspiration and join us at

We'd love for you to connect with us on our Facebook page too:


Wednesday, June 29, 2022

Flowery Critters

 Hello, It's almost the holiday weekend and we are going to spend it with family. All but one of the pups went to their new homes - I will be blogging about the babies next month so watch this space!

My post today is show casing a cute card designed using Maker Forte products. 

Rather than a full post I have recorded a You Tube video, this explains what used to make the card and the process I have followed to complete it:


Here is a list of products I used:

Grovehill Farm Stamp Set

Eclipse Black Ink

Spring Has Sprung Simple Sayings

Simply Stated Dies

Easy Foil Precut Parchment Pockets

Stormy Speciality Cardstock

Top Folding A2 card base

Makers Magic Crystal Clear

Lemon Crown Jewels 


Thank you for taking time to read my blog post.


Saturday, April 2, 2022

Tea Cup Cutie Prrr Prr Prrr

 Good afternoon and happy weekend!

It's day 2 of Stamper's Delights new release and my card today is using Chibi Tea Cup Cutie Cat Boy. I love this image, he really doesn't look happy about being petted:


I started my card by printing the image. I added the included sentiment to the cup. Digital stamps are a great way of resizing and adjusting images so they fit any card.
Once I had colored the cutie with Copic markers I trimmed him ready to fit my card. I used an A7 card which I matted with blue cardstock.
I then chose a cat design paper - I colored the images on there too.
Using a animal themed font I printed out Meow and matted this in blue card to match my base. 
Brads were added to the Meow image and both that and my image were added to my base with foam tape.

Why not stop by the Stamper's Delight Facebook page for regular news and inspiration from my Teamies you can also enter the progressive challenge there, no blog needed and if you sign up for the Stamper's Delight Membership you will get free images to enter the challenge with!

If you are looking for more then read on: 

NEVER Having To Struggle With Your Creative Process Alone Ever Again…

What if you had all the knowledge and techniques you need to create beautiful inspiring projects each month and a supportive community all in one place without the hours of unnecessary searching leaving you feeling frustrated, alone and over whelmed?

Stamper's Delights Have Packed This Membership With So Much Goodness!

To inspire you and help you grow... It's finally time to invest in yourself and what YOU love! 

Work together with them to find your own artistic voice, to help you get out of your comfort zone and try new things.

They are looking for Founding Members who can help to mold this membership by sharing ideas, what is working and what could be improved and in return for being an active member you will be locked into the lowest monthly fee it will ever be for as long as you are a member. Stamper's Delights main launch will be much high as they build up the content libraries. 

Friday, April 1, 2022

Cactus Friends Stick Together

 Hello! Welcome April - who can believe we are into month 4 already?  oh and we have had snow again this week!

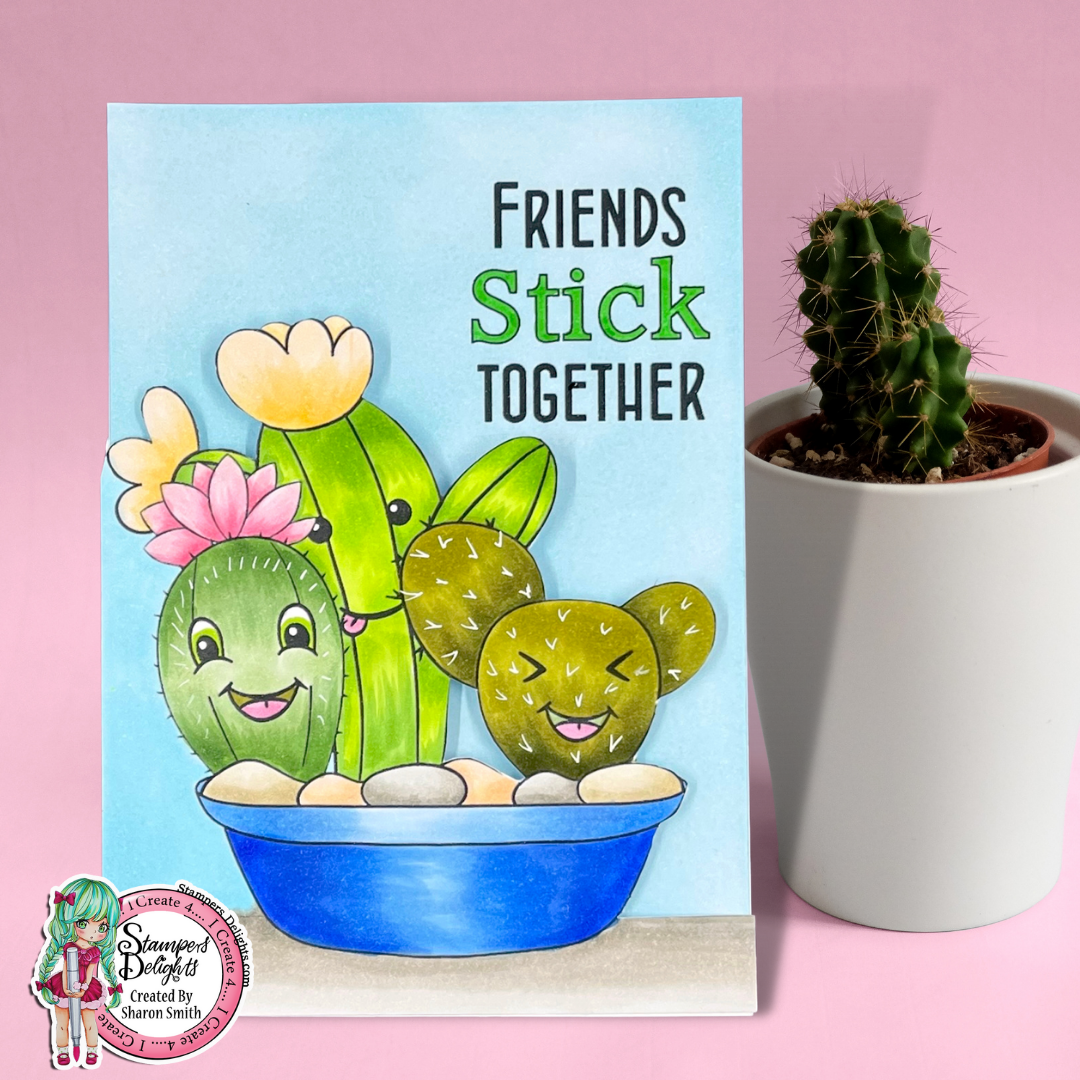
Todays post is inspiration for the new release at Stamper's Delights. This month the Kawaii release has 7 fun cactus images. I have used Kawaii Cactus 5:


Aren't they so cute!
I colored the images with Copic markers and I fussy cut around the top right section of the images. Using this I traced around the cut section on to the front of an A7 card base and cut this away giving me a shaped card.
My image was then glued in place covering the card front:


I then printed the sentiment in the top right of a 5x7in piece of cardstock. This was the ink blended with distress ink and the 'Stick' colored with green marker. When the card is closed the sentiment can still be seen.

Why not stop by the Stamper's Delight Facebook page for regular news and inspiration from my Teamies you can also enter the progressive challenge there, no blog needed and if you sign up for the Stamper's Delight Membership you will get free images to enter the challenge with!

If you are looking for more then read on: 

NEVER Having To Struggle With Your Creative Process Alone Ever Again…

What if you had all the knowledge and techniques you need to create beautiful inspiring projects each month and a supportive community all in one place without the hours of unnecessary searching leaving you feeling frustrated, alone and over whelmed?

Stamper's Delights Have Packed This Membership With So Much Goodness!

To inspire you and help you grow... It's finally time to invest in yourself and what YOU love! 

Work together with them to find your own artistic voice, to help you get out of your comfort zone and try new things.

They are looking for Founding Members who can help to mold this membership by sharing ideas, what is working and what could be improved and in return for being an active member you will be locked into the lowest monthly fee it will ever be for as long as you are a member. Stamper's Delights main launch will be much high as they build up the content libraries. 

Wednesday, March 2, 2022

You Are The Sweetest

 Good Morning, I'm praying that winter is starting to leave us - it has been so cold for so long.

My post today is to share this adorable little card made using Maker Forte products.


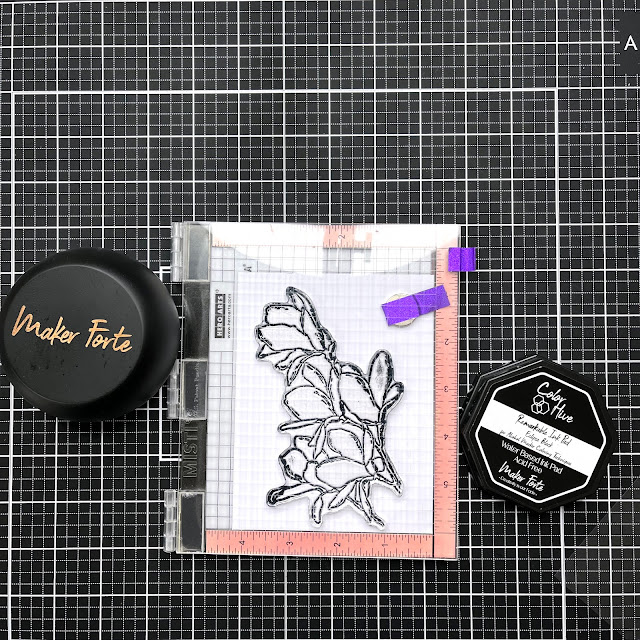
The images were stamped on to the corner of a piece of Ultra White cardstock and again onto some masking tape both with the Remarkable Eclipse Ink Pad. I always use my MISTI where I can, meaning I have very little stamping mistakes.


The images on masking paper were fussy cut and placed directly over my little pair of S'mores. This protects them and keeps the images under the masks white. Using Blue Moon Ink Pad and a blending brush I inked over the little guys, this was to make the images stand out from all the white card - as marshmallows are generally white they can become a bit lost on a white background.


I only put down a small amount of ink so this dried almost immediately and I was able to lift my masks ready to color the images. The On The Hook Tweezers are great for this as you can use the fine hook to grab the very edge of the mask.


I know it looks like I used a lot of Copic Markers for such a small image but with blending the colors out it takes a few!

I started by coloring the crackers with E44, E43 and E42. The chocolate was colored with E27 and E25. Marshmallows are white but do need a bit of shading so I used W1 and W0. Finally R22 and R21 were used for the pretty bow on the girl S'more.


Next came the adorable little faces I chose the wide faces one with and one without eyelashes. As these are tiny elements I chose to use an acrylic block for these and guess what - I dropped it so my little girl also gained a beauty spot! top reason I always (usually!) use my MISTI.


I decided to change my plans a little and decided to stamp some (love hearts from the same set) over the little guys. I used Coral Keys Ink Pad and placed the hearts in opposite directions.


Now to bring my design together, I used an A2 Top Folded Card Base, a piece of coordinating cardstock from my stash for both my mat and my sentiment (from the same stamp set) and some foam squares.


The mat and my design were adhered in place with double sided tape. I cut a 'V' into the end of the sentiment. Lining this up with the edge of my design, I held it in place with foam squares.

Finally I decided to add some Clear Glitter Maker's Magic on to the hearts to make them sparkle.


The shine and sparkle can be seen here:


Wednesday, February 16, 2022

Magnolias and Words of Encouragement

 Good morning, Hope it's warmer where you are than here!

My post today is inspiration for an encouragement card using Maker Forte Products. My main image is using Maker Forte and Alex Syberia's Beautiful Magnolia stamp set.

This stamp is stunning on it's own but I wanted a background too so I'm sharing my process for this in this post.

 As I was going to be coloring with alcohol markers, I stamped it on to white card with Remarkable Eclipse Ink Pad.

I stamped it again on to masking paper and fussy cut this out making sure I had removed all the landlocked areas to. Some of the branches are fine so when cutting they came apart but this didn't matter as I could just lay the extra parts in place and they would stick to cover my image.

Once the image was masked I laid The Cobblestone Stencil over it and fixed in place with some tape and magnets.

Using Coral Keys Color Hive Ink I lightly blended the ink through the stencil - yes it's a cobblestone pattern but I think it looks great as a patterned background. I removed the masks to reveal my clean image.


I found an image of a magnolia branch online and chose the Copic Markers nearest to the colors as I could so I could color the flowers realistically.


Magnolia flowers grow on the tops of the branches so I decided to make a landscape card at this point. I colored the flowers, petal casings and branches in my chosen colors:


The sentiments included with this stamp set were a little small for the look I wanted to achieve. I decided to chose one from Be You Dahlia stamp set which says BE YOU AND YOU WILL BE FINE. I wanted this to stand out from the pink on my card so I used a piece of black card and heat embossed the strip using Color Hive Clear Ink Pad and Ranger Seafoam White Embossing Powder. 


I then constructed my card, I covered an A2 Side Fold Card Base with pink cardstock. My image was trimmed to 4x5.5in and centered on the pink card, adhered in place with foam tape. I then decided to add some splatters with with the Splatter Rubber Stamp Style 1 and some pink ink.


Finally, I fixed my sentiment in place with foam squares.

Thank you for taking time to read my post, I hope I have given you some inspiration!


Friday, February 4, 2022

Foxing around in Spring

 Good evening I hope everyone is keeping safe in the extreme weather we are experiencing.

My post today is a tutorial using the newly released Kawaii image from Stampers Delights Spring Fox. 


Isn't he adorable! He has extras for scene building such as the flowers and butterflies here and a little fence which I didn't use.

I started my card by arranging the digital elements, I was able to change the color of the sentiment by adjusting the RGB levels in my graphics program, the scene was the printed onto stamping card. I then gathered the supplies I would be using:


Next I colored my fox, with this guy I started with my darkest colors and blended out the the lightest.


The flowers and grass were next, I know there aren't many flowers that shape which are blue but the advantage of stamping and coloring means you can tie everything in to your color scheme.


Yellow butterflies added a freshness to the image and tied in with flowers.


I die cut my image using a ricrac oval die, when I had done this I felt it needed something to make it pop off the card so I inked the edges with distress ink.


For the rest of my card I carried the butterflies over the card with a tree die: and some tiny die cut butterflies


As I had used different shades of marker to color my butterflies I used 2 shades of yellow card stock. The tree was cut twice once in green and a second one in yellow. I then cut all the yellow butterflies from the tree and glued them in the correct place on the green tree.
Next was assembling my card; I matted my slimline base with green cardstock and some blue design paper.


My tree was adhered flat to this and my die cut image fixed in place with foam tape. Finally I scattered more yellow diecut butterflies around my image, tree and right side of my card.


I hope you have enjoyed my tutorial. Head on over to the Kawaii new release post where you can find my inspiration from the rest of the Kawaii design team members. Also come back tomorrow for more new release images!

If you are looking for even more inspiration head on over to the Stamper Delights Facebook group and while you are there why not enter their progressive challenge - just sign up for free membership and you will receive emails on how to enter more details are on out Facebook page.

Friday, January 28, 2022

Scrumptious Sweet Valetines

 Good Morning! how's the weather where you are? we've had some crazy times, was warm on Christmas day, we've had high winds, rain, freezing temperatures and snow!

this is the first of 2 posts, I was invites to join the Not Too Shabby design team and I have had fun designing my first card for them. I used the Sweet Valentine image and sentiments:


Doesn't this look delicious! I colored the image with Copic markers, I added white glaze pen to the 'icing' on the biscotti and white gel pen to the heart on the mug. I fussy cut the image and edged it with black so not to have white paper edges showing.
My card was matted with red cardstock and Kraft heart patterned paper. I adhered my image in place and then using foam tape added my sentiment.

My mug is full of hot cocoa - anyone knows me knows I hate coffee! and of course the cupcake had to be chocolate. A great Valentine's snack to have on a girl friend's afternoon out!

Thanks for stopping by, please go check out Jamie's store - Not 2 Shabby, she has some fab stamps and also sells crafty goodies from other companies.


Wednesday, December 15, 2021

Tree Farm Fun

 Good afternoon from a windy rainy Michigan! It's not looking very festive out but hey there is a week to go yet. 

Have you got your trees decorated? Sunshine Bee designs Festive reindeer are visiting the tree farm, in fact I think one has already got the lights on his tree!


I made this slimline card using the festive reindeer digital stamps and the tree from Christmas Fairy digital collection.
I colored all the images and then used my scan n cut to fussy cut them. 
My card base was ink blended with distress ink before the images were adhered in place using both wet glue and foam squares.


I added glaze pen to the tree lights and the little reindeer noses. Finally, a good scattering of glitter to make the 'snow' shine.


Thank you for taking time to read, if you love what you see you can buy the images at The Little Paper Tree store where they sell lots of crafting goodies. Do You want some discount? Then use SHARON10 during checkout for 10% off your order!