Hello

Welcome to my blog, a place where I can lose myself in a crafty haven. Pull up a comfy chair grab a cuppa and come and have a read. Oh and if you like what you see, stop by and leave me some love in the comments section

Followers

Saturday, August 29, 2020

Stamper's Delights Kit and Clowder Event

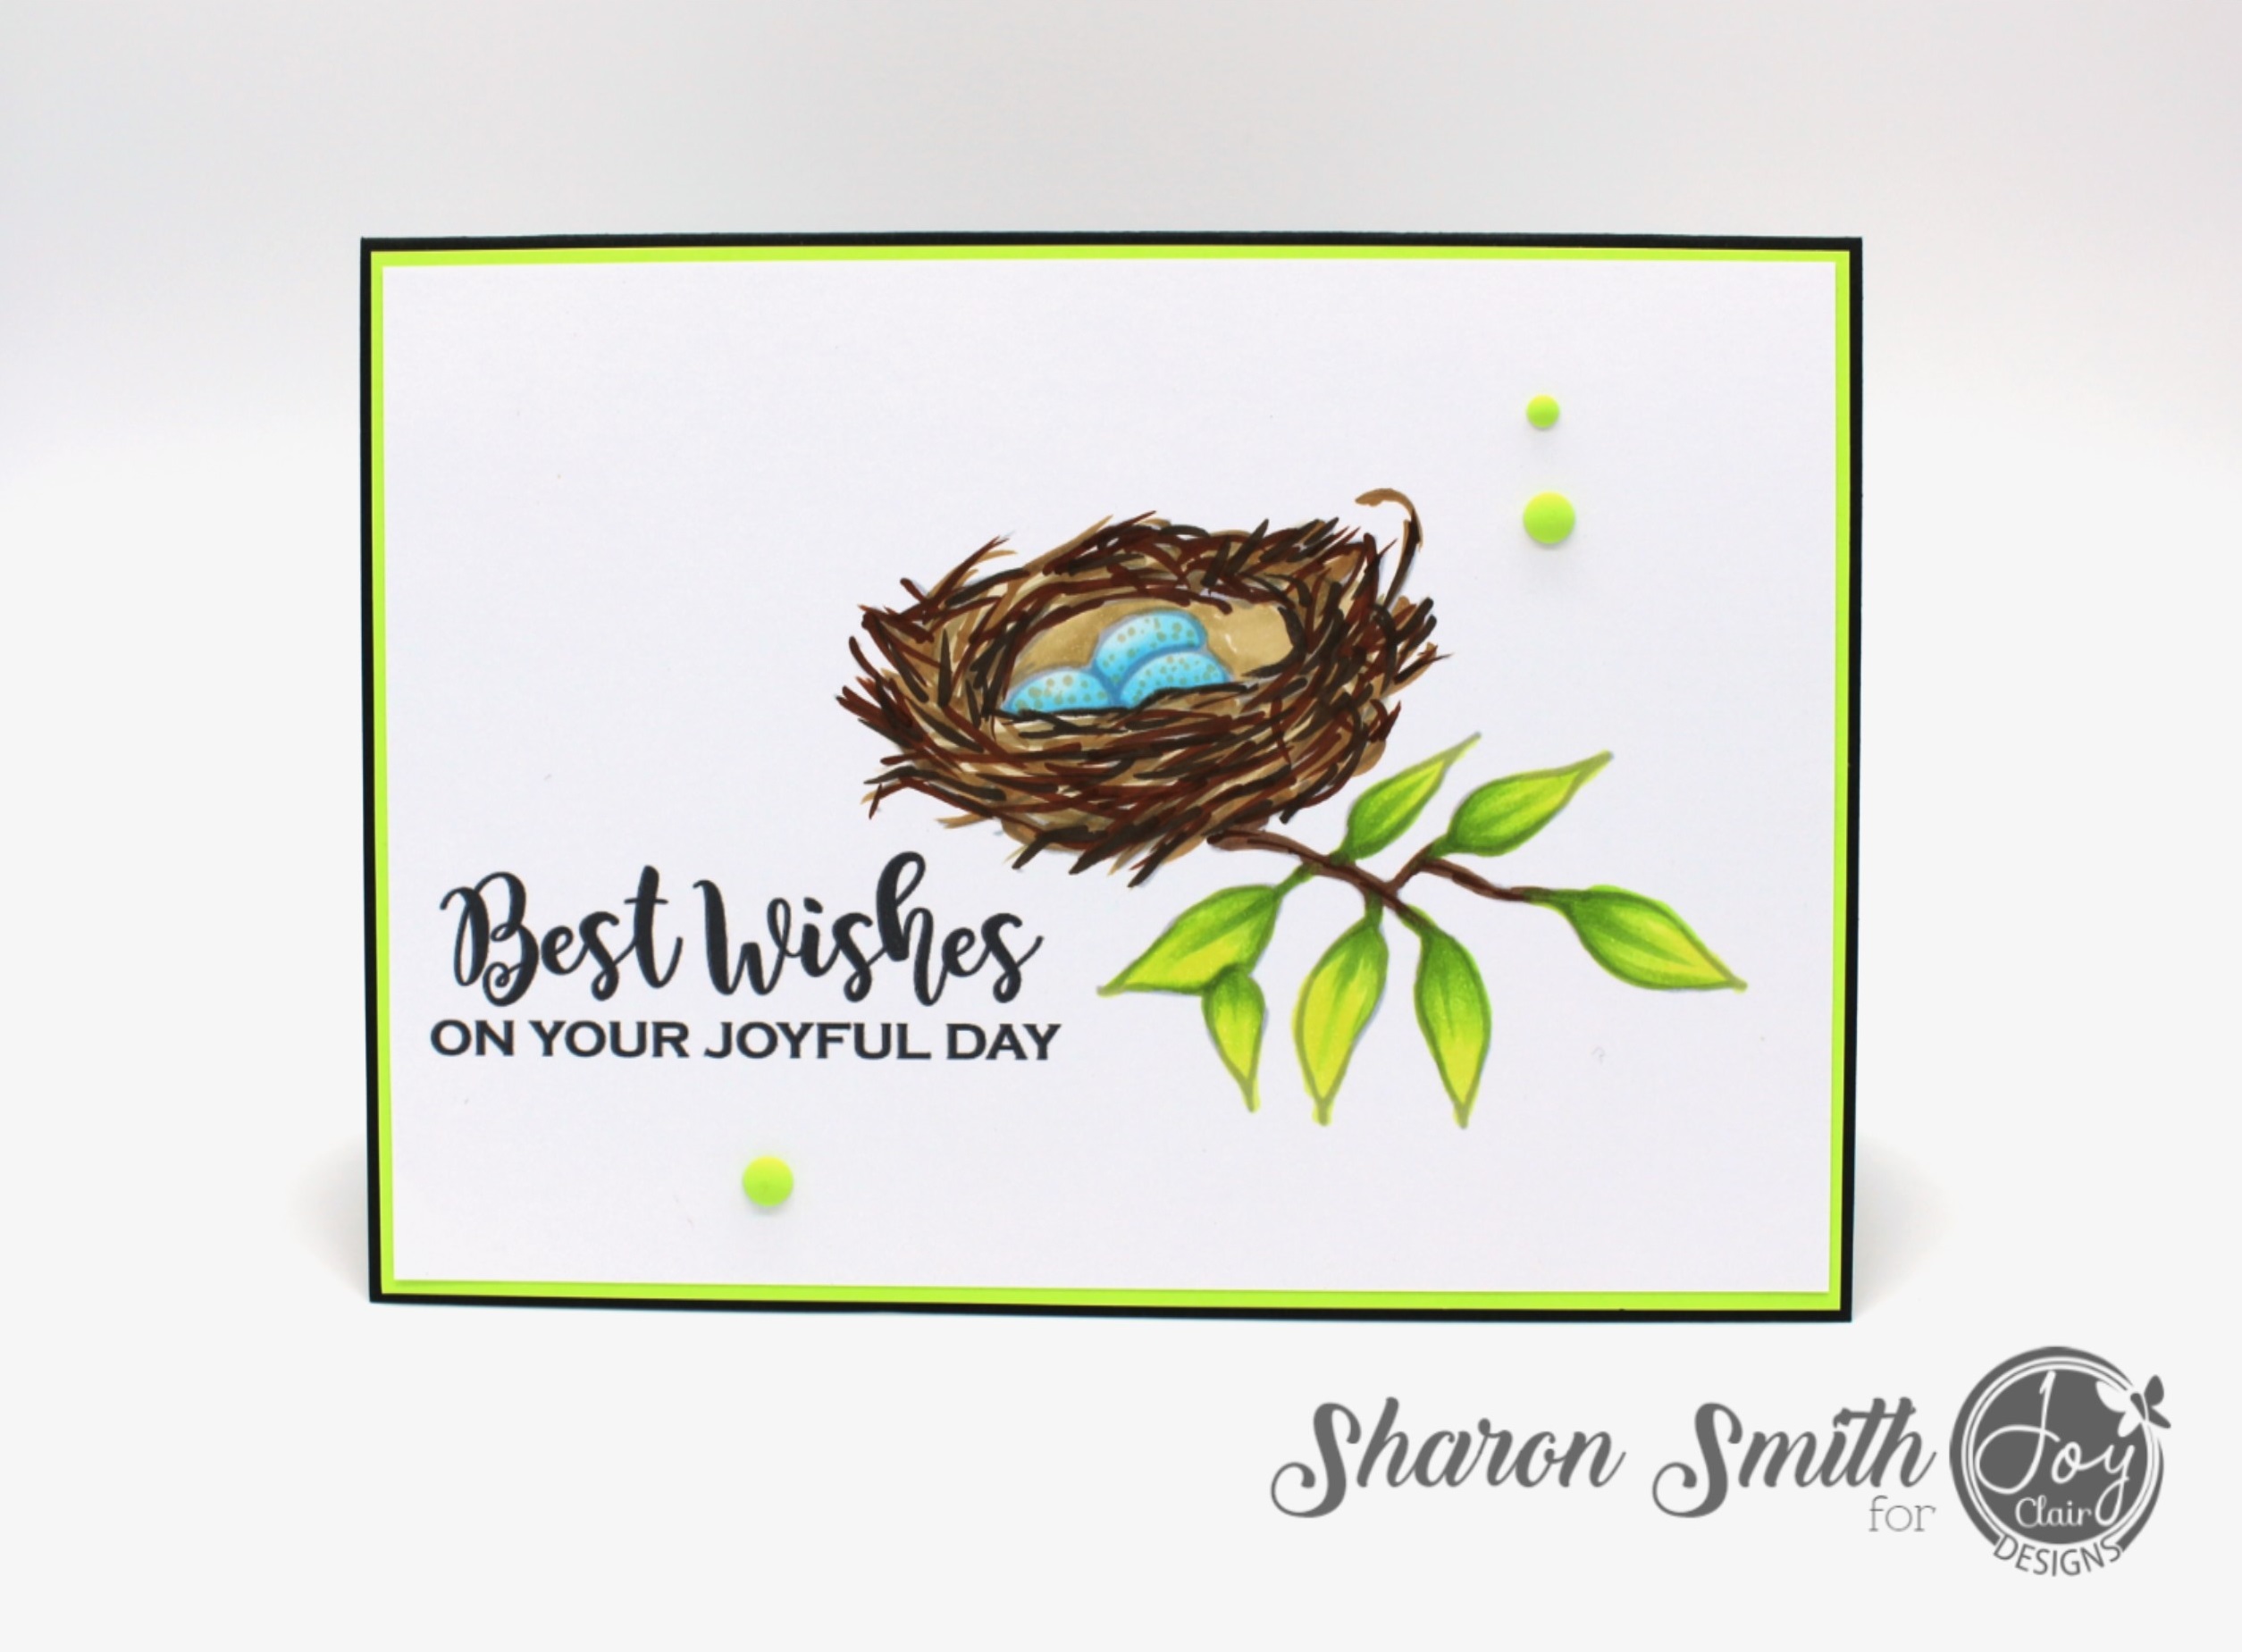
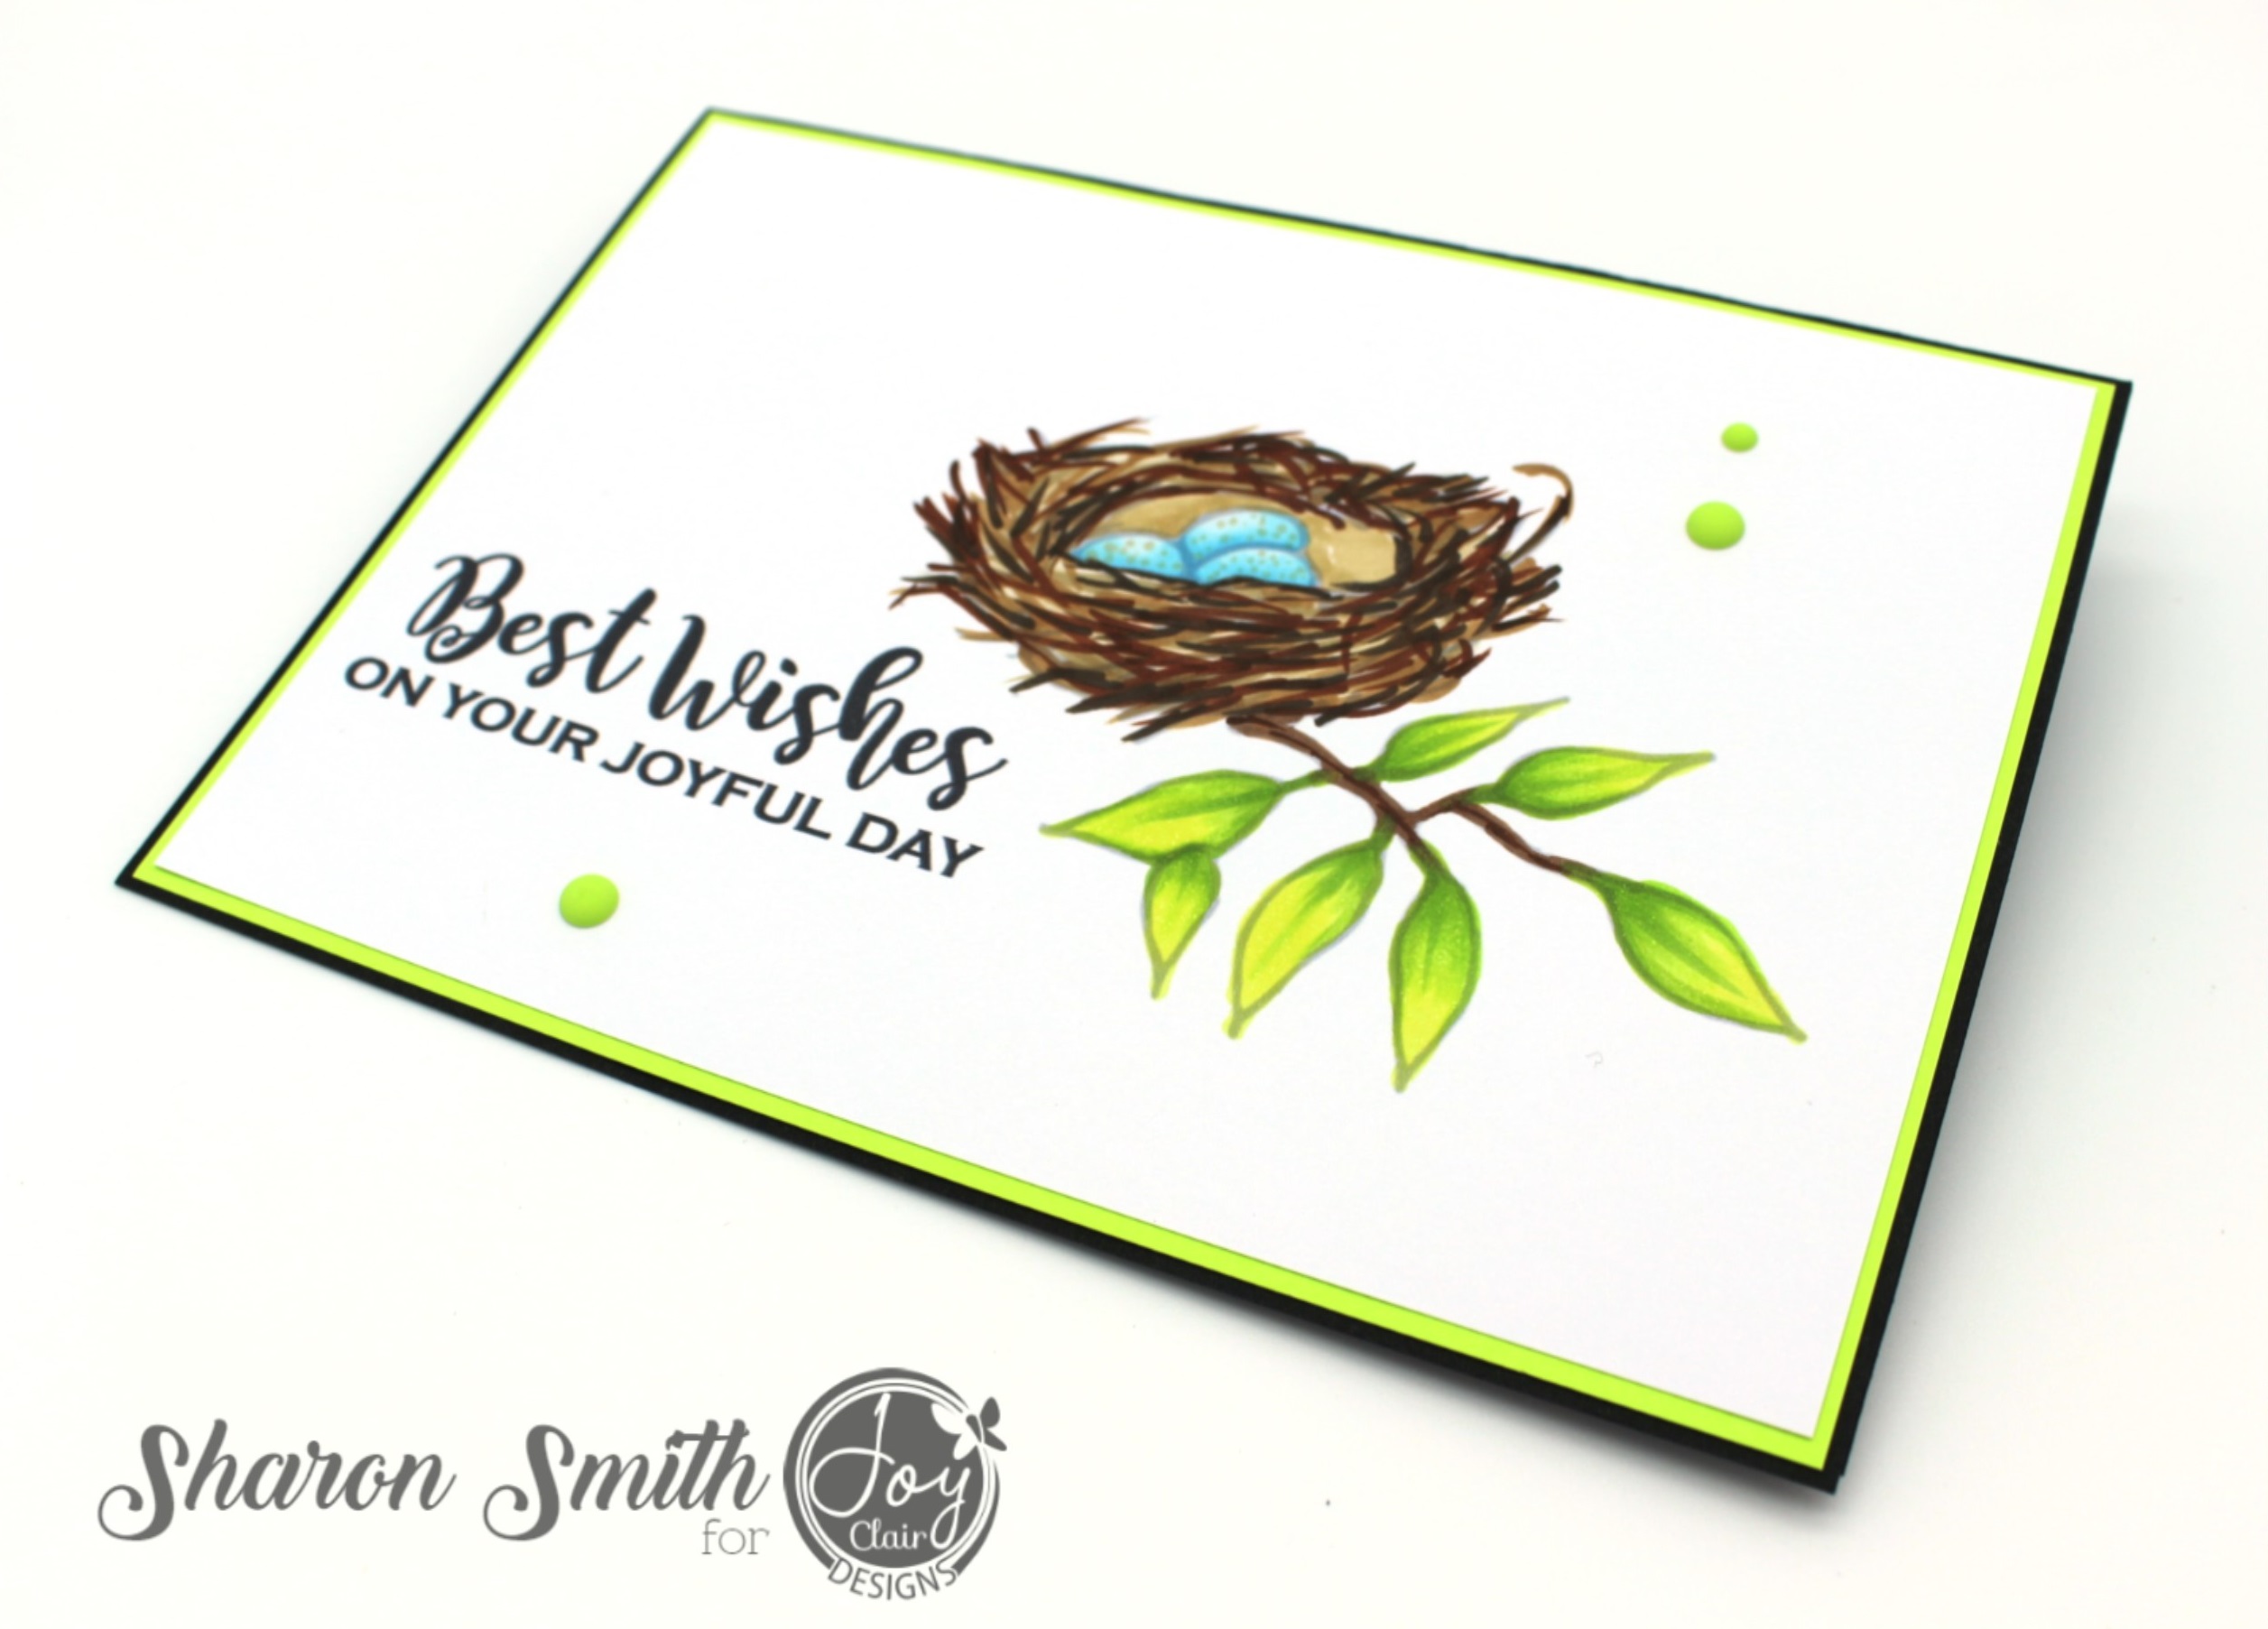
 Good afternoon! School starts on Monday and I am going to be super busy as Mollie is doing Virtual School - hopefully it will go smoothly!

Stamper's Delights are the sponsors this weekend over at Kit and Clowder. Alyce will be offering this super cute Anime Nixie Fairy free:


This is my inspiration using her:

She was colored with Copic Markers and fussy cut. My card base was matted with a yellow patterned paper, I then die cut a floral design from some polkadot paper and added this to my base. Nixie was then adhered in place and a few coordinating enamel dots finished my design.

As well as Nixie Stamper's Delights have a couple of complimenting images that they are releasing and I love these:


I could resist coloring up both of them. I colored the designs using the same color pallet. I kept the cards simple to show off the gorgeous images:


This image is Plant Fuchsia, I tried to be true to the colors of the fuchsia using Copic markers. I then googled butterflies that are attracted to to flowers and there were some super bright yellow ones so of course I emulated them in my design. A simple mat and a die cut sentiment was all I felt the card needed.

Chibi Fuchsia Fairy was colored as the butterfly in the first image but I in order to stick to my color pallet I had to add purple and where better than her dress. again a simple dark pink mat and a die cut sentiment was all I felt was needed on this card.

My teamies will all be posting their inspirations on the Kit and Clowder Facebook page so hop on over, grab the freebie and 20% off coupon which you could use on the fuchsia collection!!!

Why not stop by the Stamper's Delight Facebook page for regular news and inspiration from my Teamies you can also enter the progressive challenge there, no blog needed and receive freebies! 

Thanks for stopping by and if you like what you see please leave a comment to let me know! 


Friday, August 28, 2020

Markers Everywhere!

Good afternoon! We are still in the height of summer, heat index is really high so I've been staying in and doing lots of crafting.

Today is Kawaii new release over at Stamper's Delights and like always the images are really cute! Meet the Marker Pals:


They are super sweet and fit well with the art packs that were released a few weeks ago.

I decided to use the little boy, and he's in a bit of a mess with markers everywhere:


What I Did:
I started by resizing and printing the little guy, markers and sentiment. I used my Scan n Cut to fussy cut him and colored him and his pile of markers. I then fussy cut all the markers.
For my background I matted a grey card base with blue card. Then using watercolor paper I sprinkled different colored pigment powders over it. This was then misted with water to give the brightly colored speckled background. 
While this dried I added foam tape to the back of my little pal and the markers. I matted my sentiment with the blue cardstock and again applied foam tape to this.
Once dried I glued my background to my base. I image was added to the left of my card and the markers scattered around him. Finally I added my sentiment.

What I Used: 
Digital Images: Stamper's Delights - Marker Pals
Stamping card: X-Press It
Alcohol markers: Copic
Grey card for base: Simon Says Stamp - Fog Grey
Blue cardstock: Core'Dinations Premium
Water color paper: Canson XL
Pigment powders: Brusho
Foam Tape: Dollar Store

Head on over to the Stamper's Delights Store to see all of this week’s New Releases.

Why not stop by the Stamper's Delight Facebook page for regular news and inspiration from my Teamies you can also enter the progressive challenge there, no blog needed and receive freebies! 


All the design team projects are available on the Inspiration blog - hop on over there for more inspiration.

I am entering this card into the following challenges:

Colour Crazy Challenge - Anything Goes Coloring

Creative Knockouts - Anything Goes 

Krafty Chicks Challenge - All Occasion


Thanks for stopping by and if you like what you see please leave a comment to let me know! 


Tuesday, August 18, 2020

Best wishes

 Good morning! We still have amazing summer weather, I just wish it would cool down a bit!

I'm here today with more inspiration from the Joy Clair August new release. My card today is using the Prized Life digital Stamp Collection. I chose to demonstrate how you can still do no line coloring with digital stamps.

I placed the image and sentiment into a graphics program and resized them. I then reduced the opacity on the image to 50% this gave a me a light grey image instead of the black lined. I then printed onto stamping cardstock. I colored the image with Copic markers ensuring that I covered all the grey.

Once my image was colored I matted a black card base with a green cardstock that coordinated with the green leaves. I added my image and finally scattered a few enamel dots on my card. 


Be sure to sign up for Joy Clair Designs newsletters. You will receive notifications of new releases, sales and exclusive offers to subscribers. Also, you can follow Joy Clair Designs on Facebook PageJoy Clair Stamp Projects Facebook GroupInstagram , Twitter, Pinterest and  YouTube!

Thank you for stopping by and if you like what you see please let me know in the comments.


Christmas Gift

 Good morning! Despite all the problems this year is passing too quickly how are we nearly in September!! It's going to be Christmas before we know it!

It's Tuesday and that can only mean one thing in the world of crafting challenges - Digi Choosday!!! For this challenge my teamies and I are making Christmas projects that aren't just a card! So I made a card with a gift inside.

What I Did:
I resized my image sentiment and printed these and 2 patterned digital papers. My image was colored with alcohol markers then I added glitter to all the hat edges.
My card base was made using 2 pieces of cardstock. The first one was cut down to 10.5 x 7 in and scored length ways at 5in and 5.75in. The second was 8.5 x 7 in and scored along longest edge at 5in, 5.75in, 7.25in, and 8in. I then cut an aperture from the 1.50in section, the last 0.5in had red liner tape placed along it and the scored area was shaped into a box frame. The 2 pieces of cardstock were then glued together forming a deep card like so:

I then made a box that would slide in to the box frame. I used a piece of card cut to 8.5in x 3in. This was scored along all edges at 0.75in, a v-shape was cut out of the corners and edges folded up to form an open topped box which slid into the card to hold tealights.
I then decorated the card front with the digital papers, coordinating cards stock, my cute image and sentiment.
I also decorated inside which covered the joins of the cardstock.

What I used:
Stamp card: X-Press It
Alcohol Markers: Copic
White cardstock for base: Neenah Solar white Coverstock
Blue card: Tonic Studio - Craft Perfect Denim Blue
Glitter: from stash
Glue: Zipdry

The Digi Choosday Challenge runs for 2 weeks, it is always anything goes so there is no reason not to enter and you never know you may just win!

 Looking for more inspiration? Then check out my teamies designs over on the Facebook page, you can also post your own Polkadoodles' designs on the Craft Stamp and Colour with Polkadoodles Facebook group

Thanks for stopping by, now go join the challenge!


Friday, August 14, 2020

I Love Coloring - Who knew!!!

Good afternoon! It's almost time for school to restart

There is another new release from Stamper's Delights today and it is all about art, a bunch of different collections depending on what your favorite medium is. I have chosen to work with the Art Tools 4 which is about markers (of course!):

I started my card by lining up 22 of the markers - I actually printed 44 but there's more to come later in the month. I colored them to match my favorite alcohol markers and fussy cut the nibs making a marker border.

I then used 3 of the ink splotches, these are black in the collection but I used my graphics program to recolor them. I did the same with the heart in my sentiment and arranged all of these and printed onto white cardstock.
I matted a black 5x7in card base with green cardstock and added the card with the ink splotches on. I then used foam tape to adhere my marker border with foam tape. I had had to cut off a few markers so I arranged a couple onto my card again using foam tape to give them dimension.

Head on over to the Stamper's Delights Store to see all of this week’s New Releases, we also have a cute Anime girl that can be used with all the art packs.


Why not stop by the Stamper's Delight Facebook page for regular news and inspiration from my Teamies you can also enter the progressive challenge there, no blog needed and receive freebies! 

All the design team's new release projects are available on the Inspiration blog - hop on over there for more inspiration.

I am entering this card in to the following challenges:


Thanks for stopping by and if you like what you see please leave a comment to let me know!


Wednesday, August 12, 2020

God Guides

 Good Morning, We still have gorgeous weather and are enjoying time at home. 

I'm here today with some inspiration from this month's Joy Clair new release. The digital stamp set God Guides is just beautiful, gorgeous florals and sentiments. I chose to use one of the florals to make a wreath and Psalm 27:14

I opened God's Grace in a graphics program and arranged my design before printing on to stamping card. The flowers were colored with alcohol markers, I added a ribbon and slider and matted onto a white card base with a dark blue mat.


Be sure to check out all this month's new release on the Joy Clair store website. You can also see more inspiration here or on the Joy Clair Facebook page and Fan Group. You can also find them on Instagram and Pinterest.

Thanks for stopping by and if you like what you see please let me know in the comments 

Friday, August 7, 2020

Live Love Laugh

Good afternoon! wow despite being stuck at home time is flying I can't believe it is already August! We are still waiting to hear what is happening with school, it is due to reopen the last week of August but unsure what that will look like

I'm excited to share with you today's new Chibi release from Stamper's Delight and boy is this a cutie:


Meet Chibi Live Love Laugh is is adorable. I started by resizing her and coloring her with my alcohol markers I then fussy cut her and placed to one side while working on my card base.
I matted a 5x7in card base with dark blue cardstock. I then chose some printed paper that fit well with the colors I had used for my image. I also felt the lavender when well with the energy of the sentiments. I arranged my sentiments in my graphics program and then ran the printed paper through the printer ensuring that I would be able to trim it with the design I wanted.
This was then matted onto my card base and my Chibi was adhered in place. I loved the simplicity and didn't feel any other embellishments where needed.


This little sweetie can be found in the Stamper's Delights Store.

Why not stop by the Stamper's Delight Facebook page for regular news and inspiration from my Teamies you can also enter the progressive challenge there, no blog needed and receive freebies! 

Thanks for stopping by and if you like what you see please leave a comment to let me know!


Tuesday, August 4, 2020

Missing School

Good Morning! We are desperate from some rain here, not had much in months, the yards are all looking brown and crispy!

Here we are again another Tuesday! So go ahead and check out the new Digi Choosday challenge! The design team this week have used Miss you as our inspiration and as it still isn't known what school is going to look like I have made a miss you teacher card using Polkadoodles' Work and Play 3 collection:


What I Did:
I decided for this card I was going to use the pre-colored images so I resized the digital design paper and added the teacher and her stack of books as overlays. I then printed this and trimmed so it would fit on my 5x7in card base. I also used a circle die to cut a notch from the top as this card has a pull out section:


The pull out was made in the same way as the top section of my card except I digitally erased the blackboard which was on the easel, making it a white board, I then added the sentiments to this, overlaid it over the digital paper and printed it. 

I matted my card base with Pink cardstock, made fold back flaps on my top set of images and glued these in place on the card. My inner section then just slid into place. I added Pull Me to the center of the inner section which fits where the notch on the topper is. Finally I matted a sentiment again from the same collection and added this with foam tape.

What I Used:
Digital images, papers and teacher sentiments: Polkadoodles - Work and Play 3 Full collection Craft Download
White cardstock for printing: X-Press It
Black cardstock for base: Core'Dinations Premium Heavy Weight
Pink cardstock: Core'Dinations Premium
Glue: ZipDry
Double sided tape: Scor-Pal
Foam tape: Dollar Store

The Digi Choosday Challenge runs for 2 weeks, it is always anything goes so there is no reason not to enter and you never know you may just win!

Looking for more inspiration? Then check out my teamies designs over on the Facebook page, you can also post your own Polkadoodles' designs on the Craft Stamp and Colour with Polkadoodles Facebook group

Thanks for stopping by, now go join the challenge!


Monday, August 3, 2020

Mandala Love

Good morning! We are still at home, enjoying the sunshine and working in the yard, our veggie garden is doing great we enjoying offerings from it.

I'm back today with more inspiration for the August Joy Clair new release. This card is using one of the designs and a sentiment from the Mandala Love collection:


I loved coloring this, so relaxing just to sit and color. The Mandala is actually a full one but I decided to cut it down for my design. I used Bristol Smooth paper and printed both the mandala and sentiment. I chose to use this paper so I could color with my Prismacolor pencils, I don't use them independently often so thought I'd give them a try. 
Once colored I matted the image with black card and added to a cream card base (this was so the Bristol Smooth didn't look dirty as it would with a white base).
I added a few iridescent gems which catch the color of the mandala at certain angles.


 They are perfect for any card makers style but  I am loving being able to make my favorite card style, Clean and Simple, with the Joy Clair images.

Thank you for stopping by. I will be back during the month with more inspiration using the new release. Also my teamies will be sharing with you over on the Joy Clair Facebook Group.

 You can check out the new release and all of Joy Clair's products over in their store.


Items I used:

ZipDry Glue
ZipDry Glue
Purchase From:
SSS | AZN
Translucent Enamel Dots
Purchase From:
GMD
Prismacolor Pencils
Prismacolor Pencils
Purchase From:
SSS | AZN
Studio Katia Iridescent crystals
Purchase From:
SSS
Strathmore Bristol Smooth Paper Pad
Purchase From:
SSS | AZN
Mandala Love
Mandala Love
Purchase From:
JC

Sunday, August 2, 2020

For The Guys

Good afternoon! Another quiet relaxing weekend in the Smith home again. I am really enjoying the weekends not dashing about, doing a bit of yard work which now include includes harvesting from our garden.

Today's post is to show my work for the next classes in my Altenew Educator Certificate program, For The Guys By Jennifer, a great set of classes if you struggle to come up with male themed cards

My first card's inspiration was the galaxy class Jennifer taught:


I figured our wonderful world is out there in the Milky Way Galaxy so I used the Big World stamp and die set.
I started by making my galaxy. on Solar white cardstock I ink blended a number of distress inks to give me the dark sky. I then used a combination of paint pen and splatters of watercolor paint to add my stars and comets. This was then put to one side to dry.
I stamped my world with Altenew Inks in Caribbean Sky, Frayed Leaf and Forest Glade. I also blended the same colors onto a scrap of white card. I die cut my Earth and also die cut the word 'world' from the ink blended card scrap.
Once my background was dry I stamped the 'what a wonderful' stamp using embossing ink and then heat embossed with white powder. It is important to make sure your card is dry and to use an embossing buddy on the background or the embossing powder will stick where you don't need it!. Finally I matted a 4.25 x 5.5 card base with green cardstock and my galaxy. My earth and world sentiment were adhered in place.

My next card was an adaptation of Jennifer's geometric class. I looked through the Altenew stamp sets I have to find something I could use. Moroccan Mosaic has these little extra stamps that fit with the theme:


 I chose to use 2 stamps. I started with drawing a pencil line across a piece of solar white cardstock. I used the as a guide for my stamping I started with Desert Night ink and stamped the 2 stamps alternately across the card. I then repeated this 3 more times with Dark Night, Cloudy Sky and Misty Morning Ink. This gave me my geometric pattern which I feel looks almost like a tire tread mark
I used a sentiment from the same set, stamping it over the lightest pattern with Jet Black Ink.
I matted a grey card base with coordinating blue cardstock and added the topper to the center of this, I did cut this shorter on the long sides to draw the eye to the pattern.

My last card is a fun one Jennifer made the Windy Men from Altenew's Congrats stamp set wobble by making springs for them. I thought this was so much fun so had to recreate it:


I started by building my men and stamping them with jet black ink, they were then colored with alcohol markers and fussy cut. 
Next I used a piece of checkerboard card stock, cut it to size to fit my black 4.25 x 5.5in card base. I decided to add some detail with this and cut the corner away diagonally, trimmed the piece I cut off in to 4 pieces. I glued the main piece to my card base and then added 2 alternate piece back into the corner. I then added 2 strips of black card to the bottom of the base card just to add to the pattern.

Now to build the wobbles, I used a 20g wire and coiled 2 lengths around the end of a paint brush giving me 2 springs. These were glued to the bottom end of my windy men and then glued to my card. This stands them proud from the card and when you play with them they wobble.
Finally I stamped the Hooray and 'You did it!" sentiments with embossing ink and heat embossed with white embossing powder.

I am continuing to learn so many new techniques doing the Altenew Educator Certificate Course, and yes they can be applied to all my card making not just Altenew!

Thank you for stopping by and I hope if you like what you see you will let me know in the comments section.