Hello

Welcome to my blog, a place where I can lose myself in a crafty haven. Pull up a comfy chair grab a cuppa and come and have a read. Oh and if you like what you see, stop by and leave me some love in the comments section

Followers

Wednesday, September 28, 2022

Christmas Peace

Hello! Fall has finally arrived and I am loving the cooler temperatures, makes being outside so much more enjoyable!

My post today is inspiration for a Christmas card using Maker Forte products.


I have used elements of Modern Christmas Watercolor Stamp SetFirst I wanted to achieve a fir branch across my card. Using the branch stamp I stamped it in the top corner of my stamping card with British Racing Green Ink.


To avoid it crossing the previous stamped image I masked the branch end of the stamp with masking paper and repeatedly stamped the branch across the card.


To add some depth to the image I repeated these steps with Lady Liberty Ink.

I used one of the sentiments from the stamp settle gorgeous font is a very fine lettering I love the way it works with the images in this set. As it's a fine detail font it needs to stand out against the dark green. Eclipse Black Ink works well for this.


The card needed more detail so using a red alcohol marker and a white gel pen I drew berries among the branches.

While doing this my hand smudge the green ink. I have happy accidents like this all the time, usually a cleverly placed embellishment covers this. This wouldn't have worked on this card, I pressed my ink pad onto a mat and added lots of water. Then, using a paint brush I splattered ink all over my stamping card. Yes the smudges are still there but they now look like part of the design!

I had planned on matting my card with British Racing Green Cardstock but when I tried this it just didn't pop behind the design. Red is too bright so Eclipse Black Cardstock was used. This is a very dark black so makes the sentiment stand out against the splattered background.


Black is not something you usually see on a Christmas card but I feel it works well with this. Finally I matted the design on to a Side Folding A2 Card Base.


Thank you for taking time to read my post and I hope it gives you motivation to start your holiday cards.

Saturday, September 24, 2022

Flying by....

 Hello! Fall has finally arrived I just wish someone would tell the weather! We still have above normal temperatures

My card today is showcasing Stamper's Delights Chibi Agnes 3. Halloween is just around the corner and this image is great for your crafts.


Isn't she a cutie? I would love hair like this - maybe one day! 
I colored her with my Copic markers adding some finalizer to give texture to her hair and broomstick.
Using a circle die I then cut my stamping card into a circle with a flat side.
My card base is an A2 size matted with black card and some digital spotty paper.
I inked the edge of Agnes's circle with distress ink and adhered in place lining up the flat edge with the edge of the design paper.
Boo! and a bat die cut just finished the design.

Be sure and check out more DT inspiration and join us at

We'd love for you to connect with us on our Facebook page too:

Thank you for taking time to read my post, I hope it has given you inspiration for your halloween crafts!

Wednesday, September 21, 2022

Die Cutting Inlaying

 Good morning! It's finally cooler here, we had storms all day yesterday and has been in the 70s.

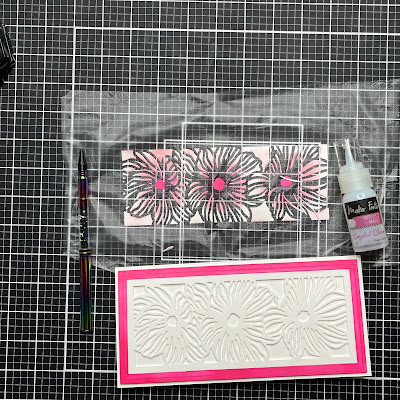
I'm back today with some inspiration using Maker Forte products. I am using the Flower Trio Die and a die inlaying technique today.


The card began life as a plain white cardstock. After running the die through my die cut machine I carefully made sure all the waste bits stayed in place in the die. Lifting off the actual image I then placed press and seal over the remaining parts. When I carefully lifted this all the white waste was attached to it.


Bubble Tea Ink and Flamingo Ink make great colors to blend together. Using brushes I started with the darker Flamingo and worked out to edges coloring all the waste pieces.


Some of the pieces lifted while doing this but as long as I didn't lose any I'm not concerned.

Moving onto the actual die cut I masked off the flowers. 


To give my card a frame I inked the remaining edge with Flamingo Ink.


The masking paper keeps the underneath ink free so on removing my flowers are still bright white.


Turning this over I applied foam tape to the edge and smaller pieces to the backs of the flowers. I then adhered this to a 8.5x4in card base. 


The card base isn't a standard size but it gives the die cut a look of matting. Next I inlaid all the 'waste' pieces back into the die countersinking them. This works because the foam tape raises the die cut. I did use Makers Magic Crystal Clearfor this, the fine tip is great for getting into the tiny spaces.


The Rainbow Picker & Poker makes lifting the tiny pieces and placing them easier than using my fat fingers!

The inlaying took quite a while but the effect is worth it.


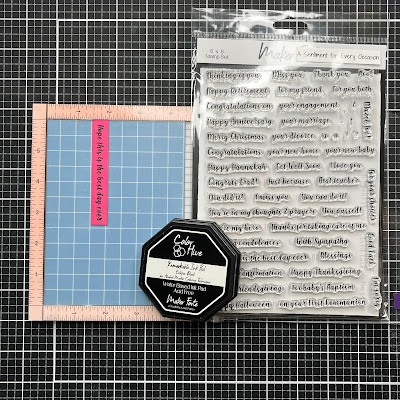
My card needs a sentiment. I love the A Sentiment For Every Occasion stamp set for cards like this. Making my sentiment coordinate with the colors on the card was easy. I swiped Flamingo Ink across a piece of 1in card strip.


Once this was dry I stamped 'Hope this is the best day ever' using Remarkable Eclipse Black Ink. I the quickly covered this with Crystal Clear Embossing Powder and melted it to give a glossy finish.


I adhered this to my card with foam tape. Subtle embellishments are a great finish to a card. Using Maker's Magic White Pearl instead of gems give a touch without taking away from the card design. These are dotted in an uneven number around my sentiment.


Thank you for taking time to read my post and I hope it gives you inspiration!


Wednesday, September 14, 2022

Rainbow Flowers

Good morning, We finally have cooler weather and I am loving it! No need for air con, all doors open letting the cool air in!

My post today is showcasing 2 cards designed and created with Maker Forte products. Both of them are using the Flower Market White Rubber Stamp. It is a great background stamp which is how I have used it but got 2 different effects even though I have only inked it once! I love rainbows so both have this theme.

My card starts by inking up the stamp. To do this I laid it flat on my desk. Picking out rainbow colors from the Color Hive Inks - Red LeicesterCalifornia LoveEvergladesVegas Strip and Sugar Plum. I also added in Candied Apple Distress Oxide for my red. Not wanting to contaminate my inks with other colors I used blending brushes to add the inks to the stamp giving me stripes of color.


I laid a piece of white cardstock onto the stamp and using a brayer pressed it against the colors. when lifted I had a simple inked piece of card.


On lifting the cardstock there was still plenty of ink on the stamp. So I gave it a light spritzing with water and laid a 2 piece of card over it. Braying this gave me an even color.

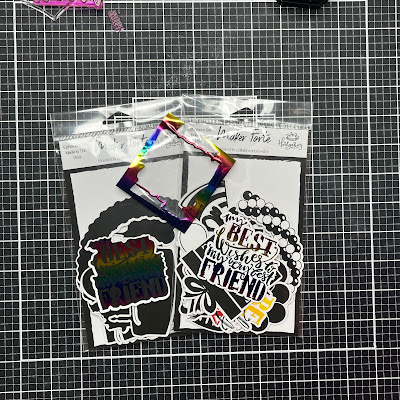
This pieces left to dry and I returned to my first piece. Due to the rainbow of ink I decided to do no more than add a sentiment. The toner Ephemera is great a great alternative to stamping. and you can turned them any color you want with foil! I chose the Birthday Elements both the wording and the backing so I could decide which to use once foiled. My background is rainbow - so is the foil

I decided to go with the wording as it stood out better against my background.

By now my other background had dried. I did consider using the reversed foiling piece on this but decided to stamp on it instead. Using the Boxed Sentiments I arranged the box and 'With Thanks' on my background. Wanting to achieve a shiny effect I stamped with Eclipse Black Ink and then quickly covered it with Crystal Clear Embossing Powder. Using my heat gun I melted this, The Eclipse ink stays wet for a few seconds after stamping allowing the embossing powder to stick.

I chose A2 Side Folding Card Bases and Coronation Purple Cardstock to mount my background on to for both cards. Once I had built my cards I added the foiled sentiment. Foam tape gives this lift to make it stand out from the card background.

I felt something was missing from both designs. As a finale I sprinkled some Crown Jewel Gems in RollerskatesLemon and Lady Liberty.

Here's the background with water added.

And the one that was just ink.


Which is your favorite?

Thank you for taking time to read my post and hope you have some inspiration.

Sunday, September 11, 2022

Altenew Educators Certification Program Level 3 - Creative Coloring with Erum, Advanced Techniques

Good Morning! It's a lazy Sunday for me so I thought I'd cover the next classes in my AECP course. I love Erum's coloring techniques and am an avid follower of her You Tube channel so when her Coloring with Erum - Advanced Techniques was available to me to do as part of my course I jumped at the chance.

She demo's lots of techniques that I will be trying but I chose 2 to document as part of my level 3. 

Day 1 was adding marker detail to stamped images. Previously this is not something I would of thought to do. I love the detail it has given to my images so will be using it frequently!


 Doesn't the flower look amazing!

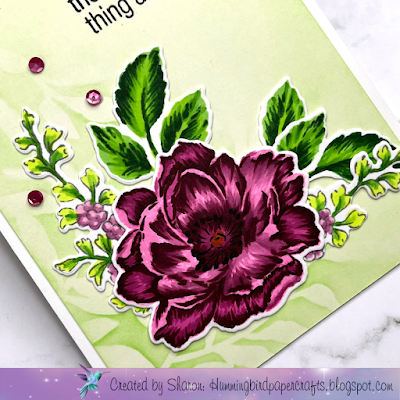
I started the card by stamping the first 2 layers of the flower from Beautiful Day. I used Puffy Heart and Cosmic Berry Inks, this gave me a guide of where to add my shadows. Using the same colors in markers, which are from Set D, I added depth to the petals using the darker Cosmic Berry first. I then 'pulled' this color out with Puffy Heart. I also used the tip to tip technique which gives a mid color between the markers allowing the colors to blend easier. I was amazed with the depth this gave and impressed with my ability to achieve it.

I wasn't sure what to do with the center of the flower, I didn't want to ruin the work I had done by attempting to draw the stamens. I decided to use the outline stamp. I masked all the flower except the center with tape and ink the center in black. One thing to remember at this point -REMOVE THE TAPE! I forgot and ruined my flower with black smudges. I had anticipated that I would need to do this technique a few times so had stamped a few flowers. Picking up the markers I repeated my coloring. I then inked up the stamens again - REMOVED MY TAPE - and stamped it onto the flower. It didn't give as darker impression as I wanted.


I used #2 from the fine liner pen set and traced over the stamped stamens to darken them.

The leaves were colored in the same way as the flower. I used Mountain Pen and Firefly inks to stamp the layers then used the same green colors in markers From set F to add more depth.

Beautiful Day also has addition stamps that you can use to 'fill' your design with. I stamped the longer of these in grey denim and colored the images with the same markers sets. I did use a light lime green Copic because I didn't have one similar color in Altenew markers.


These were all the arranged in a spray and held together with press 'n' seal.
Using the Leaf Bed stencil and Bristol Smooth cardstock I lightly inked blended firefly ink into the bottom left corner and fading it diagonally across the card. I then removed the stencil and ink blended across the whole piece of card which made the stenciled image more subdued.

I had trimmed the Bristol smooth to 4x5.5in before stenciling. This was then added to an A2 card base giving me a border on each side.

My flowers were adhered in place. I stamped a sentiment from Build a garden Magnificent Branch stamp set and added a few coordinating sequins.


My next card uses a technique erum taught in Day 2 - Playing with textures. I have used embossing paste lots of times but have never used it with glitter and watercolors - It gives an amazing finish to the stenciled image.


I had purchased some black watercolor cardstock a while back to use with metallic paints so decided to see if it would work with this technique.

I started with a 6x6in piece of cardstock and laid the  Mega Bloom Stencil over it. I smoothed embossing paste over It. I love the reveal after using paste, it always looks so pretty.  I sprinkled iridescent glitter over the paste while it was still wet. it looked so pretty!

Once this was dry I started watercoloring with the Artist Watercolor Pan Set. I sprayed the paste with water and dripped Lapis Lazuli paint  on to it. I continued with Deep Blue and shades of purple until I achieved the beautiful colored flower.


I left this to dry again and stamped my sentiment from Build a Garden Tulips and Friends with embossing ink, sprinkled it with white embossing powder and heat set it.

I also matted an A2 card base with purple cardstock. ready for my design. Once dry I trimmed my watercolor piece to 4x5.5 inches and adhered it to my card base. I did have to place something over this while the glue dried because the watercolor card had warped slightly.

I finally trimmed my sentiment and added it to my card. Using black cardstock meant that excess glitter showed up around the image so I used a small paint brush to remove this.


I loved this class and will be using the techniques learned in more of my cards in the future. Thank you Erum for making the classes engaging and comprehensive!

Thank you for taking time to read my post.

Build a Garden: Magnificent Branch
Shop at:
ALT
Jet Black Crisp Dye Ink
Shop at:
ALT
Neenah Solar White 80lb
Shop at:
AZN
Creative Coloring By Erum - Advanced Techniques
Shop at:
ALT
Beautiful Day Stamp & die bundle
Shop at:
ALT
Leaf Bed Stencil
Leaf Bed Stencil
Shop at:
ALT
Crisp Dye Ink Puffy Heart
Shop at:
ALT
Crisp Dye Ink Cosmic Berry
Shop at:
ALT
Crisp Dye Ink Mountain Pine
Shop at:
ALT
Crisp Dye Ink Firefly
Shop at:
ALT
Crisp Dye Ink Gray Denim
Shop at:
ALT
Alcohol Markers - Set D
Shop at:
ALT
Alcohol Markers - Set F
Shop at:
ALT
Mega Bloom Stencil
Mega Bloom Stencil
Shop at:
ALT
Embossing Paste
Embossing Paste
Shop at:
ALT
Artist watercolor paints 24 pan set
Shop at:
ALT
Build a Garden - Tulips and Friends
Shop at:
ALT
Pure White Embossing Powder
Shop at:
ALT
Embossing Ink
Embossing Ink
Shop at:
ALT