Good morning! It's finally cooler here, we had storms all day yesterday and has been in the 70s.
I'm back today with some inspiration using Maker Forte products. I am using the Flower Trio Die and a die inlaying technique today.
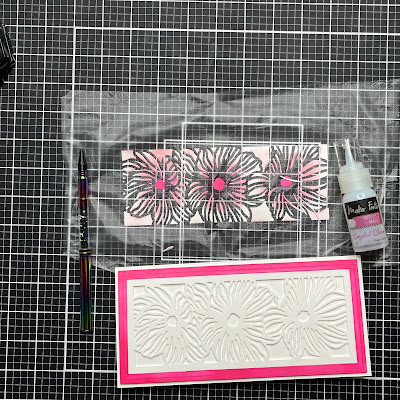
The card began life as a plain white cardstock. After running the die through my die cut machine I carefully made sure all the waste bits stayed in place in the die. Lifting off the actual image I then placed press and seal over the remaining parts. When I carefully lifted this all the white waste was attached to it.
Bubble Tea Ink and Flamingo Ink make great colors to blend together. Using brushes I started with the darker Flamingo and worked out to edges coloring all the waste pieces.
Some of the pieces lifted while doing this but as long as I didn't lose any I'm not concerned.
Moving onto the actual die cut I masked off the flowers.
Turning this over I applied foam tape to the edge and smaller pieces to the backs of the flowers. I then adhered this to a 8.5x4in card base.
The card base isn't a standard size but it gives the die cut a look of matting. Next I inlaid all the 'waste' pieces back into the die countersinking them. This works because the foam tape raises the die cut. I did use Makers Magic Crystal Clearfor this, the fine tip is great for getting into the tiny spaces.
The Rainbow Picker & Poker makes lifting the tiny pieces and placing them easier than using my fat fingers!
The inlaying took quite a while but the effect is worth it.
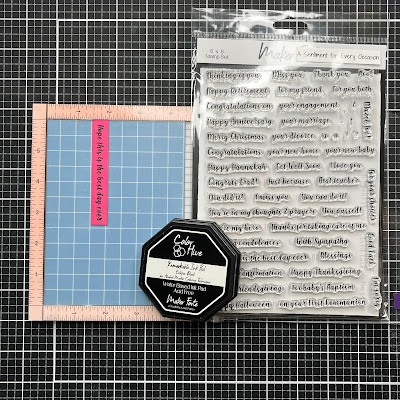
My card needs a sentiment. I love the A Sentiment For Every Occasion stamp set for cards like this. Making my sentiment coordinate with the colors on the card was easy. I swiped Flamingo Ink across a piece of 1in card strip.
Once this was dry I stamped 'Hope this is the best day ever' using Remarkable Eclipse Black Ink. I the quickly covered this with Crystal Clear Embossing Powder and melted it to give a glossy finish.
I adhered this to my card with foam tape. Subtle embellishments are a great finish to a card. Using Maker's Magic White Pearl instead of gems give a touch without taking away from the card design. These are dotted in an uneven number around my sentiment.


No comments:
Post a Comment