Hello

Welcome to my blog, a place where I can lose myself in a crafty haven. Pull up a comfy chair grab a cuppa and come and have a read. Oh and if you like what you see, stop by and leave me some love in the comments section

Followers

Showing posts with label Beautiful Day. Show all posts

Sunday, September 11, 2022

Altenew Educators Certification Program Level 3 - Creative Coloring with Erum, Advanced Techniques

Good Morning! It's a lazy Sunday for me so I thought I'd cover the next classes in my AECP course. I love Erum's coloring techniques and am an avid follower of her You Tube channel so when her Coloring with Erum - Advanced Techniques was available to me to do as part of my course I jumped at the chance.

She demo's lots of techniques that I will be trying but I chose 2 to document as part of my level 3. 

Day 1 was adding marker detail to stamped images. Previously this is not something I would of thought to do. I love the detail it has given to my images so will be using it frequently!


 Doesn't the flower look amazing!

I started the card by stamping the first 2 layers of the flower from Beautiful Day. I used Puffy Heart and Cosmic Berry Inks, this gave me a guide of where to add my shadows. Using the same colors in markers, which are from Set D, I added depth to the petals using the darker Cosmic Berry first. I then 'pulled' this color out with Puffy Heart. I also used the tip to tip technique which gives a mid color between the markers allowing the colors to blend easier. I was amazed with the depth this gave and impressed with my ability to achieve it.

I wasn't sure what to do with the center of the flower, I didn't want to ruin the work I had done by attempting to draw the stamens. I decided to use the outline stamp. I masked all the flower except the center with tape and ink the center in black. One thing to remember at this point -REMOVE THE TAPE! I forgot and ruined my flower with black smudges. I had anticipated that I would need to do this technique a few times so had stamped a few flowers. Picking up the markers I repeated my coloring. I then inked up the stamens again - REMOVED MY TAPE - and stamped it onto the flower. It didn't give as darker impression as I wanted.


I used #2 from the fine liner pen set and traced over the stamped stamens to darken them.

The leaves were colored in the same way as the flower. I used Mountain Pen and Firefly inks to stamp the layers then used the same green colors in markers From set F to add more depth.

Beautiful Day also has addition stamps that you can use to 'fill' your design with. I stamped the longer of these in grey denim and colored the images with the same markers sets. I did use a light lime green Copic because I didn't have one similar color in Altenew markers.


These were all the arranged in a spray and held together with press 'n' seal.
Using the Leaf Bed stencil and Bristol Smooth cardstock I lightly inked blended firefly ink into the bottom left corner and fading it diagonally across the card. I then removed the stencil and ink blended across the whole piece of card which made the stenciled image more subdued.

I had trimmed the Bristol smooth to 4x5.5in before stenciling. This was then added to an A2 card base giving me a border on each side.

My flowers were adhered in place. I stamped a sentiment from Build a garden Magnificent Branch stamp set and added a few coordinating sequins.


My next card uses a technique erum taught in Day 2 - Playing with textures. I have used embossing paste lots of times but have never used it with glitter and watercolors - It gives an amazing finish to the stenciled image.


I had purchased some black watercolor cardstock a while back to use with metallic paints so decided to see if it would work with this technique.

I started with a 6x6in piece of cardstock and laid the  Mega Bloom Stencil over it. I smoothed embossing paste over It. I love the reveal after using paste, it always looks so pretty.  I sprinkled iridescent glitter over the paste while it was still wet. it looked so pretty!

Once this was dry I started watercoloring with the Artist Watercolor Pan Set. I sprayed the paste with water and dripped Lapis Lazuli paint  on to it. I continued with Deep Blue and shades of purple until I achieved the beautiful colored flower.


I left this to dry again and stamped my sentiment from Build a Garden Tulips and Friends with embossing ink, sprinkled it with white embossing powder and heat set it.

I also matted an A2 card base with purple cardstock. ready for my design. Once dry I trimmed my watercolor piece to 4x5.5 inches and adhered it to my card base. I did have to place something over this while the glue dried because the watercolor card had warped slightly.

I finally trimmed my sentiment and added it to my card. Using black cardstock meant that excess glitter showed up around the image so I used a small paint brush to remove this.


I loved this class and will be using the techniques learned in more of my cards in the future. Thank you Erum for making the classes engaging and comprehensive!

Thank you for taking time to read my post.

Build a Garden: Magnificent Branch
Shop at:
ALT
Jet Black Crisp Dye Ink
Shop at:
ALT
Neenah Solar White 80lb
Shop at:
AZN
Creative Coloring By Erum - Advanced Techniques
Shop at:
ALT
Beautiful Day Stamp & die bundle
Shop at:
ALT
Leaf Bed Stencil
Leaf Bed Stencil
Shop at:
ALT
Crisp Dye Ink Puffy Heart
Shop at:
ALT
Crisp Dye Ink Cosmic Berry
Shop at:
ALT
Crisp Dye Ink Mountain Pine
Shop at:
ALT
Crisp Dye Ink Firefly
Shop at:
ALT
Crisp Dye Ink Gray Denim
Shop at:
ALT
Alcohol Markers - Set D
Shop at:
ALT
Alcohol Markers - Set F
Shop at:
ALT
Mega Bloom Stencil
Mega Bloom Stencil
Shop at:
ALT
Embossing Paste
Embossing Paste
Shop at:
ALT
Artist watercolor paints 24 pan set
Shop at:
ALT
Build a Garden - Tulips and Friends
Shop at:
ALT
Pure White Embossing Powder
Shop at:
ALT
Embossing Ink
Embossing Ink
Shop at:
ALT

Tuesday, August 17, 2021

Altenew Educators Certification - Magical Markers

 Good afternoon, after a week without power and extreme temperatures I'm ready for some cooler weather - shame the forecast doesn't agree!

My post today is my submission cards for my latest AECP class - Magical Markers by Sara Naumann - it's all about using alcohol markers but not just for coloring - there are so many techniques you can do with them.

My first card was designed using markers with a stencil:


I used the Weave builder stencil and 2 shades of grey marker. Coloring through the stencil I did the first 2 rows in a darker pen. I then flipped the stencil and used a lighter markers to color the first 2 rows on this side. I think it has given a tire track effect.

I matted a white A2 card base with black and grey cardstock, trimmed my stenciled piece down and matted this onto the same black card before adhering it to the left side of my card base.

Thanks was diecut twice once from white cardstock and once from black - I colored the white with the same lighter grey marker as the stenciled panel so it coordinated. I then attached this to the black to the back of the grey sentiment slightly off center giving me a shadow. When I adhered this to my card it stood out due to this shadow. 

To finished the card I stamped 'a million' underneath thanks. 


My next card uses techniques from lessons 3& 4


I started by stamping my feather and sentiment onto vellum. While this was drying I cut a piece of card stock slightly smaller than my A2 card base. I then scribbled a purple and bright pink directly onto my glass mat. I added isopropyl alcohol to the colors and picking them up with a splatter brush made splatters over my piece of card. I then edged this with ink by running the purple marker round the piece. I cut another piece of cardstock same length but slightly wider than my vellum and edged this in the same way.

Once dry I colored my feather using 2 alcohol markers, starting with light and adding depth with darker one. I then pounced my lighter marker over the coloring to give me texture. I adhered the vellum to the strip of card and then added this to my splattered piece. Using foam tape I attached this topper to my card base.

Finally I colored some white pearls with the darker purple marker and added these to the card.


My final card used a technique from Lesson 2 - coloring peel-offs with alcohol markers.


I cut a piece of white cardstock slightly smaller than my A2 card base. then using the wide tip of a blue marker I colored 4 strips of silver peel-offs. Once dry I laid these on the white card making a crossed border in one corner.

Beautiful Day is still my favorite stamp set. I stamped a flower and leaf outline and colored these with 3 shades of blue marker. They were then die cut with coordinating dies.

I arranged these on the bottom of my card near the crossed peel-offs. There was a lot of white space so I stamped directly onto the card with some of the included flower spray stamps and colored these with same color markers as main flower. I stamped the sentiment above these balancing my design.

The white card was added to a grey card base and the leaves were glued directly to the card and flower added with foam squares. 

Finally I colored a white pearl with a black marker and added this to the center of my diecut flower.


Thank you for taking time to read.
If you like what I have made please let me know in the comments.


Altenew products I used:

Neenah Classic Crest Solar White 110lb Coverstock
Purchase From:
SSS | AZN | ALW
Beautiful Day Stamp & Die set
Purchase From:
ALW
Crisp Dye Ink - Jet Black
Purchase From:
SSS | ALW
Envelope Liner Die Set
Purchase From:
SSS | ALW
Pure White Crisp Embossing Powder
Purchase From:
ALW
Thanks Die
Thanks Die
Purchase From:
SSS | ALW
Crisp Dye Ink - Magenta
Purchase From:
ALW
Crisp Dye Ink - Forest Glades
Purchase From:
SSS | ALW
Embossing Ink
Embossing Ink
Purchase From:
ALW
Silver Embossing Powder
Purchase From:
ALW
Build a Flower Fashion Monger Dahlia stamp and Die set
Purchase From:
ALW
Wild Fern Stamp Set
Wild Fern Stamp Set
Purchase From:
ALW
Halftone Thanks Stamps
Purchase From:
ALW
Weave Builder Stencil
Purchase From:
ALW
Mini Delights - Strength Stamp & Die
Purchase From:
ALW
Vellum Translucent Paper
Purchase From:
ALW

Saturday, May 1, 2021

Altenew Educator's Certification Program - In the Mood for Color

 Good afternoon, it's May already - how crazy is that! we only have a few more weeks and school will be out - I've survived around 18months as a home school mom!

My post today is showcasing the work I have done for my next AECP class. The lessons this time were all about "In The Mood For Color" Stephanie Klauck led the lessons which taught about how your mood can apply to the theme of your cards. I chose to showcase 2 colors Blue and Pink. 

As defined in the classes blue has a calming mood, I chose to work with the Painted Butterflies stamp set. I have always found watching butterflies calming.


I started with a 4x5.25in piece of white cardstock and using different shades of blue ink and different butterfly layering stamps created a flutter across the card. I decided to stamp the sentiment vertical for interest. I carried the blue theme onto a mat between the stamped card and my A2 card base.
Finally I added some clear blue gems.


Pink is not only one of my favorite colors but is also said to be sweet, sensitive and caring and I fulfilled these with the sentiment on my next card:
 

For this card I used Beautiful Day stamp and die set - This is one of my all time favorite Altenew sets. I stamped the outline of the flowers and leaves with black ink and then used alcohol markers and colored pencils to add color and depth. They were then all die cut and put to once side while I moved on to next step.
I carried the pink theme onto my card layers. I used a white A2 card base and matted this with pink cardstock. I then took a 4x5.5in piece of cardstock and laid Altenew's Halftone Stencil onto it. I colored some matt texture paste with pink ink and spread this over the stencil to give some delicate detail to the surface.
While this dried I heat embossed my sentiment on to a strip of vellum. This was then wrapped around the bottom of my stenciled card. 
I added the stenciled piece onto my card base with foam tape. My flowers and leaves were arranged and added both with wet glue and foam squares to give more dimension.


These were going to be the 2 cards for my post but then we were invited to join an Instagram Hop celebrating the ACEP course so I decided as I loved composing these cards I would do a 3rd card using In The Mood For Color. 

As it's a celebration I decided rainbow was the perfect color combo. 


I loved using the Painted Butterflies stamp set  for my first card so used them again. This time I used some rainbow colors and had the butterflies flittering diagonally across my card front. I die cut the word hello and the font just was perfect to follow my butterflies

My A2 card base was decorated with strips of coordinating cardstock on a diagonal, I cut my card front down so the rainbow would show underneath.
Finally I added rainbow colored enamel dots


Thank you for taking time to stop by and read my post. I am learning so much on this course and can't wait to start the next class


Items I used:

Neenah Classic Crest Solar White 110lb Coverstock
Purchase From:
SSS | AZN
Copic Markers
Copic Markers
Purchase From:
SSS | AZN
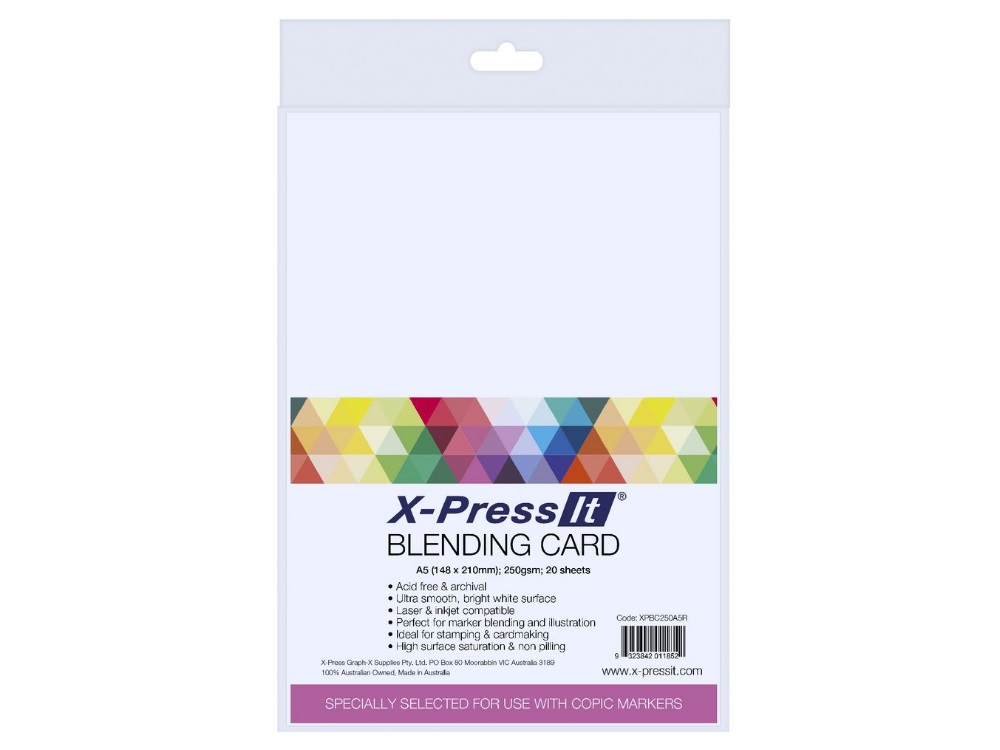
X-Press It Cardstock
Purchase From:
SSS | AZN
Altenew Beautiful Day Stamp & Die set
Purchase From:
ALW
Altenew Painted Butterflies Stamps
Purchase From:
ALW
Altenew Half tone Stencil
Purchase From:
ALW
Altenew Glacier Caves Crisp Inks
Purchase From:
ALW
Altenew Cool Summer Night Crisp Inks
Purchase From:
ALW
Altenew Blush Crisp Ink
Purchase From:
ALW
Altenew Jet Black Ink
Purchase From:
ALW
Versafine Ink
Versafine Ink
Purchase From:
SSS
Altenew Crystal Clear Embossing Powder
Purchase From:
ALW
Ranger Matt Texture Paste
Purchase From:
SSS
Altenew Envelope Liner Die Set
Purchase From:
ALW
Altenew Red Sunset Crisp Inks
Purchase From:
ALW
Altenew Summer Afternoon Crisp Inks
Purchase From:
ALW
Altenew Green Meadows Crisp Inks
Purchase From:
ALW
Shades of Purple Crsip Inks
Purchase From:
ALW
colored cardstock
colored cardstock
Purchase From:
SSS