Hello

Welcome to my blog, a place where I can lose myself in a crafty haven. Pull up a comfy chair grab a cuppa and come and have a read. Oh and if you like what you see, stop by and leave me some love in the comments section

Followers

Showing posts with label Copic. Show all posts

Saturday, August 21, 2021

Sweet Sentiment - I love you 2

 Good morning! The weekend is upon us! Nothing planned but kicking back and chilling.

I'm back with the second card I made for Sweet Sentiment's sponsor event at Passionate Paper Creations. Using the same sentiment I have designed a male themed card:


I stamped the boy, sentiment and ASL 'I Love You' onto stamping card and colored with Copic Markers.
I then repeated the ASL sign onto blue cardstock. I chose some cardstock that coordinated my image to cut an oval aperture from and adhered this over my ASL stamped cardstock.
My A7 card base was matted with black card and my aperture card. My sentiments were matted with the same black card and added to my design. Finally using glue gel for dimension I added my signing boy.

I will be back tomorrow with her male counterpart but in the meantime please head on over to the PPC Facebook group and check out my teamies posts as well as all the other amazing work that the coloring community is sharing there.
Also go checkout Sweet Sentiment's website and other fab products!

If you love what you see please let me know in the comments!


Thursday, August 19, 2021

Sweet Sentiment - I love you!

 Good morning! It's almost school time - we are counting down the days!

Today I am blogging about both a new Facebook Group and a new release from Sweet Sentiment.

If you know Rhea Weigan she is an amazing colorist and used to run a successful FB group well started up Passionate Paper Creations & Friends again and is promoting sponsors. 

For the next 4 Days Sweet Sentiment is the sponsor. This is a company run by Jammie Clark who teaches coloring classes but also has their own range of stamps. My card today is using one for her new releases - I love You, Friend


There is both a male and female character included in the set as well as I LOVE YOU spelt out in ASL 
I colored the image with copic markers along with the signed phrase which was stamped multiple times.
My A7 card base was matted with black and red card stock. Black card was used to mat my sign language panel and the included sentiments.
Finally I added my girl with glue gel to give her dimension.

I will be back tomorrow with her male counterpart but in the meantime please head on over to the PPC Facebook group and check out my teamies posts as well as all the other amazing work that the coloring community is sharing there.
Also go checkout Sweet Sentiment's website and other fab products!
 
Thanks for stopping by and if you love what you see please let me know in the comments!


Sunday, July 4, 2021

Altenew Educator's certification Program - Beautiful Detail

 Good afternoon and happy 4th July!!!! We are having a quiet weekend at home - well not so quiet if the neighbors fireworks count!

I'm spending my time working on my AECP. The class this time was Beautiful Details by Marika Rahtu. Using different coloring mediums to add detail to your cards. Marika is a fantastic artist I could watch her color all day!

My first card is using techniques from lesson 3 using pencil to add detail:


 I used Crown Bloom Stamps and stamped the first layers with ink before using pencils to add the striations and addition shading to the flower and leaves. This does take time to do as you have to blend the layers of pencils but it gives for depth to the stamped images.
Once I was happy with my work I die cut the leaves and flower before moving on to the next stage of my design. I wanted to add further detail to my card but didn't want to distract too my from the flowers. I added pink washi tape to the side of an A2 white card base. Then using the beach towel stripes stencil I added very light ink blending to a card panel. I cut this doe to 4x5.5inches and adhered it to my card base. I worked out where I wanted my colored images leaving enough room for my sentiment which was stamped directly onto the card using a darker ink than the flower. Finally I added my leaves with wet glue and my flower with foam squares to give dimension.


My next card using a technique from Lesson 5 monochromatic:


The image is almost an 'extra' flower from the Peony Bouquet stamp set I think it is a peony bud but also looks like a sweet pea flower.
Using a pale blue ink I stamped the image multiple times on a piece of watercolor card. I then colored these with one watercolor pencil, I didn't apply the pencil directly to the card but used my paint brush to pick up color. Layering the color by using more or less water gave me the look of shading and detail. you do have to let the the card dry in between layers to stop the color blending out too much. while my images were drying I cut a strip of pearl vellum and stamped my sentiment with embossing ink and heat embossed in silver powder on to this.
Not wanting to distract from the painted flowers I wrapped the vellum around the case of the card and added this to my A2 card base. A few iridescent sequins were adhered to draw the eye in to the card.


I wasn't going to add my last card as I cased Marika's she designed in lesson 4 but I thought it was too pretty not to blog about.


This card uses vellum instead of stamping card for the flower and leaves.
I stamped on the vellum with embossing ink and then used clear embossing powder to heat emboss the image.
Turning the vellum over and placing on a piece of black cardstock I was able to color the images using Copic markers without damaging the nibs of my markers. I also used pencil to add detail to the images. The flower center was stamped in brown ink on the side I had colored and I used pencils to give it more dimension.
These were fussy cut as I don't have the dies for this stamp set.
I used grey cardstock for my base and a piece of cream cardstock for my mat. I die cut a fancy square from this before adhering it to my base. Using foam tape I then added the fancy square turning it 90 degrees do the grey showed through.
I added my leaves and flower to this using a tape runner so the glue didn't show through.
My sentiment was added directly to the bottom of the card using the same ink I had used to stamp my flower center. Finally I added a few gold sequins.


I love this class, coloring is my favorite crafting technique and I have loved watching and learning new ways to use my coloring mediums. Marika is mesmerizing to watch!

Thank you for stopping by!

Altenew products I used:

Crown Bloom Stamp and Die Bundle
Purchase From:
ALW
Just for You Stamp set
Purchase From:
ALW
Beach Towel Stripes Stencil
Purchase From:
ALW
Crisp Dye Ink - Dark Chocolate
Purchase From:
ALW
Spring Daisy Stamp Set
Purchase From:
ALW
Peony Bouquet Stamp Set
Purchase From:
ALW
Faithful Feather Stamp Set
Purchase From:
ALW
Crisp Dye Ink - Sea Glass
Purchase From:
ALW
Crystal Clear Embossing Powder
Purchase From:
ALW
Crisp Dye Inks - Red Sunset
Purchase From:
SSS | ALW
Heartfelt Sentiments
Purchase From:
SSS | ALW
Crisp Dye Ink - Forest Glades
Purchase From:
SSS | ALW
Crisp Dye Ink - Frayed Leaf
Purchase From:
ALW
Embossing Ink
Embossing Ink
Purchase From:
ALW
Silver Embossing Powder
Purchase From:
ALW

Sunday, November 29, 2020

Making Holiday Memories

 Good morning, I hope everyone had a great Thanksgiving and didn't over eat!

My post today is sharing one of the adorable bears from the Making Memories Digital collection. There are 3 sweet bears and some great sentiments:


Rather than add him onto a card I made him into a card. I resized him and printed him onto stamping card. He was colored with alcohol markers and glaze pen added to his eyes and nose. I then used my scan n cut to cut him out, I kept the cutting lines on my machine, added an offset and cut 2 more images in grey card. One of these was scored at the base of his antler headband and both grey sections were glued together by the antlers making a card base. I then added my bear - he can now stand up!


Here's a view of the card back so you can see how it works!

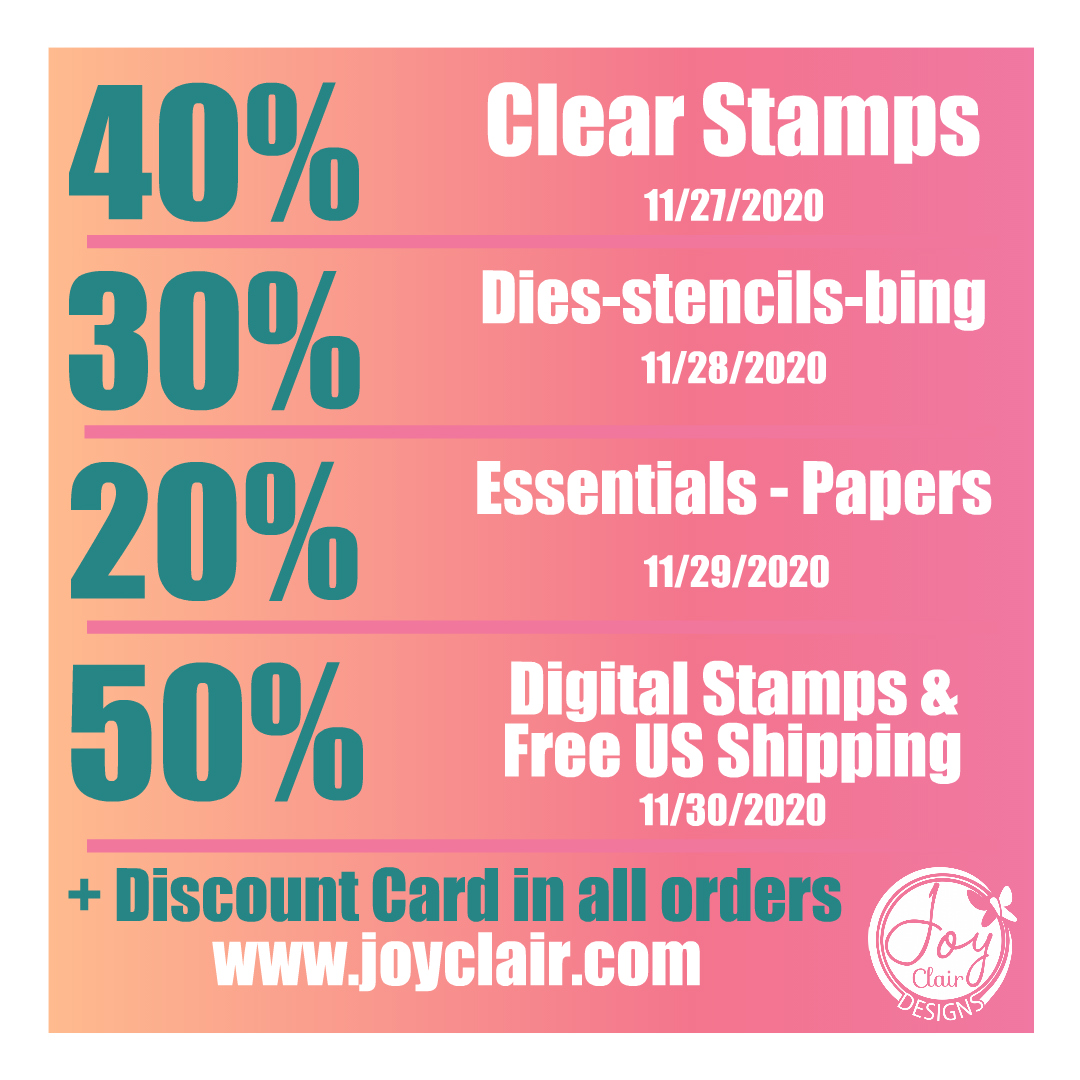
If you are shopping for crafting supplies during black Friday / Cyber Monday check out the sales in the Joy Clair store:


Thank you for stopping by. I will be back during the month with more inspiration from Joy Clair. Also my teamies will be sharing with you over on the Joy Clair Facebook Group.

FOLLOW US!

Be sure to sign up for Joy Clair Designs newsletters. You will receive notifications of new releases, sales and exclusive offers to subscribers. Also, you can follow Joy Clair Designs on Facebook PageJoy Clair Stamp Projects Facebook GroupInstagram , Twitter, Pinterest and  YouTube!


Friday, November 27, 2020

Santa's Little Helper

 Good Afternoon! We had a fab Thanksgiving day yesterday, a lot quieter than normal but I'm good with that!

It's the Kawaii new release day over at Stamper's Delights and I say this every time but the images are sooo cute! Meet Xmas Elf Gift:

What I Did:

I resized him and printed onto stamping card. In my graphics program I cropped the image so I only had the gift, I resized this 3 times and printed onto stamping card. my little guy was then cut out using my scan N Cut and I cut the extra gifts out by hand. All were colored with alcohol markers and I added glaze to the pompoms on his collar and the scissors.
There is a sentiment included with the elf, I added this multiple times to my graphics program, recolored them and printed onto white cardstock.
A white A7 card base was matted with red card and my sentiment layer was added. Finally I added the little elf with foam squares. The gifts were stacked at the side of him again using foam squares.

What I Used:

Stamping Card: X-Press It
Alcohol Markers: Copic
Glaze: Gelly Roll Glaze Pens
White Cardstock: Neenah Solar White Cover 110lb
Red Card: Tonic Studios

Head on over to the Stamper's Delights Store to see all of this week’s New Releases.

Why not stop by the Stamper's Delight Facebook page for regular news and inspiration from my Teamies you can also enter the progressive challenge there, no blog needed and receive freebies! 

 All the design team projects are available on the Inspiration blog - hop on over there for more inspiration.

Thanks for stopping by and if you like what you see please leave a comment to let me know! 


Saturday, November 21, 2020

Merry and Bright

 Good evening, a quick post from me tonight.

I've been playing with the cheeky little house mice again today. I pulled out one of my Joanna Sheen CDS that has these delightful creatures as digital images so I printed a sheet off and colored them:

Just look how cute they are all curled up among the fairy lights!
I colored them with Copic markers, matted them onto green cardstock and put to one side while I did my card base. For this I used a Tonic Merry & Bright die to cut the sentiment into one of my mats. I then cut the bottom part of the die 4 more times with green, yellow, blue and silver cardstock so I could fill in the lights and ornaments.
I then added a second mat of digital design paper covered in ornaments. Finally I added my little mice!

Thanks for stopping by, I ma entering this card into the House Mouse & Friends Monday Challenge which this time is anything goes with using a die or punch as an optional theme


Friday, October 23, 2020

Fall treats

 Good afternoon! hope everyone is enjoying fall, I have had time to get out and do some walking amongst the fall colors, Michigan is beautiful this time of year.

Talking of Fall, It's new release day at Stamper's Delights for the super cute Kawaii images and the fall images are adorable:


What I Did: 

This is actually 2 images that I have, resized,  grouped together and shuffled some leaves around which demonstrates how versatile digital stamps are.

Once I had them where I wanted them I colored with alcohol markers - I had to add lots of freckles to my little redhead. The image was fussy cut ready for my card.
I matted an A7 card base with green cardstock. I made my own digital design paper, I took an orange striped paper, reduced the opacity and added all the script fall words. I then printed and cut down to fit on my base.
I added my image and die cut leaves from foil paper. These where scattered to make it look like they were being blown around.

I couldn't resist using one of the other Kawaii new releases to make a little note card:


This little guy is Just a note, I resized him and one of sentiments printed and colored with alcohol markers. I joined the pen to the sentiment then off the page to.......


The second sentiment inside! Both were matted with blue cardstock and added to an A7 card base.


What I Used: 

                          Stamper's Delights - Just a Note 2
Digital Paper: Sherry K Designs plus computer edits
Stamping Card: X-Press It
Alcohol Markers: Copic
White Card For Bases: Neenah Solar White Coverstock
Green and Blue Cardstock for mats: Core'Dinations Premium
Leaf Die: Lawn Fawn
Foil Paper: Rinea

Head on over to the Stamper's Delights Store to see all of this week’s New Releases.

Why not stop by the Stamper's Delight Facebook page for regular news and inspiration from my Teamies you can also enter the progressive challenge there, no blog needed and receive freebies! 


All the design team projects are available on the Inspiration blog - hop on over there for more inspiration.


Thanks for stopping by and if you like what you see please leave a comment to let me know!


Friday, September 25, 2020

Frankie Stein is Trick or Treating

 Good afternoon, we have had a rough week this week, 2 of our very dear neighbors have moved homes, one to a completely new state. Then Mollie's well loved bunny Snowball died. We've worked through it all and I am so proud of Mollie, even though she has been devastated at losing Snowball she never let her school work slip!


On to better news - It's Kawaii new release over at Stamper's Delights and if you love Halloween you need to check it out. We have some adorable Trick or Treaters for you. I got to play with the super cute Frankie Stein:

What I Did:
I resized the image and the star, I added the sentiment to the star and printed everything. I then used my Scan N Cut to fussy cut them. They were then colored with alcohol markers.
My A7 card base was matted with orange cardstock and a piece of Halloween themed digital design paper. I added my star so it went off the edge of card and used foam to to raise Frankie off the card giving him some dimension.

What I Used:
Digital Stamps: Stamper's Delights Frankie Stein
Stamping Card: X-Press It
Alcohol Markers: Copic
Black card for base: Linda Chapman
Orange cardstock: Core'Dinations Premium
Digital Design Paper: Polkadoodles
Glue: ZipDry
Foam Pads: Dollar Store

Head on over to the Stamper's Delights Store to see all of this week’s New Releases.

Why not stop by the Stamper's Delight Facebook page for regular news and inspiration from my Teamies you can also enter the progressive challenge there, no blog needed and receive freebies! 


All the design team projects are available on the Inspiration blog - hop on over there for more inspiration.

I am entering this card into the following challenges

Colour Crazy Craft Challenge - Anything Goes with colouring

Creative Knockouts - Anything Goes 

Krafty Chicks Challenge - All Occasions


Thanks for stopping by and if you like what you see please leave a comment to let me know! 


Tuesday, September 22, 2020

Best Witches!

 Good afternoon, welcome to my final post showcasing Polkadoodles Winnie Wednesday release

Today's cards are made using the Stamp sets Best Witches Winnie Wednesday and Spooky Time

In my first card Winnie has dressed but her pet:

What I Did:
I stamped the image and colored her with alcohol markers. I then used a frame die to cut my image out,  I cut a second frame in black cardstock.
I matted an A2 card base with orange cardstock and paper from the new Boneshakin Paper pack.
I stamped my sentiment and matted this with black cardstock. Finally I added my image and adhered the black frame around her.

What I Used: 
Stamping Card; X-Press It
Alcohol Markers: Copic
Frame Die: Gina Marie
Black and Orange Cardstock: Core'Dinations Premium Heavyweight
Glue: ZipDry

My next card I used Winnie dressed as a witch and did a background for her using Spooky Time:


What I Did:
I stamped Winnie and the sentiment onto stamping card, I colored her then used my Scan N Cut to fussy cut her. For my background I used Distress Oxide inks and blended them together. I then stamped the web and spider along with some cute bats. Their eyes were lost in the background so I added these with a white gel pen. I added this to an A2 card base. I added Winnie to my card, the sentiment looks too white so I colored over this with an alcohol marker, edged it in black and adhered it in place.    

What I Used: 
              Polkadoodles - Spooky Time Clear Stamps
Stamping Card: X-Press It
Alcohol Markers: Copic
Blending card: Bristol Smooth
Inks: Tim Holtz Distress Oxide
Gel Pen: Gelly Roll
Black card: Core'Dinations Premium Heavy Weight
Glue: ZipDry


Looking for more inspiration? Then check out my teamies designs over on the Facebook page, you can also post your own Polkadoodles' designs on the Craft Stamp and Colour with Polkadoodles Facebook group


Thanks for stopping by.


Wednesday, September 9, 2020

Sunflower Fall Release and Blog Hop

 Good morning! We say goodbye to our house guests today, 8 dogs has been fun but I'm ready for a rest!

Joy Clair have an amazing September release starting today with a blog hop.

My inspiration card is using Thankful For You stamp collection I love sunflowers! Because of my style of card I have made 2 designs for this release my first uses the sentiment Hello Friend:


The second uses Thankful For You:


Both sentiments are part of the Thankful For You stamp collection. I started by printing 3 sunflower images. One of then I placed the Hello Friend sentiment. I also printed the Thankful For You sentiment. I then colored only one of the images. I die cut a circle from my colored image and put to one side keeping both the circle and the outer part of the sunflower. I matted a black card base with brown and yellow cardstock and then added my uncolored Hello Friend image. I then added wet glue to the back of the colored circle and lined it up on the uncolored image making a spotlight effect. I then added a few clear enamel dots to the card to finish my design.
My second card was made in the same way except I lined up the outer part of my colored sunflower and glued it in place. These were then trimmed and matted on yellow card. I wrapped a length of ribbon around a piece of yellow card and patterned paper and added this to a top folding card base. My Sunflower was adhered in place with foam tape. Thankful For You was matted with yellow card and foam tape glued this in place. A few yellow dots scattered on the uncolored portion of the card finished the design.

To enter the blog hop please leave a comment and answer the following question:


The line up for the blog hop is as follows you should have arrived here from Carol's Blog and will go next to visit Joy.

You are invited to the Inlinkz link party!

Click here to enter
You have until September 13th at 11:59 pm EST to post a comment and be to eligible to win one of the two $15.00 gift cards from Joy Clair Designs, valid for stamps and Digital Sets. Only one comment per person please.  Two randomly selected winners will be announced on Joy Clair Designs Blog on September 16th.  

Thank you for stopping by, head on over to the comments page to leave your comment and good luck with the blog hop 


Friday, September 4, 2020

Waddy picking out his Christmas Tree

 Good Morning! The sun is still shining here and temps are still up so who knows when fall will start!

I'm back today with another inspirations design for the Polkadoodles Too Cute Release. Waddy has been to pick his Christmas tree:


What I Did:
I started by resizing my image and sentiment and then printing them on stamping card. I colored the image with Copic markers and added glitter to Waddy's hat 
I then die cut him using an oval nesting die. I also cut the frame and the one next size up from green cardstock.
To make my design paper I opened a design paper from Pretty Sweet  in my graphics program, I then layered images from Baked With Love Foliage in a random design. This was printed and matted along with green card stock onto a 5x7 in card base.
I then added my image to the center of my card and layered the green frames around it. 
My sentiment was matted with green cardstock and adhered to my card with foam tape. Finally I added some glitter enamel dots to balance the design.

What I Used:
Digital Paper: Polkadoodles - Pretty Sweet Mini CD
Sentiment: Polkadoodles - Winnie White Christmas Sentiments
Stamping Card: X-Press It
Alcohol Markers: Copic
White cardstock for Base: Neenah Solar White 110lb
Green Card Stock: Core'Dinations Premium
Oval Dies: Gina Marie - Geometric Oval Frame 
Glitter Enamel Dots - Gina Marie - Irish Sparkle
Glitter: Chloe's Creative Cards - Twinkle Sparkelicious
Glue: ZipDry
Foam Tape: Dollar Store

All the new releases can be found in the Polkadoodles Store I will have another Waddy inspiration post later this week.

Looking for more inspiration? Then check out my teamies designs over on the Facebook page, you can also post your own Polkadoodles' designs on the Craft Stamp and Colour with Polkadoodles Facebook group


Thursday, September 3, 2020

Too Cute - Yep that's Waddy!

 Good afternoon! it's already been a crazy week but that's life now!

I'm here today to share the first of my Polkadoodles Too Cute new releases with you. Christmas is only 3 and a half months away and we have some adorable things to share with you over the coming weeks.

Meet Waddy Snow Kite:


What I Did:
I resized the image and printed him onto stamping card. I then colored him with alcohol markers.
My white 7 x 5 in card base was matted with deep red cardstock. I matted digital design paper onto this.
I then rounded opposite corners of my image with a corner rounder along with a mat for this. and adhered it to my card.
My sentiment was resized and printed onto stamping card, matted and added to my card with foam tape.
To give dimension to my image I added crystal glaze to Waddy's googles and covered the bottom of his sled with snow writer. I then cute a length of twine and covered the kite string with it.
Finally I added some graduated pearls to the lower left corner.

What I Used:
Alcohol Markers: Copic
Stamping Card: X-Press It
White Cardstock for Base: Neenah Solar White 110lb 
Red Cardstock: Core'Dinations Premium
Crystal Glaze: Tonic Studio Nuvo
Snow Writer: DecoArt
Twine and Pearls: From my Stash
Glue: ZipDry
Foam Tape: Dollar Store

All the new releases can be found in the Polkadoodles Store I will have another Waddy inspiration post later this week.

Looking for more inspiration? Then check out my teamies designs over on the Facebook page, you can also post your own Polkadoodles' designs on the Craft Stamp and Colour with Polkadoodles Facebook group


Friday, August 28, 2020

Markers Everywhere!

Good afternoon! We are still in the height of summer, heat index is really high so I've been staying in and doing lots of crafting.

Today is Kawaii new release over at Stamper's Delights and like always the images are really cute! Meet the Marker Pals:


They are super sweet and fit well with the art packs that were released a few weeks ago.

I decided to use the little boy, and he's in a bit of a mess with markers everywhere:


What I Did:
I started by resizing and printing the little guy, markers and sentiment. I used my Scan n Cut to fussy cut him and colored him and his pile of markers. I then fussy cut all the markers.
For my background I matted a grey card base with blue card. Then using watercolor paper I sprinkled different colored pigment powders over it. This was then misted with water to give the brightly colored speckled background. 
While this dried I added foam tape to the back of my little pal and the markers. I matted my sentiment with the blue cardstock and again applied foam tape to this.
Once dried I glued my background to my base. I image was added to the left of my card and the markers scattered around him. Finally I added my sentiment.

What I Used: 
Digital Images: Stamper's Delights - Marker Pals
Stamping card: X-Press It
Alcohol markers: Copic
Grey card for base: Simon Says Stamp - Fog Grey
Blue cardstock: Core'Dinations Premium
Water color paper: Canson XL
Pigment powders: Brusho
Foam Tape: Dollar Store

Head on over to the Stamper's Delights Store to see all of this week’s New Releases.

Why not stop by the Stamper's Delight Facebook page for regular news and inspiration from my Teamies you can also enter the progressive challenge there, no blog needed and receive freebies! 


All the design team projects are available on the Inspiration blog - hop on over there for more inspiration.

I am entering this card into the following challenges:

Colour Crazy Challenge - Anything Goes Coloring

Creative Knockouts - Anything Goes 

Krafty Chicks Challenge - All Occasion


Thanks for stopping by and if you like what you see please leave a comment to let me know!