Hello

Welcome to my blog, a place where I can lose myself in a crafty haven. Pull up a comfy chair grab a cuppa and come and have a read. Oh and if you like what you see, stop by and leave me some love in the comments section

Followers

Showing posts with label Die cut. Show all posts

Saturday, January 8, 2022

It's cold outside

Good afternoon! the first week of the year has passed - how did it go for you?

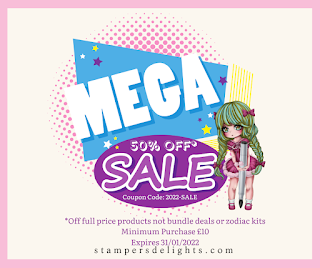
the sale at Stamper's Delights continues all images (excluding bundles or zodiac kits) are 50% off so go shop until you drop!

My inspiration today is using a chibi image It's Get-Well-Girl however I have used her for a winter card:


I printed her onto stamping card and colored her with Copic markers - I did make a bit of a boo boo i colored the left part of her pillow same as the blanket - but hey it looked like the folds of her blanket so I left it.
I worked out where my image was going to sit and die cut a window from teal colored cardstock sized to mat onto an A7 card base. I  worked out where I wanted my image to sit and die cut the window. This was also from Kraft card, then both windows were glued together.
I sent the teal card through my printer adding my typed sentiment to it.
The back of the window 'hole' was covered with snowflake patterned paper, turned over and matted on to my base. The windows were adhered into the hole giving me a window frame.
Finally I added my image with foam tape. I decorated her mug with snowflakes - I often look like this when we have been out with the fur babies - huddled in a blanket with a hot cup of cocoa.

Stamper's Delights sale is live until the 31st January so go check their website out!

https://stampersdelights.com/digital-store/

Why not stop by the Stamper's Delight Facebook page for regular news and inspiration from my Teamies you can also enter the progressive challenge there, no blog needed and if you sign up for the Stamper's Delight Membership you will get free images to enter the challenge with!

All the design team projects are available on the Inspiration blog - hop on over there for more inspiration.

Thanks for stopping by and if you like what you see please leave a comment to let me know!


Saturday, September 4, 2021

Sparkly Snow

 Good afternoon! It's a holiday weekend here so chilling at home with maybe a hint of crafting!

It's Chibi new release day over at Stamper's Delights and I have an adorable image to share with you today, meet Chibi Angel Snowglobe:


I love this image and you may see my use her again - she is perfect for new baby girl cards!
I added the included Sparkle word to the image and printed her on stamping card. She was colored with Copic markers and fussy cut.
I matted an A2 card base with pink cardstock and an iridescent paper that shines so much! My globe was added to this and I die cut a banner from the pink card stock and added this with foam squares for dimension. Finally I added silver glitter to all the stars around her to make her shine even more!

Head on over to the Stamper's Delights Store to see all of this week’s New Releases.

Why not stop by the Stamper's Delight Facebook page for regular news and inspiration from my Teamies you can also enter the progressive challenge there, no blog needed and if you sign up for the Stamper's Delight Membership you will get free images to enter the challenge with!

All the design team projects are available on the Inspiration blog - hop on over there for more inspiration.

Thanks for stopping by and if you like what you see please leave a comment to let me know!


Thursday, September 2, 2021

Feather's and Angels

 Good afternoon! it's finally starting to cool down a bit here, the humidity has dropped too which makes things more bearable.

There's a new release over at Stamper's Delights and the images are so gorgeous this time, meet Sweet Angel:


she is the first of 2 adorable angels being released this weekend. I started my design by printing her and the sentiment onto stamping and colored her with Copic markers. I then did a repeat pattern of the included feathers, colored these and cut to size for my design paper.

An A7 card base, my image and sentiment were all matted with pink card. I added my feather paper to the card before centering my image and adhering her. My sentiment was added at an angle above the image and I added a die cut feather to the opposing corner.

Head on over to the Stamper's Delights Store to see all of this week’s New Releases.

Why not stop by the Stamper's Delight Facebook page for regular news and inspiration from my Teamies you can also enter the progressive challenge there, no blog needed and if you sign up for the Stamper's Delight Membership you will get free images to enter the challenge with!

All the design team projects are available on the Inspiration blog - hop on over there for more inspiration.

Thanks for stopping by and if you like what you see please leave a comment to let me know!


Friday, December 18, 2020

Santa's Favorite Gift Tags

Good Morning! It is white over here, it snowed at the weekend and because it's so cold it's hanging around.

I'm here today with inspiration for the gifts you are going to be giving during the holidays. Each gift needs a cute tag to go with it and I am going to share 4 with you using Santa's Favorite Digital Stamp Set:


The first 2 have the adorable Santa's Favorite penguins - the little guy fishing and my favorite the penguin in eye glasses:


I die cut some tags and mats for my little guys. The penguins were fussy cut with my scan n cut and colored with alcohol markers. I couldn't resist giving one little guy candy cane glasses. I used crystal glaze on the glasses and the other little guy's proud catch! Foam tape was used to adhere them to the tags and some bows and ribbons completed the design.

My second set of tags used the same Santa's Favorite digital set, the remaining penguin is skiing and I decorated a tree for him.


Both images were colored with alcohol markers and added to the tags with foam tape. I then added snow writer to the edge of the tree layers and decorated it with red ornaments and of course a star at the top! My little skier had glitter added to his hat pompom and glaze to make his eyes shine. again ribbon and bows completed the tags.

Thank you for stopping by. I will be back during the month with more inspiration from Joy Clair. Also my teamies will be sharing with you over on the Joy Clair Facebook Group.


Sunday, November 22, 2020

Altenew Educators Certification Program - Celebration Stencil Techniques

 Good afternoon, It's chilly but fair here today, since the virus struck weekends have mainly been family time at home and today is no different. 

I have completed another class on my AECP and today I'm sharing some of the work I have done for it. The class this time was about stenciling with Laurel Beard - if you have watched any of Laurel's you tube videos you will know she does amazing work with stencils.

My first card used a die as a stencil. I used pail colors to I could keep with the CAS looking cards I love to make:


I die cut the Shutter Cover Die with cover weight cardstock, I taped this in place over my white cardstock and stenciled through it with Soft Lilac Dye ink. I matted an A2 card base
 with black card and added my stenciled panel. I then stamped 2 lavender buds with Lavender Fields and Forest Glade ink. I die cut these with the coordinating die placed them on my card leaving room to add the sentiment with accompanies the flower which was stamped in Jet Black Ink.

My second card was a new technique for me using texture paste. This is a medium that I hadn't used before. I bought the mat opaque white kind so I can color it to coordinated with my needs!


I started by smooshing some Ocean Wave ink onto my glass mat, I then added a small amount of the paste and mixed them together which gave me a gorgeous muted turquoise color.
I fixed the Halftone Stencil to my white cardstock. Using a pallet knife I spread the paste across the stencil in a thin layer - I was just like icing a cake! I carefully removed the stencil and left to dry.
Meanwhile I stamped the Faithful Feather stamp using Jet Black, Misty Morning, cloudy sky and Nimbus inks (which are available as the Tranquility Ink set) for all the feather layers. I die cut this with the coordinating die. 
I then chose a sentiment from Label Love stamp set and stamped this with jet black ink onto white card then cut around the edges.
Once dry I trimmed my stenciled cardstock down and added it to a grey A2 card base. I arranged my image and sentiment and adhered these with foam dots.

I am really enjoying the techniques I am learning doing this course and also loving sharing them wth others!


Saturday, January 11, 2020

Kuddly Koala

Good afternoon, We are supposed to be under a winter storm warning with up to a foot of snow but so far it's only raining. It's so cold that it's freezing rain so if the snow does come it will likely settle.

I'm sure you have all seen the devastation that is hitting Australia with all the fires. Being a huge animal lover it is so sad seeing all the pictures of the native animals suffering and dying. So today's card is in honor of them. I love koala bears and couldn't imagine a world without them. I still have my childhood bear bought for me by my Nanna and he is a koala bear.


The image on my card is one of Lili Of The Valley's digital stamps, I have colored him with Copic markers. I used card scraps from my stash to decorate the card which led to me doing a purge of scraps - who else collects bits of card and design papers just in case?

Supply List:
X-press It card stock
Koala digital stamp - Lili of The Valley
Copic Markers
White Card Stock for base card - The Paper Studio
Blue cardstock - Core'dinations
Leaves - Sylvan Frame: Poppy Stamp
Design paper - from stash

Thank you for stopping by and if you like what you see please let me know in the comments.


Monday, December 30, 2019

Shaking In The Snow

Good afternoon! I hope everyone had a great Christmas I know we did! Santa was definitely kind to use all.

Today's post is a card using a super cute image from Scrapper's Delights which was a gift for the design team members:


Isn't this a gorgeous Image! I colored it with my Copic markers, after it was colored Mollie said the girl reminded her of Anna from Frozen - I had unintentionally colored her is a similar color scheme!

I haven't made shaker cards for so long that I thought this was the ideal image to do so.
I had some acetate with snow already on it so I used This for my window. I cut an oval aperture from some patterned and foiled cardstock and added the acetate over this. 
I then matted my 7x5 inch card blank with a coordinating aqua colored card. I then lined up my image so she would show through the aperture and adhered it to my card base. Using foam tape I covered the back of the aperture card ensuring that there was a seal around the acetate window so the glitter wouldn't fall through.
I added a pile of glitter over the image and placed the aperture cardstock over the base, sealing in the glitter so it would shake loosely.


As the cardstock has snowflakes foiled on to it I didn't feel I needed to add anything else to the card.


I am trying to incorporate more videos in to my crafting so here's a little one showing the shaker!

Thanks for stopping by and if you love what you see please let me know in the comments


Thursday, November 21, 2019

Basket of Thanks

Good afternoon from a very wet Michigan. The weather is all over the place, over the past 2 weeks we have had freezing temps down at 14f, snow, rain, wind and sunshine. No one knows how to dress!

A couple of weeks ago Kev and I watched Susan Tierney Cockburn make some stunning dies with her new release and I was hooked. I bought the collection and couldn't wait to play.

The dies are being marketed by Tonic Studios they have arrived and are so easy to use. The card I am showing today is using the gathering basket and lacecap hydrangea dies:


The flowers are all on plates and you cut a bunch of them together thank goodness! I started with a lilac piece of card stock. I die cut the basket from Kraft card then embossed it to get the detail. I used a copper gilding wax to highlight the detail and give it some dimension. I then shaped this by curling it slightly, applied glue just to the edges and held in place on my card until it held.

The flowers have a base, I shaped this using a ball tool and adhered 2 of them on top of each other on my card to give strength for my flowers. As I die cut the flowers I colored them through the dies before releasing them. I then shaped them with a ball tool and starting with the tiny ones glued each individual flower in place. Yes it takes patience but is kind of peaceful and cathartic. Once I'd built the flowers I moved on to the leaves. These were cut from white card and colored using copic markers. I then added veins to the leaves using a small stylus and oil pastels. I glued these under the flowers. I added tiny drops of  nuvo drops into the middle of each flower. I did have a few extra flowers so these were just scattered on the card. 

I matted my 5x7 in  card base with a dark purple and cut a thank you sentiment from the same card. I adhered my topper to the base and the sentiment on to the finished design. 

These dies sold out extremely quickly but I believe they will be back in stock tomorrow. Also If you want inspiration Susan has a Facebook group that you can join Susan's Garden Club.

Thank you for stopping by and as always if you like what you see please leave a comment