Hello

Welcome to my blog, a place where I can lose myself in a crafty haven. Pull up a comfy chair grab a cuppa and come and have a read. Oh and if you like what you see, stop by and leave me some love in the comments section

Followers

Saturday, July 4, 2020

Happy Birthday America!!!!

Good afternoon - Hope everyone is celebrating safely today, we should all still be social distancing where we can and wear your mask!

My post today is to share a cutie from Sherry West Art - meet Fireworks Girl:


What I Did:
I started by resizing the image and printing her onto stamping card. She was colored with alcohol markers and I foiled her firework - this was a trial and error process. I 'colored' over part of the firework with an embossing ink pen then heat embossed with clear embossing powder. This process was repeated 3 times so a thick layer of embossing. I then covered the area with blue foil and ran through my laminator 3 times. I left this to cool then repeated the process over different parts of the firework with red foil. The result was a bit thicker than I wanted but it worked! The laminator melts the embossing powder making the foil stick.
You can just see the shine this achieves here:


 For the rest of my card I matted a 5x7in card base with with red cardstock and then added a digital design paper. I used paper from same collection under my image and then matted my image and added with foam tape.

What I Used:
Alcohol Markers: Copic
Embossing Ink Pen: Versamarker
Embossing Powder: Wow Clear Gloss Powder
Foil: Minc Heidi Swapp Red and Blue 
White Card Base: Neenah Solar White 110lb
Red Cardstock: Core'Dinations Premium
Digital Design Papers: Polkadoodles - 4th July Celebrations
Glue: ZipDry
Foam Tape: Dollar Store

Friday, July 3, 2020

Growing Friendship

Good afternoon! It's hot hot hot here, Holiday weekend and its going to be in mid 90s. I struggle in the heat so staying tucked up inside with cool air on suits me well.

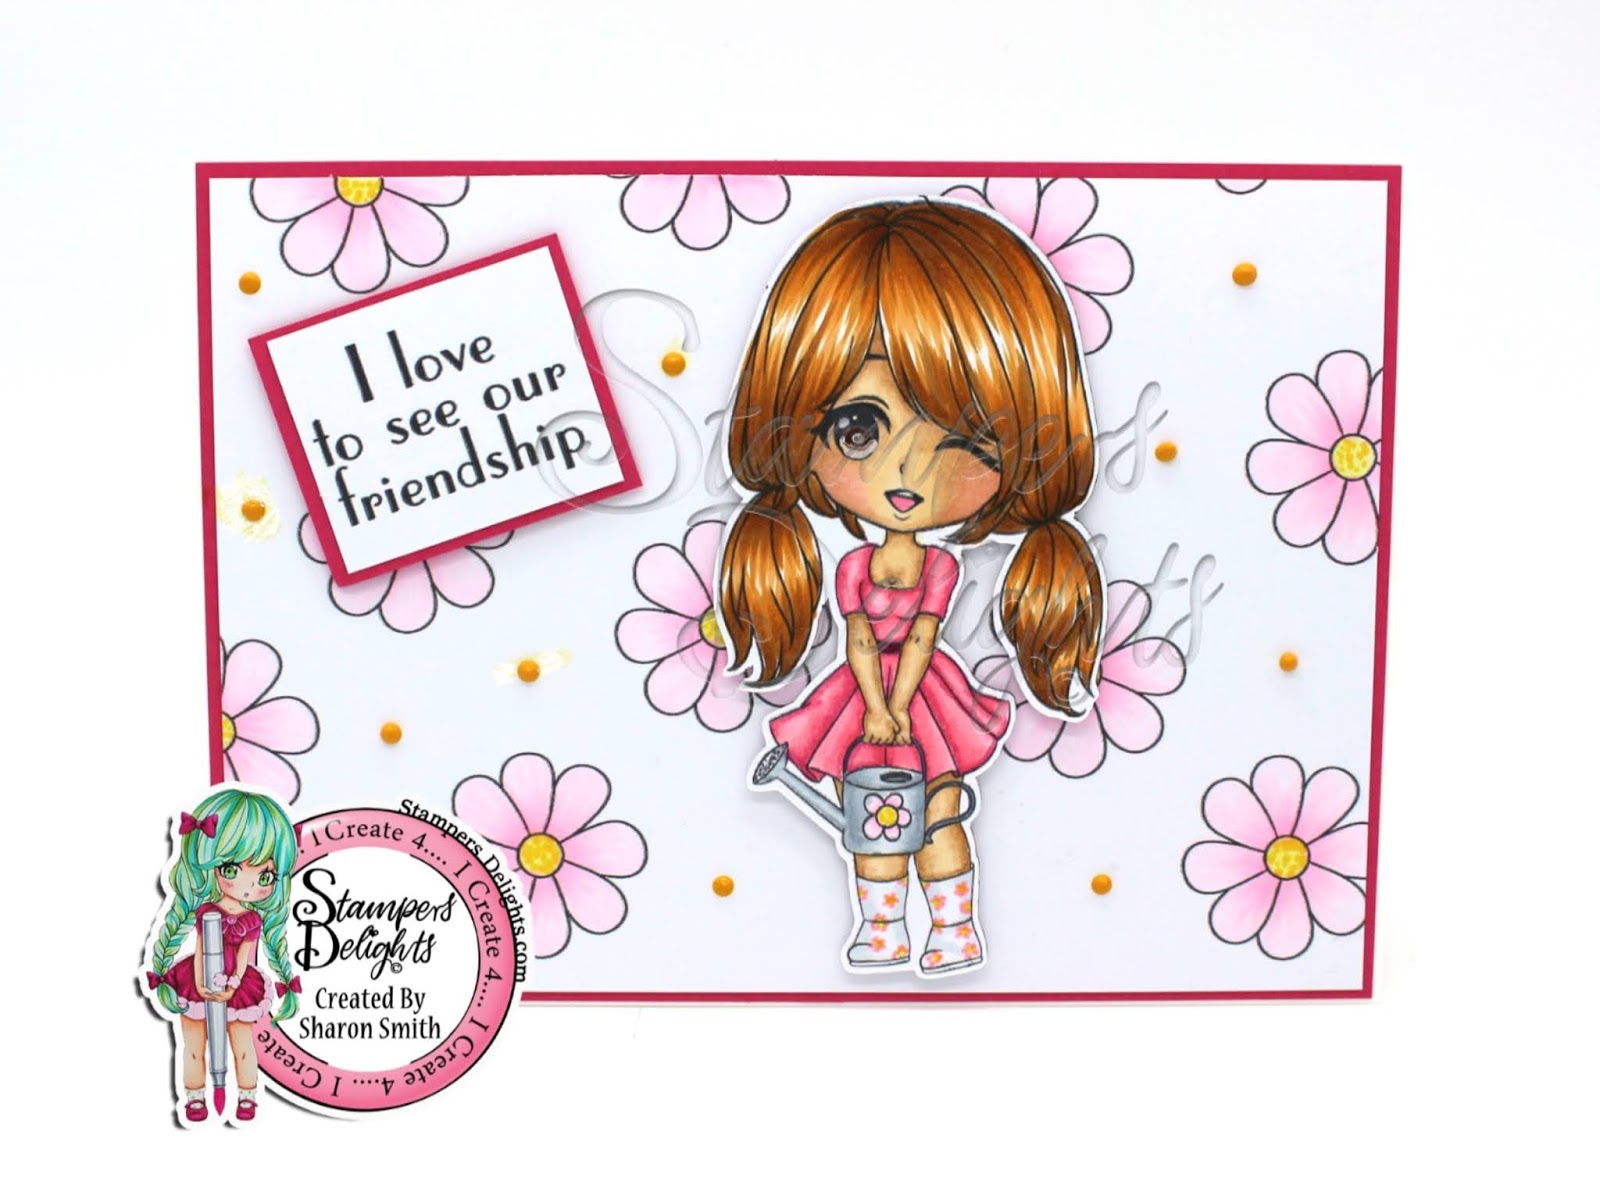
We've had a shuffle around over at Stamper's Delights and as well as showing the gorgeous Kawaii images I now get the chance to play with the super cute Chibis ones too and today is the Chibis new release so I got to play with Chibi Friendship Grows:


What I Did:
I started by making my design paper, I used one of the images from the set, resized it and copied it multiple times so that I had a random flower pattern. I then printed this and colored the flowers. I resized the Chibi image and sentiment and printed these onto stamping card. She was then colored using alcohol markers, her boots are plain but they just needed to have a matching flowery pattern. I fussy cut her out and put to one side.
I made my 7x5in card base and matted this with pink cardstock and the flowery patterned paper. My sentiment was matted onto the same pink cardstock and both this and my image were arranged and adhered to the card using foam squares.
Lastly I added some yellow nuvo drops to the paper both for texture and to tie the yellow color from the flowers.

What I Used:
Digital Stamps for design paper, Image and Sentiment: Stamper's Delights - Chibi Friendship Grows
Stamping Card: X-Press It
Alcohol Markers: Copic
White Card Base: Core'Dinations Premium Heavyweight
Pink Cardstock: Core'Dinations Premium
Nuvo drop: Tonic - English Mustard

Head on over to the Stamper's Delights Store to purchase this super cute image set, Look at all you get:


Why not stop by the Stamper's Delight Facebook page for regular news on and inspiration from my Teamies you can also enter the progressive challenge there, no blog needed and receive freebies! 

I am Entering into the following Challenges:
                                               Gem of a Challenge: Anything Goes
                                               Color Crazy Challenge: Anything Goes
                                               Polkadoodles: Anything Goes

Thanks for stopping by and if you like what you see please leave a comment to let me know!


Thursday, July 2, 2020

CAS Boutique Cards

Good Morning! I'm having a lazy day today, the heat is just too much to get busy!

My post today is all about Clean and Simple Boutique Cards - the third course in my Altenew Educator Certification Program. I have made 3 cards that are all CAS:

My first card was from lesson one simple styling, I've covered this by doing a single rose in the center of my card and a very simple sentiment:


I used Altenew's Painted Rose stamp set, stamping the layers of the rose with Rose Quartz, Puffy Heart and Purple Wine inks from the Rose Petal Mini Cube Set. I stamped the leaves with Frayed Leaf and then loosely drew the outline of them with a Faber Castell Pitt pen. Lastly I used a sentiment from Altenew Heartfelt Sentiments and stamped it with jet black ink.

 For my next card I used lesson 2 - Stamped backgrounds:


For this card I used one of the stamps from Wild Fern Stamp Set and stamped it multiple times on my card in  Just Green Ink. I then mixed some watercolor marker ink with water and, using a paint brush, made splatters cover the card front.
The sentiment, again from the Wild fern Stamp Set, was stamped in versamark ink and I heat embossed this with white embossing powder onto a strip of black card. This was then adhered on to my card.

My last card was my favorite technique and one I wasn't aware of. I added foiling:


This is a great technique if you don't have alternate ways of foiling. I do have a foil press but can't use that with my stamps! 
I used Altenew's Dahlia Blossoms, picked one of the layers of both the smaller and large flower and stamped this in Buttercream Ink. Then came the magic. I used my antistatic bag across my card and stamped the outline of the flowers with Stayzon ink. I heat embossed this with clear embossing powder. I had to repeat this step 3 times to get a thick enough outline for the foil to stick to. Following the embossing I laid Minc foil over the images and sent it through a laminator which had been heating up for a while. Once my card had cooled I removed the foil sheet and was left with a gorgeous rose pink foiled outline on my dahlias.
I went on to stamp the leaves from the Dahlia stamp set and some more from Altenew's beautiful Day stamp set. 
As I loved the foiling so much I had to do more! I chose a sentiment die from my stash. I die cut this in both black and white. I covered the white version in Stayzon ink and dipped it into my embossing ink. Again I repeated this 2 more times then covered it with foil and ran it through my laminator and it worked! I adhered this to the black diecut, slightly offsetting it so I had a black shadow to my foiled sentiment. This was then glued to my card.

This was my favorite lesson from the whole Clean and Simple Boutique Card course and I will be using frequently!!

Thanks for checking out my post - I hope it gave you some inspiration and if you like what you see please leave me some love in the comment section

Tuesday, June 30, 2020

Thank You medical Staff

Good afternoon! It's been a busy day but I've got 5 minutes to get to my computer and blog!

today's make is using the cute Brentwood Owl from Jessica Lynn Original, he's all dressed up for his rounds in the hospital:


What I Did:
Brentwood and his matching sentiment were resized and printed onto stamping card. I then cut him out using my Scan n Cut and colored him with alcohol markers.
I then matted an 8x8in card base with blue card stock. I then printed and cut the heart, arranged this onto my card.
Brentwood was the adhered using foam squares to give dimension. I matted the sentiment with red and blue cardstock and using foam squares assed this to the card.

What I Used:
Digital stamp and sentiment: Jessica Lynn Original - Brentwood Owl Dr. Thank You
Stamping Card: X-press It
Alcohol Markers: Copic
Card Base: Craft UK Card Blanks
Blue and Red Cardstock: Core'Dinations Premium
Medical Heart: Iconspng
Foam Squares: from my stash
Blue: Zipdry

Jessica Lynn Originals have both digital and clear stamps, They have a fantastic range including a whole range of Brentwood - He sure has fun!

Thursday, June 25, 2020

All About Layering 2

Good evening! It's been a warm one today which doesn't help my pain but hey cool air in the house and a well stocked craft room helps me get by!

Tonight's post is to showcase the work I have done for the Altenew Educators Certification Program and is the 2nd class I have taken - All about Layering 2.

My first card uses the gorgeous Peony Bouquet stamp set. I love this set, It's an older one but the stamps layered together make some stunning flowers:


What I Did:
I started the card with white cardstock and using the palest of the ink collections I stamped the Peony outline and leaves in random positions.
Then using Nicole's technique of stamping, I stamped the 4 layers in the beautiful purple soft colors and layered the coordinating leaves.
As I don't own the dies for this set (yet!) I fussy cut the flower and leaves leaving a white edge.
I decided where the flower was going to be positioned on my background and then used the same ink as the flower outline to stamp my sentiment.
My background was then adhered to a 4/14 x 51/2 inch card base and my flower and leaves positioned with foam tape.

What I Used:
Stamps: Flowers: Altenew - Peony Bouquet
             Sentiment: Altenew - Dahlia Blossoms
Stamping Card: Neenah Solar White
Ink: Flower: Altenew - Sugar Plum Oval Set; Pale Mauve, Amethyst, Grape Agate & Plum
        Leaves: Altenew - Green Fields Mini Cubes; Frayed Leaf, Forest Glades & Evergreen
        Sentiment: Altenew - Plum Oval

My next card from this class uses the Big World stamp and die set. I bought this set as I feel it is great for masculine themed cards:


What I Did:
I again started with a piece of white stamping cardstock. I chose the 'adventure awaits' sentiment and using my MISTI for positioning I stamped it multiple times diagonally to give me a background.
I stamped the globe using Nicole's techniques - So much easier than trying to figure out positioning!
I then die cut the globe. I die cut the stand 3 times in white scratch card and once in matt silver mirror cardstock. these were stacked and glued together to give dimension.
I adhered a piece of black card to my background using foam tape. Then added my globe stand and globe (making sure I got it the right way up!) I then stamped my sentiment on white stamping card and adhered this across my globe.
My design was then glued to a top opening black card base.

What I Used:
Stamps: Altenew - Big World
Stamping Card: Neenah Solar White
Ink: Altenew - Green fields Mini Cubes Frayed Leaf, Forest Glades & Black; Ocean Waves & Misty Morning (background).

Thank you for stopping by and please let me know in the comments if you like what you see