Hello

Welcome to my blog, a place where I can lose myself in a crafty haven. Pull up a comfy chair grab a cuppa and come and have a read. Oh and if you like what you see, stop by and leave me some love in the comments section

Followers

Showing posts with label Minc. Show all posts

Sunday, July 9, 2023

Wanna Zig-a-Zig-Ahhh

 Good afternoon! Hope you are enjoying the summer, We have had some great weather but could do with more rain as the ground is parched.

I'm back today with a super cute image from Stamper's Delights. Do you remember the Spice Girls bringing us Girl Power? Meet Posh-Victoria as a super cute Chibi character:
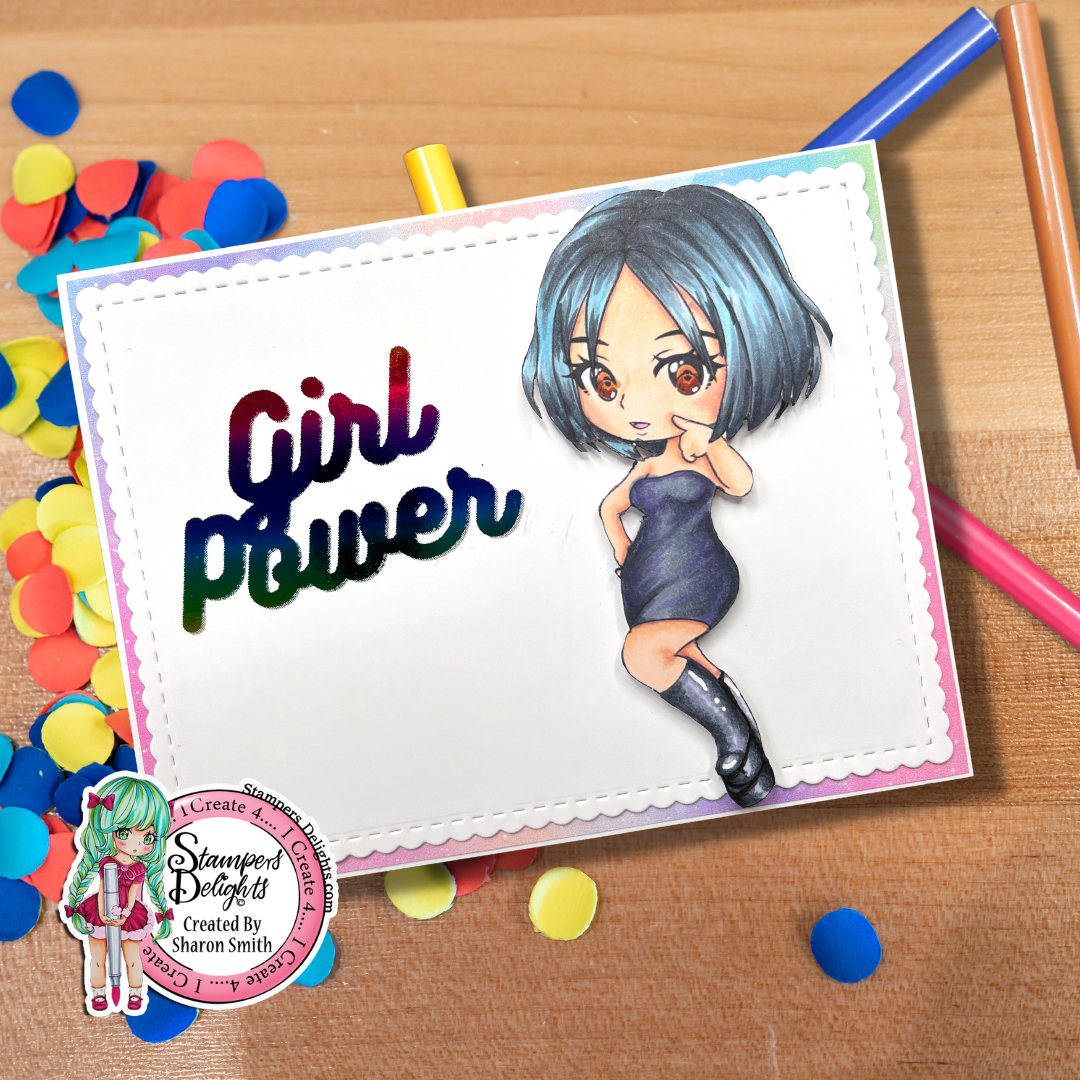
She is part of the latest new digital stamp release which also includes all the other girls and a a group image.


Aren't they the cutest?
I resized, printed and then colored Posh with alcohol markers, She was fussy cut and put to one side while I made my card base.

Using smooth 60lb cardstock I printed the text 'Girl Power' using a laser jet printer. Then I placed some rainbow toner reactive foil over and fed it through my Minc. This gave me a foiled sentiment as my card topper.

A scalloped die was used to frame this and it was then added to my A2 card base which was matted with rainbow digital paper.

Posh was added on foam squares. I had her slightly over lap the topper to make her stand out against it.

Our design team will be posting more inspiration using the Stamper's Delights Spice Girls so check them out over on their Facebook Page.

All images are available in the store along with lots of other super cute digital stamps. If you do use any of the images please share with us in the Fan Facebook Group.

Thanks for stopping by and if you like what you see let me know in the comments!


Thursday, July 2, 2020

CAS Boutique Cards

Good Morning! I'm having a lazy day today, the heat is just too much to get busy!

My post today is all about Clean and Simple Boutique Cards - the third course in my Altenew Educator Certification Program. I have made 3 cards that are all CAS:

My first card was from lesson one simple styling, I've covered this by doing a single rose in the center of my card and a very simple sentiment:


I used Altenew's Painted Rose stamp set, stamping the layers of the rose with Rose Quartz, Puffy Heart and Purple Wine inks from the Rose Petal Mini Cube Set. I stamped the leaves with Frayed Leaf and then loosely drew the outline of them with a Faber Castell Pitt pen. Lastly I used a sentiment from Altenew Heartfelt Sentiments and stamped it with jet black ink.

 For my next card I used lesson 2 - Stamped backgrounds:


For this card I used one of the stamps from Wild Fern Stamp Set and stamped it multiple times on my card in  Just Green Ink. I then mixed some watercolor marker ink with water and, using a paint brush, made splatters cover the card front.
The sentiment, again from the Wild fern Stamp Set, was stamped in versamark ink and I heat embossed this with white embossing powder onto a strip of black card. This was then adhered on to my card.

My last card was my favorite technique and one I wasn't aware of. I added foiling:


This is a great technique if you don't have alternate ways of foiling. I do have a foil press but can't use that with my stamps! 
I used Altenew's Dahlia Blossoms, picked one of the layers of both the smaller and large flower and stamped this in Buttercream Ink. Then came the magic. I used my antistatic bag across my card and stamped the outline of the flowers with Stayzon ink. I heat embossed this with clear embossing powder. I had to repeat this step 3 times to get a thick enough outline for the foil to stick to. Following the embossing I laid Minc foil over the images and sent it through a laminator which had been heating up for a while. Once my card had cooled I removed the foil sheet and was left with a gorgeous rose pink foiled outline on my dahlias.
I went on to stamp the leaves from the Dahlia stamp set and some more from Altenew's beautiful Day stamp set
As I loved the foiling so much I had to do more! I chose a sentiment die from my stash. I die cut this in both black and white. I covered the white version in Stayzon ink and dipped it into my embossing ink. Again I repeated this 2 more times then covered it with foil and ran it through my laminator and it worked! I adhered this to the black diecut, slightly offsetting it so I had a black shadow to my foiled sentiment. This was then glued to my card.

This was my favorite lesson from the whole Clean and Simple Boutique Card course and I will be using frequently!!

Thanks for checking out my post - I hope it gave you some inspiration and if you like what you see please leave me some love in the comment section