Hello

Welcome to my blog, a place where I can lose myself in a crafty haven. Pull up a comfy chair grab a cuppa and come and have a read. Oh and if you like what you see, stop by and leave me some love in the comments section

Followers

Wednesday, February 23, 2022

Foiling With Die Cuts

 Good morning! The weather here has been all over the place, snow, rain, freezing rain and winds - Oh well it's March in a couple of weeks!

I'm blogging today with a card made for Maker Forte design team, and I have a You Tube video explaining how I made the card!


Hope you enjoy it - please be kind as this is very new to me but I'm enjoying a new way to show my crafts!

The card is designed using a die cut to stencil through and then the image foiled - It's a magical process when you lift off the remaining foil and see the prettiness underneath:


I used Deco Foil Gel through the stencil, allowed this to dry then placed the foil over the top, ran it through a laminator and this was the result. I used the same die to make a frame for my foiled image and the same foil on my sentiment.


Like I said above if you want to see the process head over to my You Tube channel by following the link.

Products I used on this card include:

Thank you for stopping by - I would love your comments on the card as well as my video!


Wednesday, February 16, 2022

Magnolias and Words of Encouragement

 Good morning, Hope it's warmer where you are than here!

My post today is inspiration for an encouragement card using Maker Forte Products. My main image is using Maker Forte and Alex Syberia's Beautiful Magnolia stamp set.

This stamp is stunning on it's own but I wanted a background too so I'm sharing my process for this in this post.

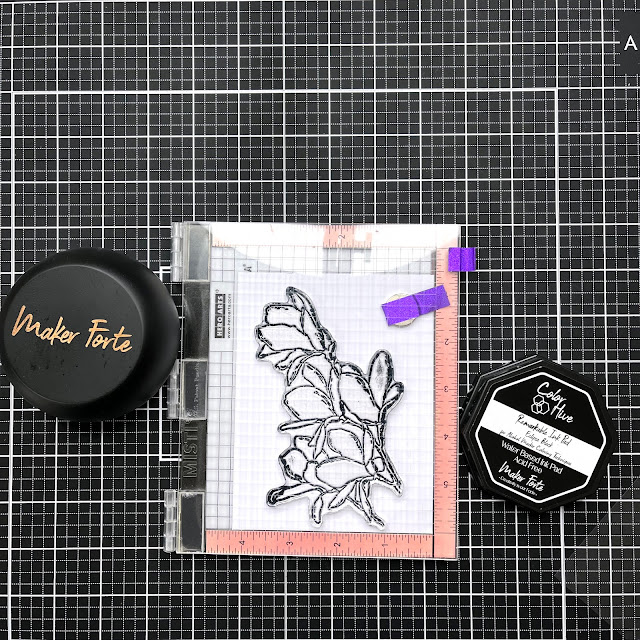
 As I was going to be coloring with alcohol markers, I stamped it on to white card with Remarkable Eclipse Ink Pad.

I stamped it again on to masking paper and fussy cut this out making sure I had removed all the landlocked areas to. Some of the branches are fine so when cutting they came apart but this didn't matter as I could just lay the extra parts in place and they would stick to cover my image.

Once the image was masked I laid The Cobblestone Stencil over it and fixed in place with some tape and magnets.

Using Coral Keys Color Hive Ink I lightly blended the ink through the stencil - yes it's a cobblestone pattern but I think it looks great as a patterned background. I removed the masks to reveal my clean image.


I found an image of a magnolia branch online and chose the Copic Markers nearest to the colors as I could so I could color the flowers realistically.


Magnolia flowers grow on the tops of the branches so I decided to make a landscape card at this point. I colored the flowers, petal casings and branches in my chosen colors:


The sentiments included with this stamp set were a little small for the look I wanted to achieve. I decided to chose one from Be You Dahlia stamp set which says BE YOU AND YOU WILL BE FINE. I wanted this to stand out from the pink on my card so I used a piece of black card and heat embossed the strip using Color Hive Clear Ink Pad and Ranger Seafoam White Embossing Powder. 


I then constructed my card, I covered an A2 Side Fold Card Base with pink cardstock. My image was trimmed to 4x5.5in and centered on the pink card, adhered in place with foam tape. I then decided to add some splatters with with the Splatter Rubber Stamp Style 1 and some pink ink.


Finally, I fixed my sentiment in place with foam squares.

Thank you for taking time to read my post, I hope I have given you some inspiration!


Monday, February 7, 2022

Rainbow Birthday

 Good morning - the snow continues as does the below freezing temperatures.

I have more exciting news - Paper and i which is a craft store here in Michigan accepted me as part of their design team. They sell a wide variety of craft supplies and products and I will be hoping customers love my inspiration of what can be done with them.

My first card as part of their design team uses just dies, glue and cardstock!


As I am struggling with all this cold weather I thought a nice cheery rainbow would brighten everyone's day!
I started this card by cutting multiple strips using the LDRS 1/2" stitched slimline background strips. Back in the UK, as kids, we are taught to remember rainbow colors with this little rhyme:

Richard - Red
Of - Orange
York - Yellow
Gave - Green
Battle - Blue
In - Indigo
Vain - Violet

I put adhesive all over my A2 card base and laid the strips diagonally in the above order. repeating as needed - as you can see I has to add a tiny bit of red to the bottom right corner to completely cover the card. I trimmed the excess off by turning the card over and cutting all the colored card away with scissors.
Next I used black card and cut the Picket Fence Happy Birthday Word Topper Die 4 times. These were then glued on top of each other to give my sentiment dimension. I chose black card as it stands out well from the rainbow colors.


I glued these in place with wet glue and trimmed the edges so it fit on my card.
Finally I added a few different sized enamel dots also in black to draw the eye to the sentiment.


All of the products I have used can be purchased from Paper and i. If you check out their Facebook page they hold bi-weekly lives showing all the new products that have arrived in the store. They also show techniques of different ways that the products can be used. 
If you are local to the store pop in and say hi - tell them I sent you!


Saturday, February 5, 2022

Who Stole The Fox?

 Hello! Hope everyone is staying warm and safe!

I'm back today with more inspiration for the Stamper's Delights new release and the cute image I am using today is called Chibi boy fox, this cute little guy has been in the hen house!


Look at that little fat chicken under his arm!

I started my card by resizing my image, printing him onto stamping card and coloring him with Copic markers. He was then fussy cut and he sat and watch while I built my card.
I matted my base with Kraft card and cut a scalloped frame with the same card. 
I printed some digital design paper ad stamped chicken wire over this. This was then adhered to my card base and the frame was added using foam tape.
Finally my little chicken thief was added

I hope that he just wants to pet the chicken........................

Why not stop by the Stamper's Delight Facebook page for regular news and inspiration from my Teamies you can also enter the progressive challenge there, no blog needed and if you sign up for the Stamper's Delight Membership you will get free images to enter the challenge with!

All the design team projects are available on the Inspiration blog - hop on over there for more inspiration.

Thanks for stopping by and if you like what you see please leave a comment to let me know!

Friday, February 4, 2022

Foxing around in Spring

 Good evening I hope everyone is keeping safe in the extreme weather we are experiencing.

My post today is a tutorial using the newly released Kawaii image from Stampers Delights Spring Fox. 


Isn't he adorable! He has extras for scene building such as the flowers and butterflies here and a little fence which I didn't use.

I started my card by arranging the digital elements, I was able to change the color of the sentiment by adjusting the RGB levels in my graphics program, the scene was the printed onto stamping card. I then gathered the supplies I would be using:


Next I colored my fox, with this guy I started with my darkest colors and blended out the the lightest.


The flowers and grass were next, I know there aren't many flowers that shape which are blue but the advantage of stamping and coloring means you can tie everything in to your color scheme.


Yellow butterflies added a freshness to the image and tied in with flowers.


I die cut my image using a ricrac oval die, when I had done this I felt it needed something to make it pop off the card so I inked the edges with distress ink.


For the rest of my card I carried the butterflies over the card with a tree die: and some tiny die cut butterflies


As I had used different shades of marker to color my butterflies I used 2 shades of yellow card stock. The tree was cut twice once in green and a second one in yellow. I then cut all the yellow butterflies from the tree and glued them in the correct place on the green tree.
Next was assembling my card; I matted my slimline base with green cardstock and some blue design paper.


My tree was adhered flat to this and my die cut image fixed in place with foam tape. Finally I scattered more yellow diecut butterflies around my image, tree and right side of my card.


I hope you have enjoyed my tutorial. Head on over to the Kawaii new release post where you can find my inspiration from the rest of the Kawaii design team members. Also come back tomorrow for more new release images!

If you are looking for even more inspiration head on over to the Stamper Delights Facebook group and while you are there why not enter their progressive challenge - just sign up for free membership and you will receive emails on how to enter more details are on out Facebook page.

Wednesday, February 2, 2022

Best Wishes and Margaritas!

 Good Morning! We had temperatures above freezing yesterday for first time in weeks - nothing to get excited about though, we are back to snow today!

I'm here with a cheeky early drink today - well it is 5 O'clock somewhere!


I designed this card using products from Maker Forte.
I started by foiling my sentiment, this is from the set of ephemera Birthday Elements as these are all toner printed I foiled in it green Minc foil.
My base was made from Maker Forte Welsh Dragon Cardstock. folded to give a top folding card. My background was made by stamping Splatter Stamp Style 1 numerous times in green ink. This was adhered to my base with foam tape.
Using the Martini Builder Stamp Set I made a margarita - ok wrong shaped glass but still tastes the same!
I layered the glass and drink stamps up using my Misti from precision stamping and various shades of green ink. The extras were stamped in Eclipse Black ink, the olives and lime where colored with markers and the cocktail brolly with Tiptree ink. All were fussy cut by yours truly!


These were the arranged on my card along with the sentiment. I used a combination of Foam Squares and Crystal Clear Glue to adhere them in place.


Ok I'm off for a cheeky drink - shhhh don't tell Kev!