Hello

Welcome to my blog, a place where I can lose myself in a crafty haven. Pull up a comfy chair grab a cuppa and come and have a read. Oh and if you like what you see, stop by and leave me some love in the comments section

Followers

Wednesday, October 26, 2022

Rainbows and Stars

 Hello! Well after the snow of last week the temperatures have risen again and we have been back in 75F weather!

I'm back today with a card using Maker Forte supplies. In the main the Star Gazer White Rubber Stamp Set.


The design in this stamp is tiny but the fact it is rubber makes it is show perfectly.
My card begins by using the circle from the Spotlight Circle Stencil to mask off part of my cardstock.


The Stargazer background stamp is put in place over this also I am using my MISTI because I want to stamp the image a couple of times. This makes sure I get a solid color on my cardstock. Sugar Plum Ink covers all of the stamp and I used my Smoosher to make sure I got even pressure. 


It doesn't matter that the ink hasn't stamped right up to the edge of the mask. It's just going to make my 'moon' look bigger. Being careful not to get ink onto the masked section, I lift the circle up and have a perfected clean circle area. 
It's not going to stay that way for long though. Fossilized Amber and Squeezed Lemonade Distress Oxide Inks are blend across the circle to give me a yellow moon.


Trimming my design makes it ready for my card base.

The sentiment that come as part of the stamp set are perfect for using with the background stamp. Using black cardstock I prepped with an Anti-Static Pad. Applying Clear Embossing Glue Ink Pad to the wording helps white powder to stick to them, heating it gives crisp white sentiments.


I couldn't at this point decide which sentiment to use however once fussy cut the top one looks a little lost on my card but the rainbows and stars looked perfect.


Foam Squares adhere the sentiment in place to give some dimension to my card front.
I love using A2 Top Folding Card Bases and this design is no different. Gluing the design straight on the base without a mat (which would take away from the star pattern) finishes my card.


I decided moon looks a little bland so Shooting Star Crown Jewels in sets of 3 take the bareness away.


Thank you for taking time to read my post, I hope you love my design and it gives you inspiration.


Saturday, October 22, 2022

Pumpkin Fun

Hello! Well it feels more like winter than fall here, our heated blankets are out and the puppies are all cuddling together in piles!
My card today is more Halloween inspiration for Stamper's Delights. Meet Chibi Halloween Sachi. Isn't she a stunner dressed in her cat halloween outfit? 


I printed her on to Stamping card and colored her with Copic markers. I then printed a 2nd version on to masking paper and carefully cut around the part of her that was covering the moon. This was then used to mask her so I could stencil the moon. 
I used grey ink for the stenciling then added yellow ink to give the moon a glow. 
My image was then cut down so it fit on an A7 card with a purple mat underneath.
finally I added some shine to areas of the image.

Be sure and check out more DT inspiration and join us at


We'd love for you to connect with us on our Facebook page too:
Thank you for taking time to read my post, I hope it has given you inspiration for your halloween crafts!

Wednesday, October 19, 2022

Thank and Gather Tags

 Good morning - well we've had snow this week! yep never mind fall we've jumped straight to winter.

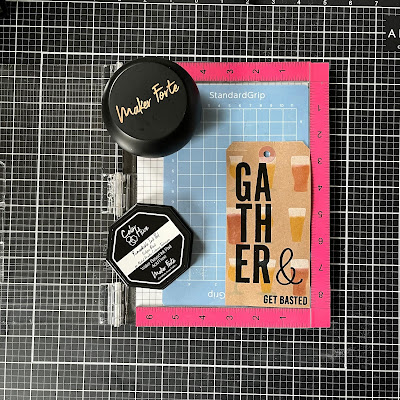
I've started planning thanksgiving makes and my post today is my first design. I am using Maker Forte products for these tags including Thanks and Gather Stamp Set.


These Kraft Shipping Tags would make great place setting labels with the person's name attached to the ribbons.
The first step is to add the design to the tag. Using On Tap Stencil Set, Taping the first layer to the tag I inked through with English Mustard and Grand Canyon Inks. This gives me the color of 2 different beers. 


Replacing the stencil with the 2nd layer I inked Icy Mist and Picket Fence Distress Ink through which gives me a head on my beer and a stem on the glasses.


Leaving this to dry I repeated the steps on a 2nd tag and left this to dry. They have to be dry because I am heat embossing in the next step and I don't want the embossing powder to stick to my beers!

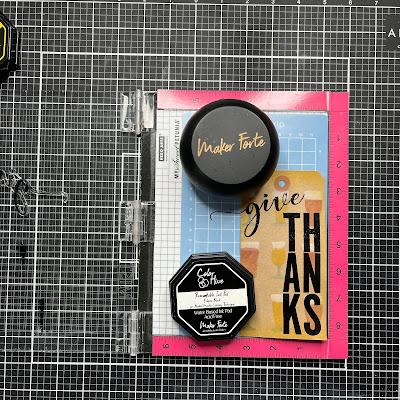
Placing the tag in my MISTI I lined up the Gather stamp on the left of it and the ampersand plus 'basted' in place. Eclipse Black Ink is perfect for heat embossing as it stays wet for a few seconds after stamping.


Crystal Clear Embossing Powder gives me the shiny lettering which helps make it stand out from the beers.

I repeated this step on the 2nd tag but using Give Thanks. I love the different fonts, it gives the possibility of lots of different looks. There is also a ton of combinations with the different words too.


The tags looked a little plain so using the English Mustard I ink blended around the edges giving them a more distressed look.


These are more of a masculine look so the edging helps to keep this theme.


Finally some yellow and brown ribbon was threaded and stapled through the holes.


Thank you for taking time to read my post. I hope these simple designs give you some inspiration for you holiday makes.


Saturday, October 8, 2022

Pumpkin Wishes

Good Morning! I hope the weather has cooled for you where you live! It as here, its so much nicer for our evening walks.

My post today is sharing the super cute Halloween Harvest from Stampers Delights. 


I colored this adorable image with alcohol markers. The scene didn't need anything else other than a green mat on my white A2 card base. I did add white gel pen for highlights.

I love fall and love coloring in fall colors and digital stamps are great for this because they can be resized for your project.

Be sure and check out more DT inspiration and join us at

We'd love for you to connect with us on our Facebook page too:

Thank you for taking time to read my post, I hope it has given you inspiration for your halloween crafts!


Wednesday, October 5, 2022

Fall Country Girl

Good morning! The weather is great at the moment, nice and sunny but at a great temperature! I am loving it - yes it gets cooler at night but who doesn't like that!

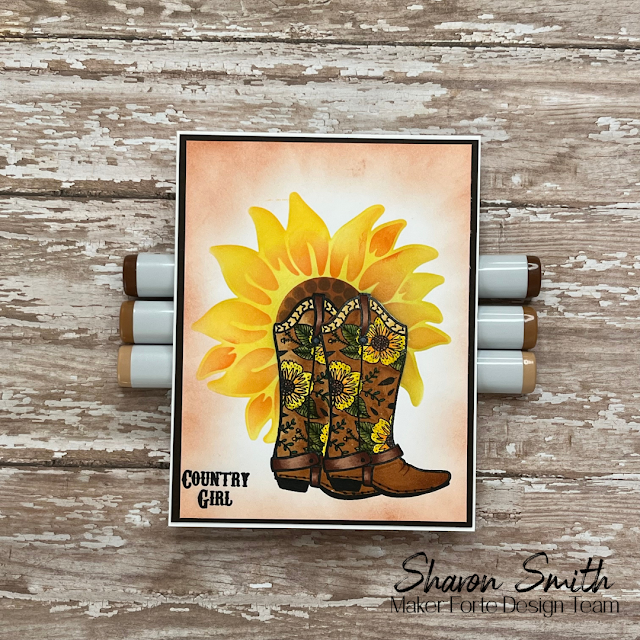
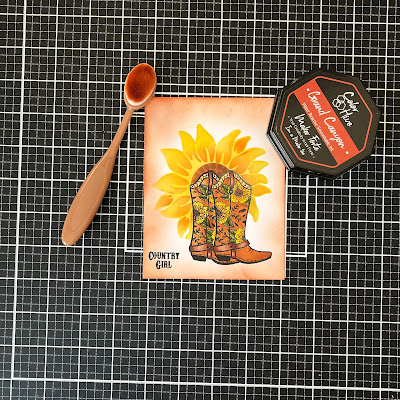
Fall is THE best season and my card today is fall themed - Sunflowers and western boots my favorites and I would love some boots like these.


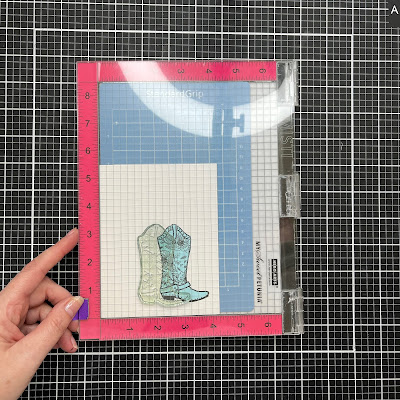
Aren't they adorable? There are a few boot designs to choose from in the For My Cowboy Stamp Set from Maker Forte. I began with stamping one the floral boot onto stamping card using Eclipse Black Ink


Covering the first boot with masking paper I stamped 2 more boots on the paper and fussy cut these. 


Masking is how to achieve layered images. By covering the first boot and stamping the second one nearby I can make it look like the 2nd boot is behind the first.


Placing a mask over the 2nd boot I moved on to my background. The Layered Sunflower Stencil is perfect so the first layer I stamped in English Mustard Ink which is a great yellow.


The next layer is the shading on the petals using Red Leicester InkGrand Canyon Ink colors the flower center then the seed layer uses Ground Espresso Distress Ink.


Removing the masks leaves me with clean white stamping of the boots all ready to color.


You can see here how masking gives the impression of stacked images with the sunflower behind them.

Copic markers work great for the main color of the boots and fine liners for the floral design. These allow me to get into the smaller parts of the design.


My card needs a sentiment and 'Country Girl' is part of the stamp set. It fits well with the design in Eclipse Ink.


I love clean and simple cards however the white of this looked a little stark against the bright colors. using Grand Canyon again I ink blended the edges of the card.


To finish the design I chose a brown cardstock for my mat and a Side Folding A2 Card Base with wet glue so keeping the layers flat.


The colors just pop against the darker brown mat.


I hope you love the fall look of this card as much as I do and thank you for stopping by.