Good morning from Tennessee! Our vacation has finally arrived and we are in s stunning cabin high up in the Smokey Mountains. It's a much needed break from reality.
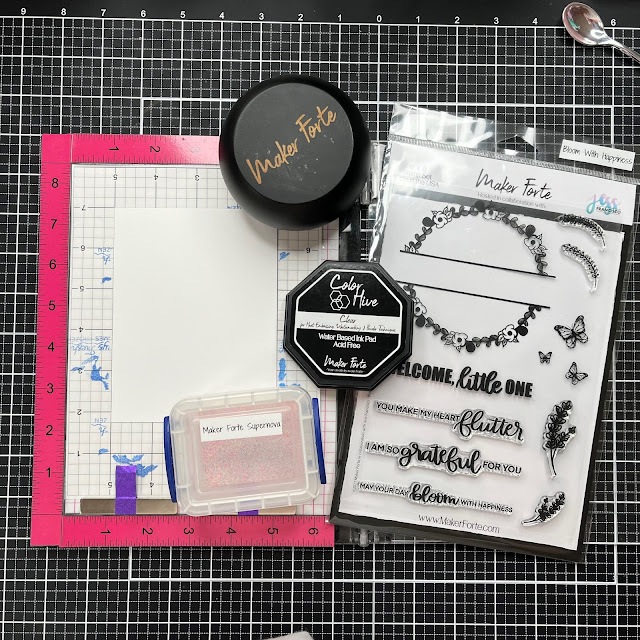
My post today is inspiration for Maker Forte products. I am using the gorgeous Bloom Its Happiness Stamp Set as my main focus.
As always I gathered my products, before starting my project. I attempted a couple of techniques but discovered some weren't going to achieve the look I wanted so discarded my original idea. I started this card with a piece of Ultra White Heavy Card Stock, Clear Embossing Ink and Supernova Embossing Powder:
Using the main wreath image from the stamp set I stamped it with the clear ink. I used my Perfect First Impression Smoosher to get even pressure when stamping the image on to the card stock. This gives an even ink layer for the embossing powder to adhere to. My card stock needed prepping, I use baby powder so the embossing powder only sticks to the stamped image. The Supernova Embossing Powder has a number of colors within it and gives a pretty finish to end stamped image.
When the embossed image had cooled I added my sentiment. I decided to make this an any occasion so went with the 'may your day bloom with happiness'. The included sentiments all fit across the center of the wreath image. This image is also perfect for an A2 card.
I used Flamingo Ink which drew attention to the pink within the embossing powder. The stamp set includes lots of extra images including a trio of butterflies in incremental sizes. I stamped these inside the wreath, again with Flamingo Ink, to fill in the white space.
Next came building my design using White A2 Top Folding Card Base, and a mat with Tiptree Jam cardstock. this was cut slightly smaller than the card base. My topper adhered to this again cut smaller than the mat. I like to cut my layers an 1/8th of an inch smaller than the last. This gives a visible border of the base and mat but not too big it detracts from my image.
Because I had so much white space below the image I decided to add some embellishment. White Pearl Maker's Magic is great for this, it gives a touch of shine without distracting you too much. 3 dots in each lower corner is just enough.
The Bloom with Happiness Stamp Set is such a pretty set, it can be used in so many ways for so many occasions that it's perfect addition to anyone's collection.
Thank you for taking time to read my post and I hope it inspires you to make something similar. If it does I would love to see your creation.


No comments:
Post a Comment