Good afternoon! Welcome to part 2 of my AECP Level one final challenge part 2, this is the female card gift. As I did with the male gift I have made 8 cards in groups of 2 to show different techniques. I have used Ink blending, Stamp Layering and Shine on all of the cards. These are some of the components from the classes in level one. As with my male collection I have also made a box to present them in.
I will list all the supplies I have used at the end of my post but I have used Vintage flowers across all of the cards and chose pink and grey as my color scheme. The sentiment theme across all the cards is encouragement.

I stamped lots the layers of the flowers in both Tranquility and Red Cosmos ink collections before I started my cards. As I don't yet have the dies for this set I then sat at my desk and fussy cut them out.

My first 2 cards show basic ink blending and I have used gold embossing and gems for the shine

Basic ink blending involves just a blending tool and inks

Using inks from the same set I blended ink onto 4in x 5.5in Bristol Smooth card pieces starting in the center with light ink working to the edges with the darker color.
Once both bases were ink I added foam tape to the back of them and adhered them to my A2 white card bases and started to build my design with the following:

As I previously said I had pre-stamped and cut my flowers so I arranged some these across my card without sticking in place so I could work out where I wanted my sentiment. After dusting the card with an antistatic pad I used versamark ink to stamp the sentiment. I used gold embossing powder heated to melt it leaving me with a shiny gold message.
My flowers were then put back in place, some were glued flat on the inked surface and other were adhered with foam squares to give dimension and interest to my card.
Finally I added some gold pearls to balance the design. This was repeated on my second card.


My next 2 cards were made in landscape orientation so that the background was more visible.

The background was inking blending with detail so I decided to use this lovely stencil I wanted to have a delicate looking background so only used the pale ink from each collection.

I used white A2 card bases and matted one with pink and one with grey cardstock. My stenciled panels were then added to the opposing colored base.

I placed the flowers into a corner arrangement and adhered both flat with glue and raised on foam squares for dimension
Thinking of You was stamped in black ink and a few crystal gems scattered around add some delicate shine.

My next cards for the set are a bit more bold

I chose to use the embossed resist technique on this card, using some of the smaller blossoms for Vintage Flowers for my pattern

I used my antistatic pad across 4x5.5in pieces of Bristol Smooth cardstock and then stamped 3 different sizes of blossom with versamark ink. I arranged the stamps so the larger blossoms were at the top decreasing as I got to the bottom. These were then heat set with clear embossing powder.
I then used 2 inks to ink blend dark to light over the top of these. Once this was done I buffed with a lint free cloth and the shine from the embossing comes through also leaving the areas where the blossoms were white.
These were then adhered to white A2 card bases.

I arranged my flowers in the center of the cards and glued these flat.
Using white cardstock I heat embossed 2 halftone versions of happy with gold embossing powder and die cut them with the coordinating die. These were placed across my flowers and held in place with foam dots to give dimension and of course the shine element.
Finally I stamped 'everything' onto strips of white cardstock with black ink and glued these across the tails of happy.


My Final female cards are a 'Thanks" card this can be thanks for anything as I haven't made it more specific.
For my backgrounds, as I did with my male collection I did a shaker technique. Ink blending the back drop for my shaker element.

I started by die cutting 2 pieces of white scratch cardstock with the shutter cover die. While this was cutting I ink blended 2 A2 pieces of Bristol Smooth cardstock one 2 shades of pink and one with 2 grey shades. starting with light at the bottom and working up to dark at the top.
I cut an aperture in pieces of pink and grey cardstock. My shutter die cut pieces were glued to some stamp packaging clear plastic then adhered behind the aperture making a window.
I placed some silver glitter sequins in the middle of my inked pieces of cardstock and using foam tape fastened the window section to the ink blended section.
This gave me the shaker frame that you can see on the next photo:

The frames were glued onto white A2 card bases. I then added some of the pre-stamped flowers in apposing colors to the frames.
I die cut the "thanks' die into glitter cardstock and adhered this across the top of the shaker. I had planned to add a further sentiment from the Label Love stamp set but changed my mind and just added a few scattered sequins to add to the shine!


I used white 12x12in cardstock for the box and grey and pink to decorate it.


All pieces were cut on my cameo and I adhered both sections on the box together with Scor-tape.
I decorated the inner section with pink cardstock mats and the outer box part with grey card.
I used some of my pre-stamped flowers to decorate the outer box. I shaped these with with a ball tool to give them more of a flower shape and glued them in place with glue gel which helps to maintain the dimension I had achieved with shaping them.
Just Foe You was die cut 3 times from pink cardstock, then stacked them together for dimension and added to the side of the box.
As with my male collection I have to use a recycled element. This was achieved by using scratch cardstock and stamp packaging on some parts of my cards. I also decided to make the spine on the box into a shaker.
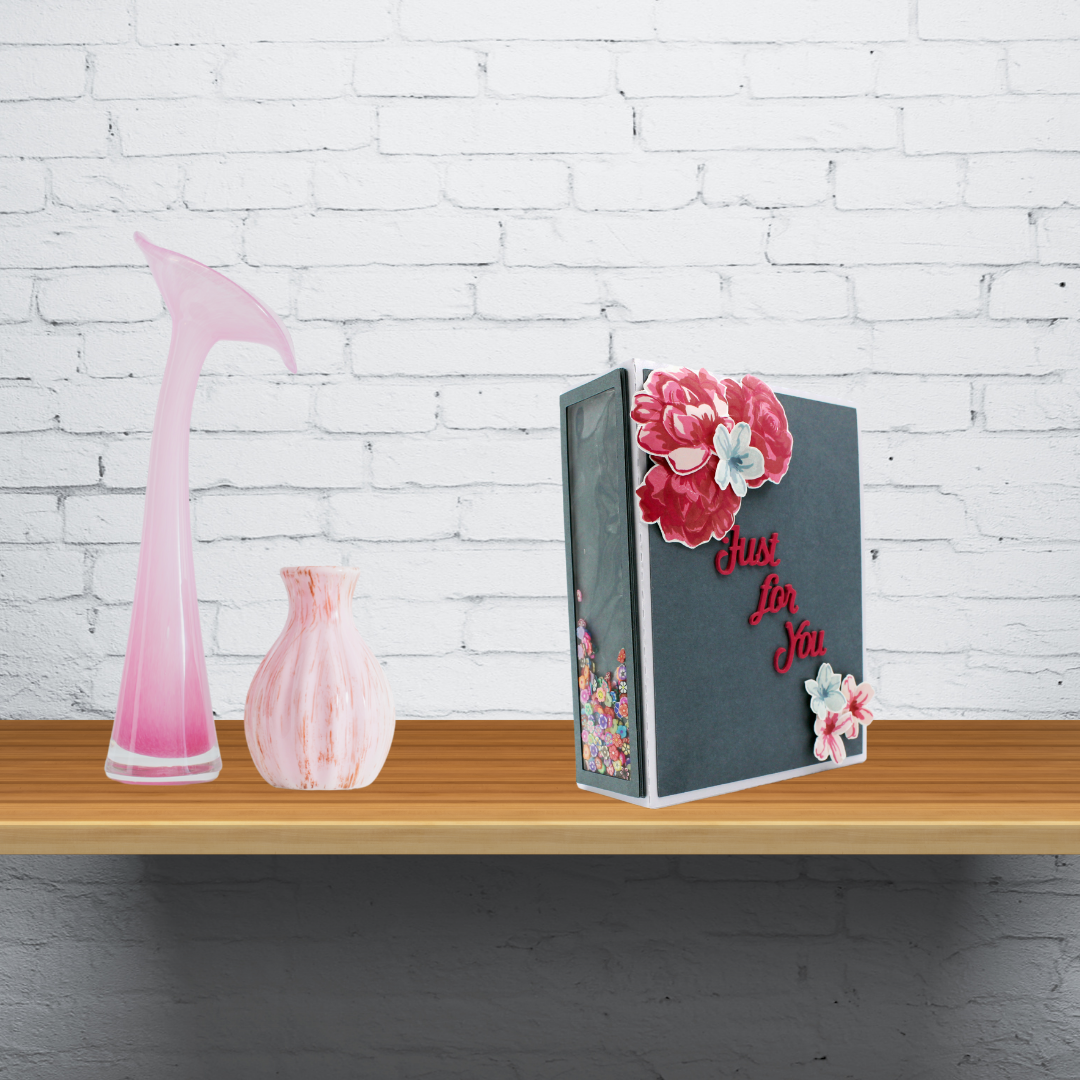
I used some grey cardstock left from making my cards for the frame and stamp packaging for the 'window'
I cut 6 frames so I didn't have to use foam tape which you would see when looking at the front of the box. On one frame I glued the stamp packaging and then stacked the remaining frames on top of this.
I used some tiny polymer clay flowers as my shaker particles, these were placed in the center of the spine and my frames glued in place over this.

SUPPLIES
Other: Crafter's Companion Every Day Words (Just For You)
Other: Versafine, Versamark,
Cardstock: Neenah Solar White 110lb, Core'Dinations Grey, Tonic Classic Card - Fuchsia, Strathmore Bristol Smooth, Crafter's Companion Glitter, Centura Pearl 12x12in white & various Scratch card.
Embossing Powder: Create and Craft Gold, Hero Arts Clear Embossing Powder.
Other: Collal Glue, Collal Glue Gel, Ranger Multi Medium Matte, foam tape, foam squares, Scor-tape, Crystal Gems, Gold Pearls, Silver Glitter Sequins, Empty Stamp packaging.
Thank you for taking time to read!

1 comment:
As much as I love the graphically edited backgrounds, sometimes, they take the attention away from the projects. This is just feedback, not a rule :) Your cards looked incredible! I like the colours you chose, they are quite eye-catching and very different too!
Thank you for submitting your wonderful work to the AECP assignment gallery.
Post a Comment