Good afternoon! How can it be Sunday already? I wish time would slow down!
I'm back today with my latest submission for my AECP - This class was all about using heating embossing in different ways to stretch your stamps and crafting further.
My first card used the technique from class 2 but I also added elements from class 6, using clear embossing powder to give you a watermark effect - darkening the cardstock:

I die cut the green piece with a rectangle die and when I laid this over the white card I could line up the leaves so they looked like complete leaves just in 2 different greens. These pieces were adhered together using wet glue so I had 'wiggle' time to make sure they were lined up correctly.

I worked out where I wanted my die cut and stamped the remainder of my sentiment directly on my green cardstock and heat embossed with with white powder.
I adhered my design onto a black A2 card base with foam tape to give dimension, lined up the Love with my stamped sentiment and added a few cream colored sequins to balance the card.


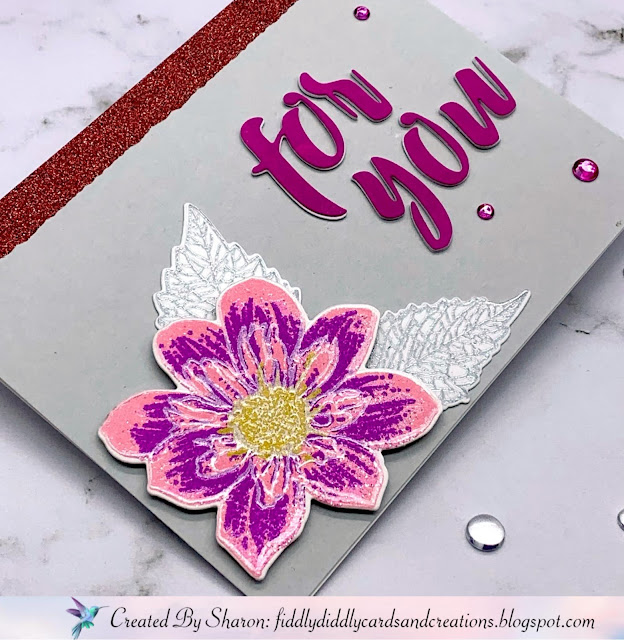
The first struggle was finding embossing powders for my layers. I used build a flower Fashion Monger Dahlia which has 4 layers for the main flower and 2 for the center.
I started with the solid layer in a pale pink color. the tick was to make sure each layer was fully cooled before adding the next. My second layer isn't as obvious on the photos but it was a slightly darker pink with glitter. The 3rd layer was a brighter pink. I added my center in yellow after this, I chose to just do one of the center layers. My last layer was the outline of the flower. I initially tried gold for this but I lost the definition of the flower and the outline lines looked too thick so tried again with a pearlized white and liked this much better.
I only used one layer for my leaf, I used both gold and silver embossing powder on this and decided to go with the silver,
My flower and leaves were die cut ready to go on my card
I added a strip of glitter washi tape to the top of a landscape white A2 card base, This is actually nearer the base color of the flower but the camera shows it darker.
I matted a piece of grey cardstock over this and arranged my flower and leaves using both wet glue and foam tape in the corner of the card.
I cut my sentiment 4 times and used Magenta ink to color one of these. I stacked these together and adhered in place.
I didn't have any embellishments in coordinating colors so I used clear gems and colored them with alcohol markers to match the pink in my sentiment.
Altenew products I used:
 Envelope Liner Die Set Purchase From: SSS | ALW |
 Pure White Crisp Embossing Powder Purchase From: ALW |
 Crisp Dye Ink - Magenta Purchase From: ALW |
 Crisp Dye Ink - Forest Glades Purchase From: SSS | ALW |
 Embossing Ink Purchase From: ALW |
 Silver Embossing Powder Purchase From: ALW |
 Build a Flower Fashion Monger Dahlia stamp and Die set Purchase From: ALW |
 Wild Fern Stamp Set Purchase From: ALW |
